Tag: OneNote

  • Teaching Portfolios: How to set up a OneNote portfolio

    I’ve been using OneNote to build my teacher portfolio for a while now.

    Back in 2016 I wrote a quick how-to about building your teacher portfolio in OneNote. Back then, of course, there were 12 criteria, and so the template is no longer valid.

    However, since that time, I’ve also been adjusting the way in which I use OneNote to collect evidence and artefacts for the portfolio and how they’re organised. This means two things:

    1. Its okay to change as you go

    Don’t feel like you have to keep your portfolio in the same mode for all three years of your registration. If something isn’t working, don’t feel like you have to stick with it just because that’s how you decided to do it before you had even started.

    2. It’s flexible

    OneNote is completely flexible to keep up with however you want to organise it. If you want to have the years along the top sections, go for it. If you’d rather have each of the six standards along the top, you can do that too. However it works for your brain, OneNote is flexible enough to cope with it.

    Getting Set Up

    1. Install Microsoft OneNote

    Firstly, you will want to install Microsoft OneNote. Most Windows computers already come with it. However, there are TWO versions of OneNote. There’s the App Store version (which is an all-operating-system app for iOS, Android, and Windows Store), and there is the BETTER version that comes with Microsoft Office – OneNote 2016.

    You will want to get the OneNote 2016 version and ensure you pin the icon on your taskbar so you don’t open the other version.

    The main reason for this is the ability to install macros, and there is a LOT more control over things like tags, both of which you’ll want to utilise to make your portfolio.

    2. Get an Account.

    This isn’t a necessity to be able to use OneNote. However there are benefits to having an account, such as sharing, and accessing your portfolio on different devices. Luckily, Microsoft products are free for schools to use. Talk to your network administrator to get Office365 accounts set up for you and your staff.

    3. Create a New Notebook

    You’ll need to make a new notebook. I would call this something such as “Portfolio 2020-2022” or whichever year range you intend (I just use my registration years).

    The reason for this is that as you add evidence into your portfolio, the filesize of your notebook will get bigger and bigger, and cause things to take longer to load the more you have in it. By setting it to just three years, it keeps everything nicely in one place for one round of registrations. You can then save it off and begin a new one when your new registration begins!

    I’m not going to go into details on how to create a new notebook. You can find multiple tutorials for this online.


    OneNote Tutorial

    4. Set Up Sections

    The first decision you will want to make is whether you’re going to go with a date-based portfolio or standards-based portfolio. You can read more about that here.

    Along the top of OneNote 2016, you will see your ‘Sections’. Here you can see I’ve gone with a date-based section portfolio, but you could just as easily go with standards, or even types of evidence. Dates is just the one that made best sense to me, and it allowed me to try different things each year of the registration period without having to stick to one method of collecting evidence.
    Adding a new section is as simple as clicking on the white ‘+’ tab. You can add as many sections as you like, as well as, have groups of sections. So – for instance – you could have a section group for each year, and within each of those groups, have each of the six standards as sections as well. This essentially creates two layers of sections at the top. Like I said, OneNote is pretty flexible for however you want to structure your portfolio.

    5. Create Page Headings

    On the right hand side of OneNote are your pages (although you can completely customise this so that it is on the left).

    You can make up to three layers deep of pages by indenting them under parent pages.

    Here you can see I have an “Admin” parent page which holds my index, summaries, job descriptions, release records and anything else pertaining to my registration for the year.

    Then I’ve made an “Evidence” parent page which I dump all my pieces of evidence in it. I’ve gone through and put it roughly in chronological order, but this hasn’t always been the case. You could put it in subject order, or leave it in complete chaos. Once again – however your brain works!

    Below that is a quick screenshot of another way of setting out the parent pages. You can see that these are expandable with the drop down arrows. You can have anything as parent pages – you could even set up each of the six standards as parent pages that you then put evidence within.


    6. Create Custom Tags

    OneNote comes with it’s own set of pre-made tags (and many of these are useful to keep). It also allows you to add in your own tags, and this is where comes the power of OneNote.

    Remember: this is in Microsoft OneNote 2016 – not the App version.

    1. Under the ‘Home’ tab at the top, go to the tags part and open the drop down list of tags.
    2. At the bottom of this is a “Customize Tags…” button. In there, you can create six new tags, one for each of the six standards. You can select an icon for them – I’ve just used the six coloured squares.
    3. You can then order them and see them within your list of tags. You could even move them to the top so you have the shortcuts for them (I’ve got other tags that I use for teaching in those slots…)
    7. Macro It Up!

    This step is a bit extra for those who like to have a list of their evidence somewhere.

    In Microsoft OneNote 2016, there is a ‘Macros’ part under the ‘Home’ tab. You can download a range of different macros which are like plugins for OneNote that carry out different tasks systematically. The one that allows you to create an index page like the one above is called ‘Tag Summary with Page Names‘.

    Once you’ve installed it you can create a new page and then run it.

    It will ask you for the ‘Scope‘. Select from Current Section, or Current Section Group, Current Notebook, or All Notebooks. I usually just select the ‘Current Section‘ option.

    Under ‘Filter‘ make sure you select ‘All‘. The unchecked only and checked only are for the ‘To-Do’ tag which can be marked as checked or unchecked. Our tags are just tags.

    Click ‘Ok‘ and it will go through and create a list of the pages that include the different tags.

    It could take a while depending on how many pages are in the Current Section. It’ll go along and show you the progress and page it is up to, and eventually be all finished and show you a page like the one above.

    Now, bear in mind, you selected ‘All’ for the tags it would look for, and so it will also list the other tags as well. You can go through these and delete the list of pages under these tags, leaving you with just the six standards and the pages that include that tag on them somewhere

    Other Macros

    Another good macro to get is a TOC (Table of Contents) called TOC in Current Section and TOC in Current Notebook. Both of these will build a linked list of pages within your section or notebook and display it on its own page. It’s not dynamic, so it won’t update as you add pages, but is good to have at the end of the year for example.

    Some Examples

    And that’s it. Add your evidence as a page in the section, organise it and add it in a parent page, and you’re away laughing!

    Below are some examples of evidence I have added into my OneNote portfolio.

    A great thing about OneNote is it is quick and easy to add evidence. Just create a new page in the right section, move it under a parent page if you need to, and then start typing. The date of creation is added at the top (I believe you can edit this if you’re adding evidence in retrospectively) and then you can add in an explanation or annotation of the evidence. It is easy to add screenshots or images, photos, or other media. If you have an iPad you can even write and draw in the page with Apple Pencil or a stylus.

    In this example, you can see at the top of the page I’ve added in the tags for the standards I believe that the piece of evidence links to. This is the strength of using tags, is that you create the evidence ONCE, and attribute the tags to that one evidence. There’s no copying it to different sections and organising it everywhere making multiple copies or anything. Just add the tags at the top. You can see the star one, which is my icon for PB4L stuff, which this also pertains to.

    In Conclusion

    I hope that is enough to get you started in using OneNote to house your teaching portfolio. It is the best system I’ve found for keeping your portfolio, and I’ve tried most of them. In my opinion it is the best for because of the following:

    • Adding evidence is easy, with the ability to copy and paste images and text into it. It also saves automatically.
    • It fits with my other OneNote notebooks that I keep for my other teaching work, allowing me to quickly copy work I’ve already done over into my portfolio as well.
    • Tags. Need I say more?
    • Flexible organising to suit my needs. Whichever way I need to structure my portfolio, it has a way of making it work with different layers of sections, section groups, pages, parent pages, and more.
    • Being able to draw, take notes, and annotate evidence with my iPad and Apple Pencil in OneNote has been awesome. These are at an additional cost, but add to the whole experience, and part of the reason why I use OneNote for all the other areas of teaching as well.
  • Teaching Portfolios: Example of My Portfolio

    Sometimes the best way to work out what you need in a portfolio is just to see what someone else has done.

    So I’ve taken a series of whole screen screenshots to show off what I’ve done. It’s not necessarily the best portfolio in the world, or at all what you do. But, it is what I have done, and have been adjusting and trying different things with time.

    Introduction
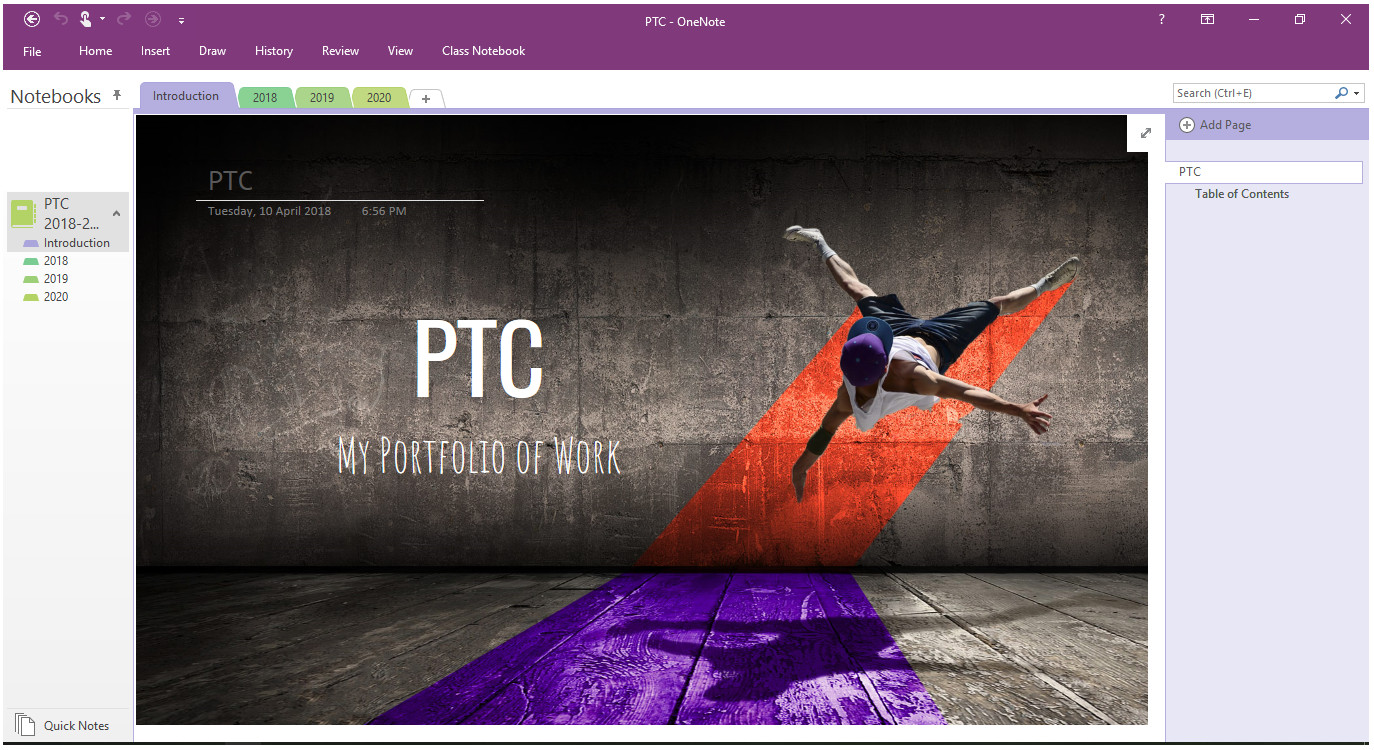
    Title Page

    I’m not sure why, but I made a title page for my portfolio. It just seemed like something that I could do to include some of my graphics design skills.

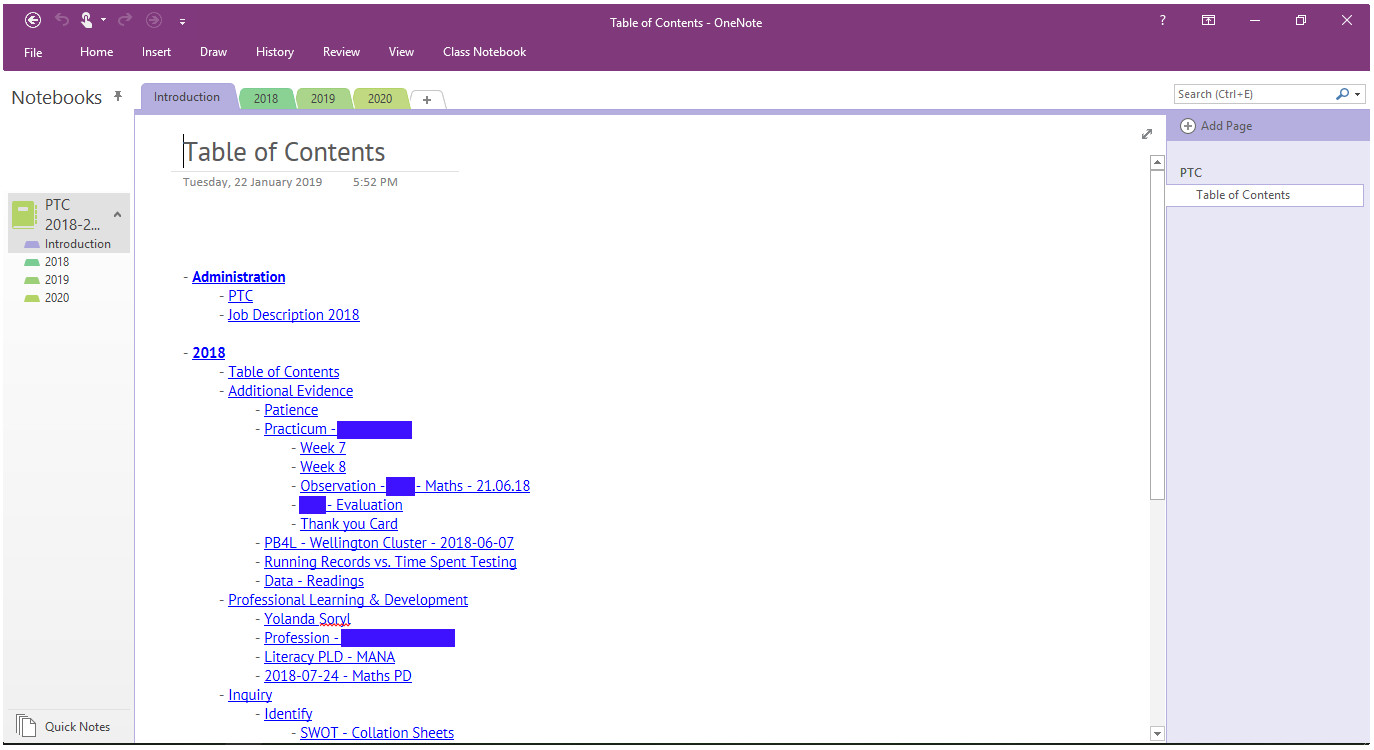
    Table of Contents
    A Table of Contents with all the pages for my portoflio listed

    I used a downloaded macro that creates a list of the pages in an indented list.

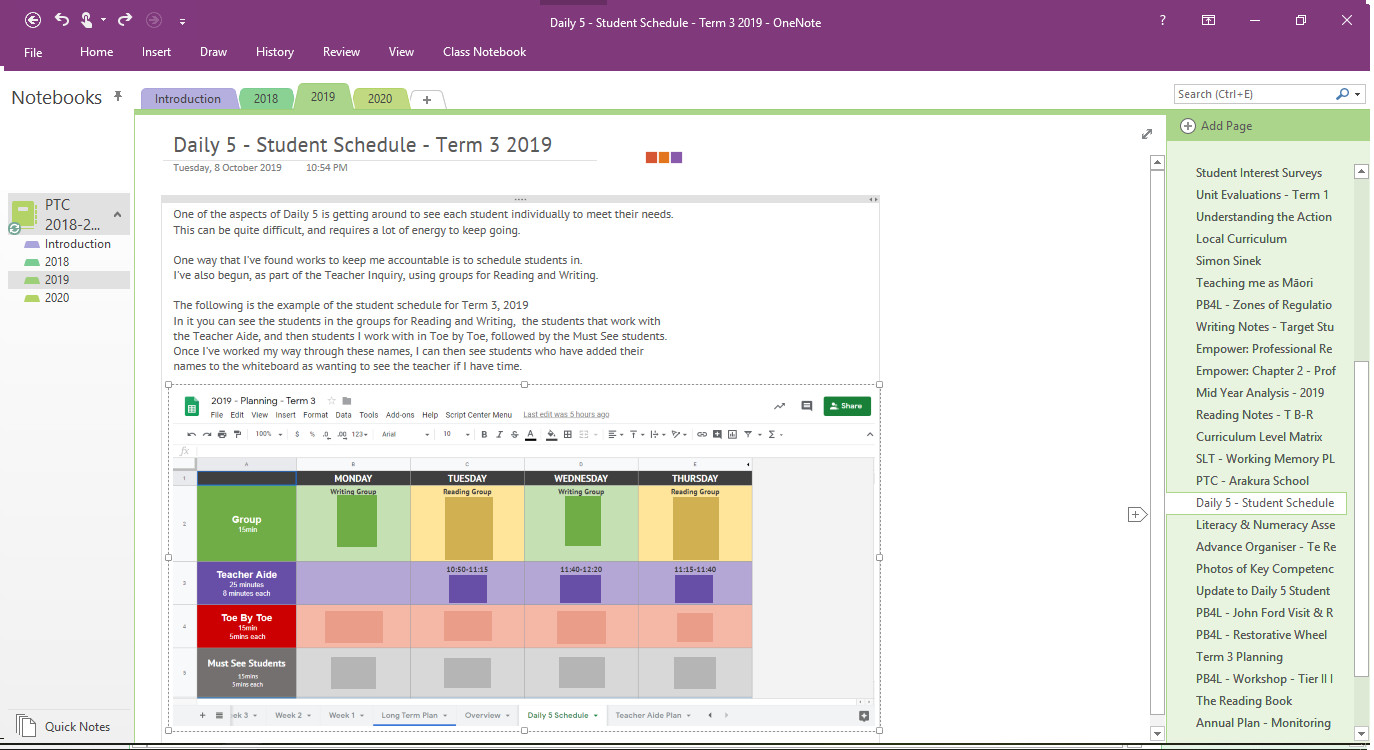
    In 2018 I focused my registration efforts into Inquiry, and through that Inquiry made links to the standards / criteria. I then collected additional evidence that I wanted to keep a record of.

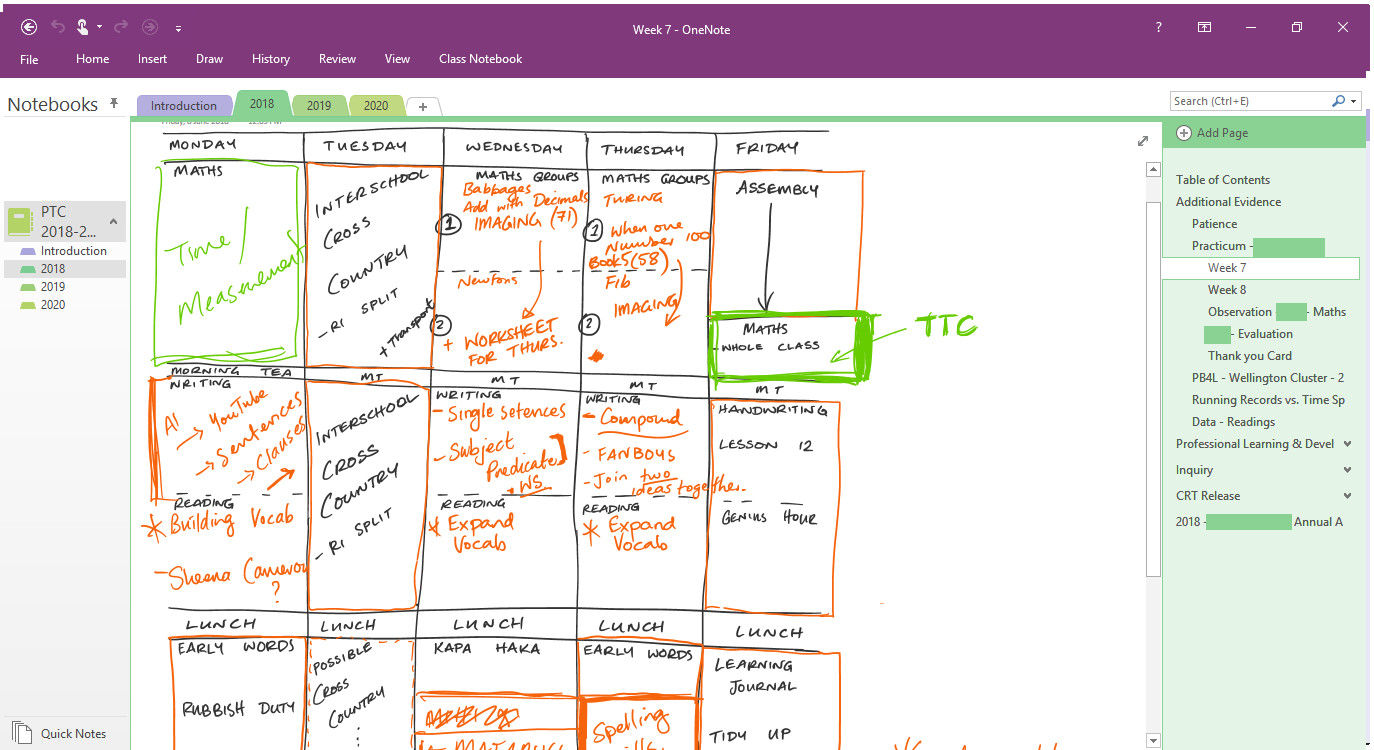
    Evidence example 1

    This is an outline of the week plan for the student teacher in my class.

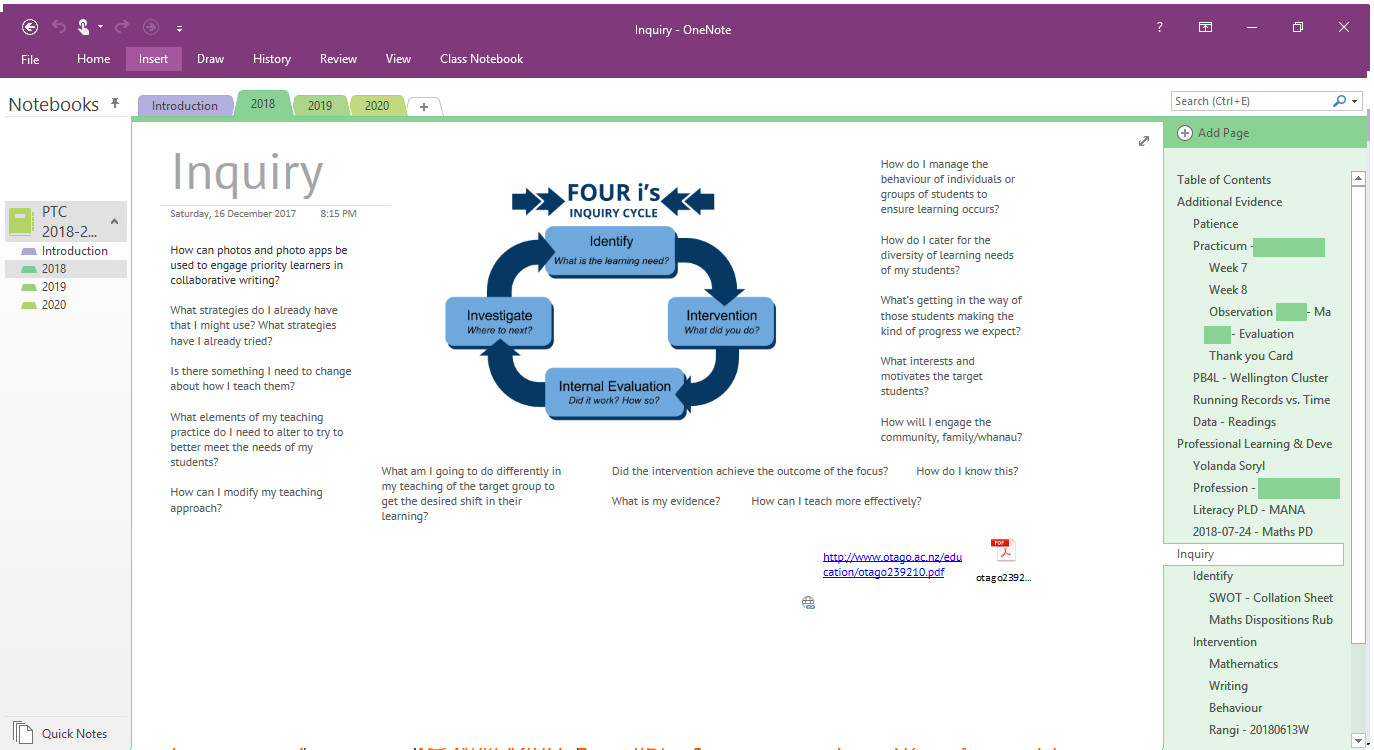
    Evidence example 2

    The Inquiry cycle we used as a school staff complete with some of the questions we would be asking ourselves.

    Evidence example 3

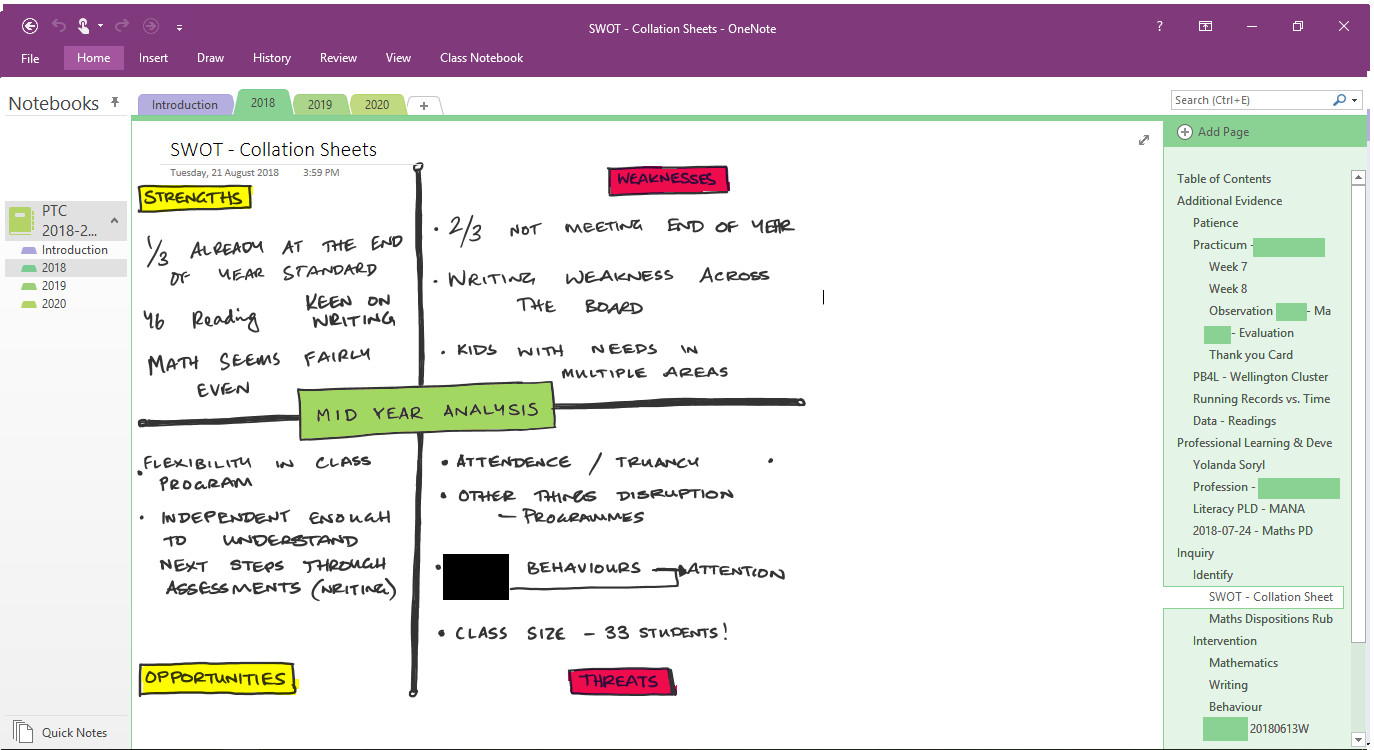
    A mid year review using ‘SWOT’ as a focus. I won’t go into details with these as they are merely serving as examples of the kind of evidence I collected for my Inquiry and portfolio. The key here is doing ONE thing but getting two uses out of it – as well as not doubling up on any work!

    Evidence example 4

    The record keeping of the interventions I carried out for one of my priority learners in my Inquiry.

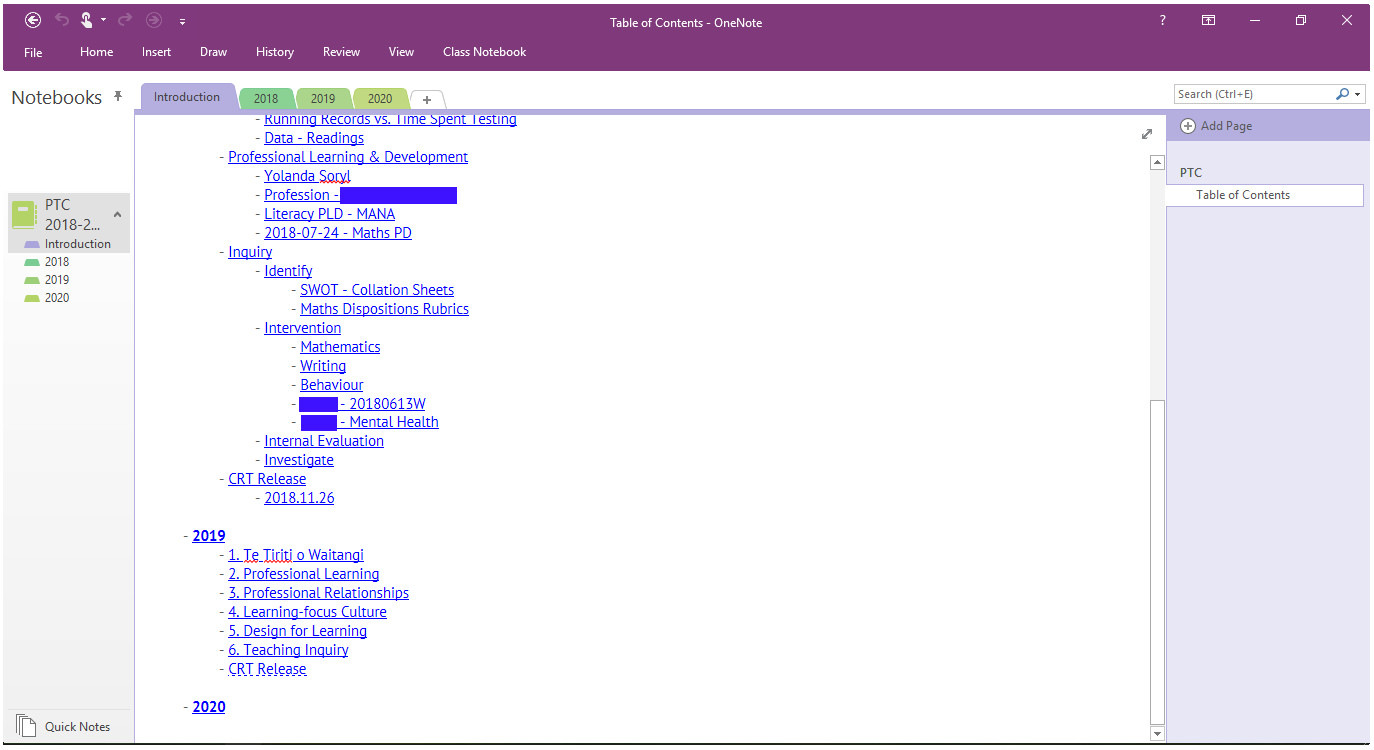
    2019 contents page

    In 2019, I began keeping my portfolio in a slightly different method, with more focus on evidence than on Inquiry. Essentially, the Inquiry became just another piece of evidence, rather than using the Inquiry to show the standards being met.

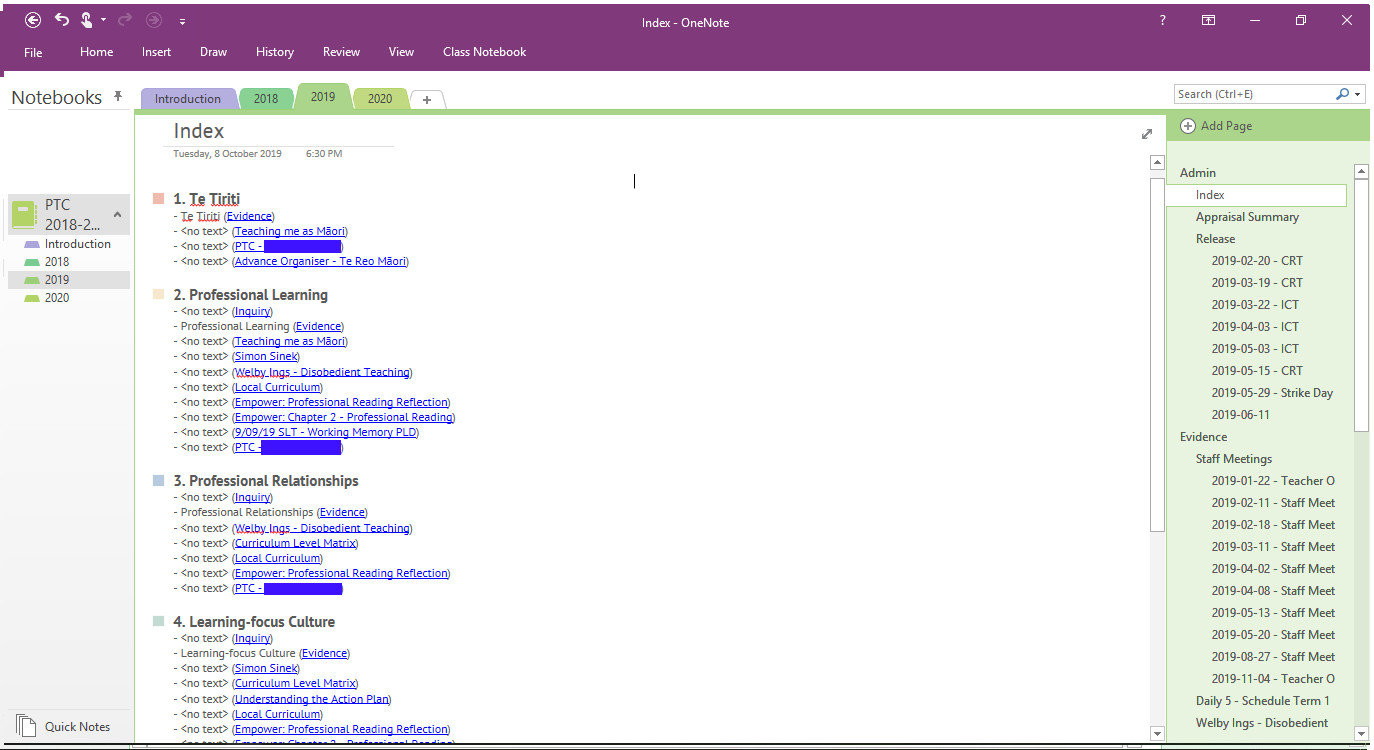
    You can see on the right hand side that all the evidence has just been added into one big folder, and then in the Contents page it has a list of the tags being used using the standards as each tag.

    Evidence Example 5

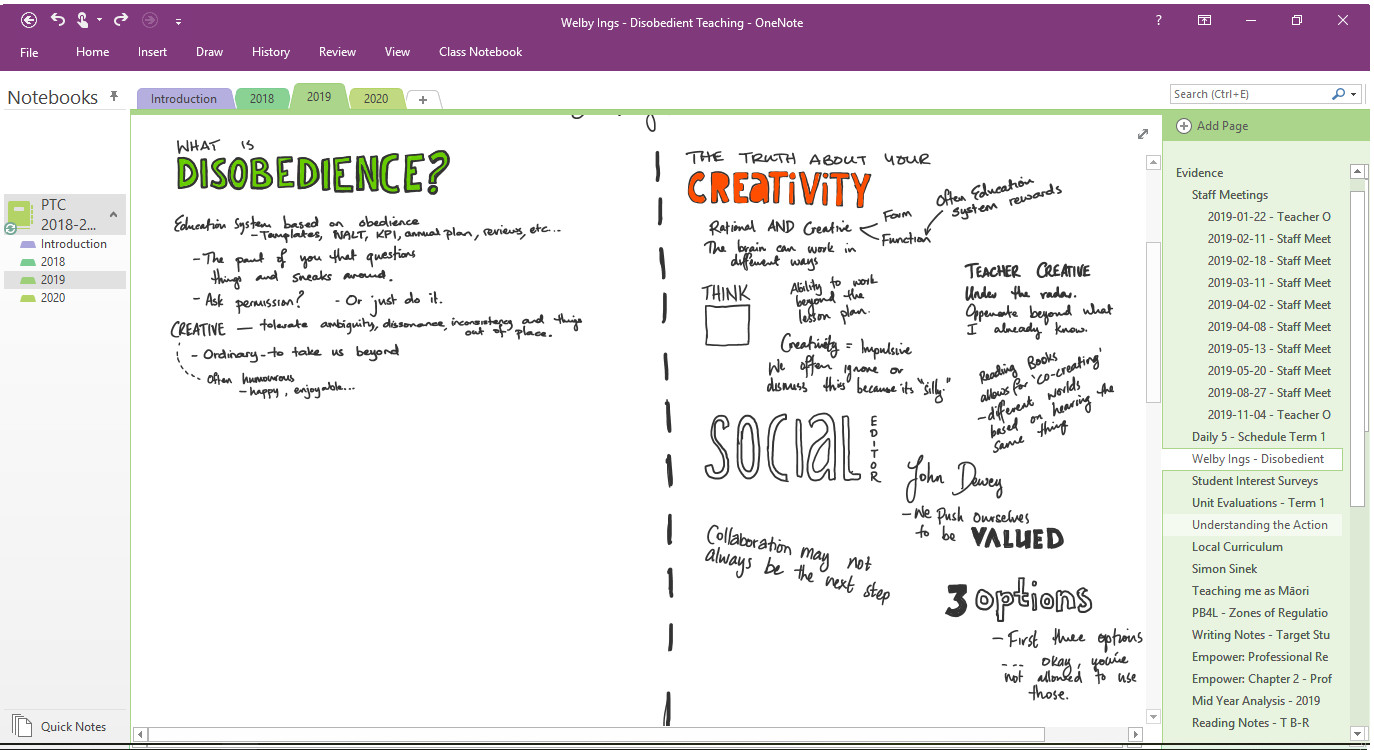
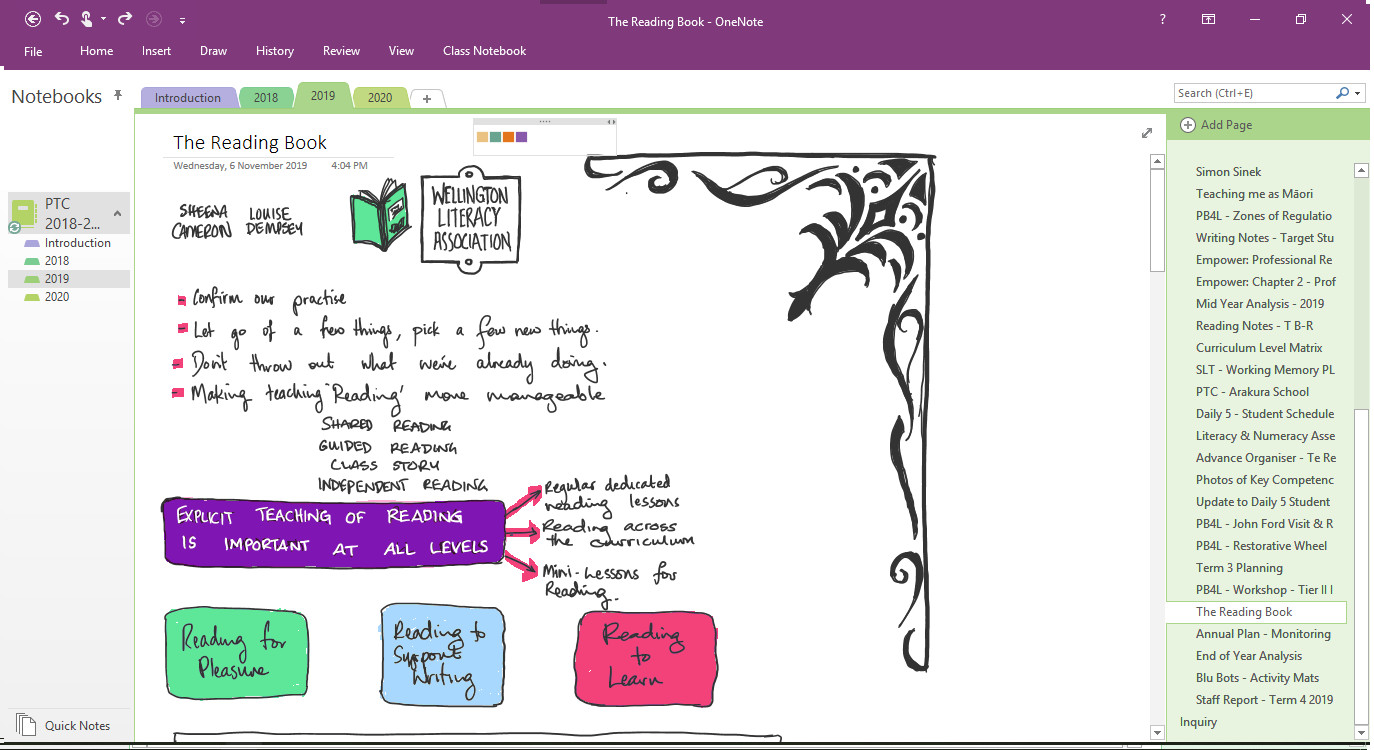
    Another piece of evidence from a PLD session. Check the list on the right side; everything is in one big folder. I’ve attempted to keep it in chronological order.

    Evidence Example 6

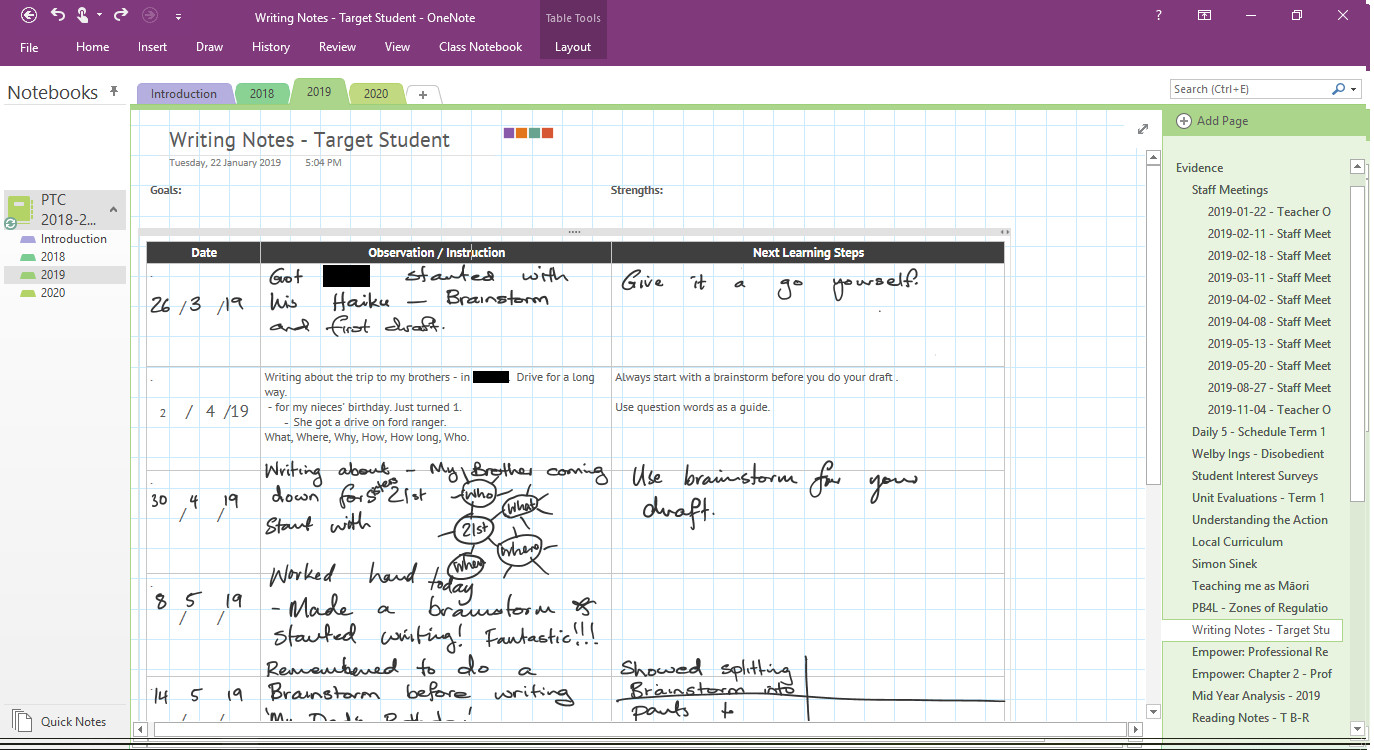
    An example of anecdotal notes taken on one of my priority learners.

    Evidence Example 7

    In this piece of evidence, you can see three benefits of using OneNote for collecting evidence. Firstly, the ability to add in screenshots easily means that you can use other documents and then import them straight in. Secondly, I am able to add my own explanation and description of the evidence in the text above. Thirdly, you can see the three coloured box icons at the top of the page – these are the tags of the standards that this piece of evidence meets – meaning that one piece of evidence can fit into multiple standard categories without having to copy and paste or duplicate evidence.

    Evidence Example 8

    More evidence I’d taken from notes at a PLD workshop. Note the tags used at the top of this evidence.

    Evidence Example 9

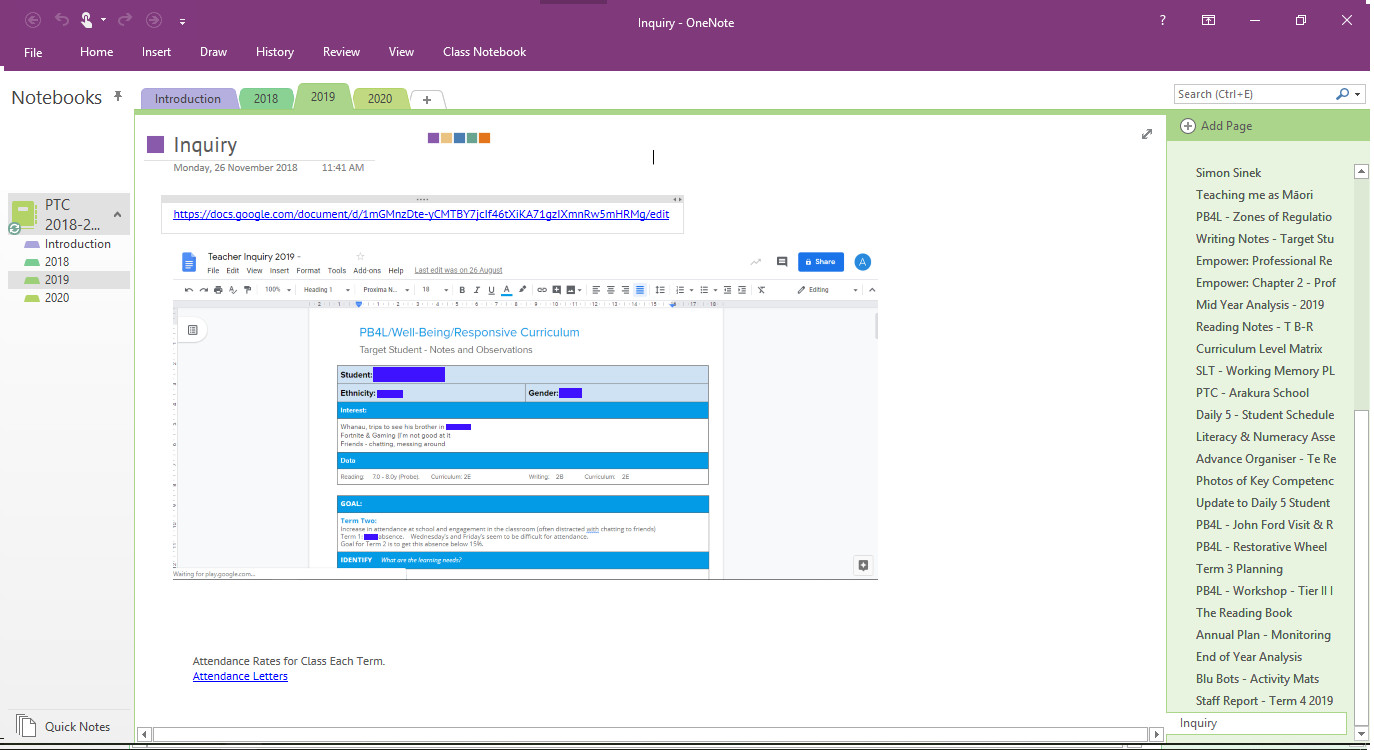
    Finally, as mentioned, I had kept my Inquiry as a separate piece of evidence from my portfolio. Here I’ve made a link to the document (so that I could access it from OneNote and my portfolio) and included a quick screenshot as well as other notes and links that are relevant to the inquiry as the year went on.

    So hopefully that has been a help to those out there that are looking for ideas, or just want to see what others are doing with their portfolios. Remember to check out my other posts about teacher portfolios and ways that you can maintain and keep a portfolio of this kind.

  • Teaching Porfolios: Date Based Portfolio

    One way in which you can build your teaching portfolio is to use each of the years for your registration as a structure for folders and dividers for your portfolio. This can be done easily in both hard copy portfolios as well as online or computer based portfolios.

    Whichever way you decide to go in setting up your portfolio, you should consider each of the steps in this guide.

    Hard Copy Portfolio

    Essentially you just need a divider, or section, or entire folder for each year. You could choose to group your years together for the three years of your registration, though this is not necessary.

    Then its just a matter of putting each piece of evidence into the relevant year as you teach. I would keep each one dated and keep them in the order they happened in. Then at the end of the year, close it off, and open up the next section ready for the new year.

    Computer Portfolio

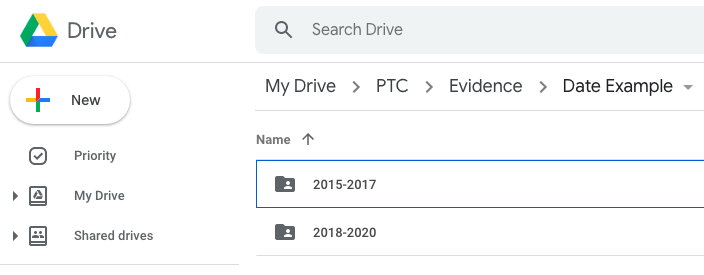
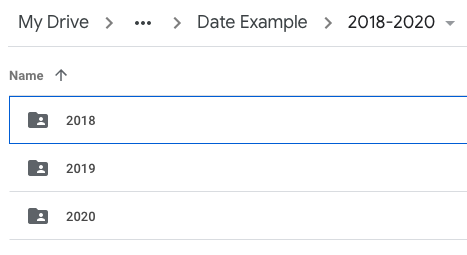
    In Google Drive / Drop Box / Windows Explorer / Finder create three folders inside your portfolio. Label these as the years of your registration. Obviously, you could just continue, or keep your registrations together in a folder themselves.


    One big melting pot

    Obviously if you just add each piece of evidence into a folder for each year it will begin to resemble a dumping ground of teaching stuff or one big melting pot of evidence rather than a well organised portfolio.

    One could merge the standards based approach outlined here into each of the year folders in order to add another layer of structure to your portfolio in an effort to keep it more organised. But this would require six folders, all named the same, created three times for each of the years. It would work, but it wouldn’t be very elegant. But, if this is how your brain works, then its a viable option. However, a better way would be by using tags.

    Tags for each teaching standard

    You can create a set of six tags, each one relating to a standard.

    Tags can be used throughout most file systems, but in particular if you use OneNote I would highly recommend this. If you set up a blog for your portfolio, categories or tags can be used for this purpose. I believe both Windows and MacOS have the ability to tag files. I’m not sure this is possible in Google Drive or Drop Box, but I could be wrong.

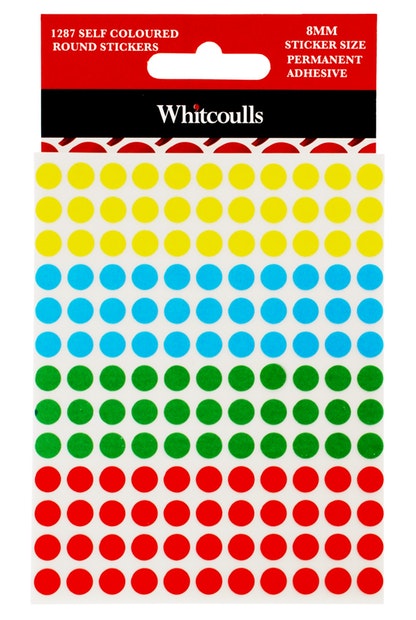
    If you’re building a hard copy portfolio, then stickers are your friends! Choose six coloured stickers to use, make a key of which standard each colour relates to, and then in the corner of the piece of evidence, place a sticker for the standard or standards that it relates to.

    Multiple Standards

    The biggest benefit to using tags is that it becomes very easy to attribute multiple standards to one piece of evidence. This is something that happens more often than not. Using tags saves on the doubling up of evidence as you copy a piece into multiple standards folders of other systems. Instead, you merely add as many tags as is suitable for the evidence, and it is “added” to those standards straight away.

    OneNote is free to use. Whilst the online and app version is very good, I find the OneNote 2016 software to be the best.

    For syncing, you will need an Office365 account, which costs. However, it is free for all schools thanks to the Government schools agreement with Microsoft.

    The Best Method

    The best software I’ve found for building a portfolio is Microsoft OneNote. In particular is the ability to use tags. These can then be searched for, and using different macros it can also build a contents / index page for each of these tags.

    I used to use a blog type approach, with each post being a different piece of evidence, but with some privacy issues being that it was online, as well as the fact I was having to create posts as a piece of evidence, rather than just using the file, it became cumbersome and extra work with the doubling up. I did however appreciate the use of tags and categories to be able to organise the evidence while still maintaining a date based approach.

    I will write an in-depth article about setting up your teacher portfolio in OneNote soon.

  • Practising Teacher Criteria and Microsoft OneNote

    As we move further into tighter and tighter regulations around registering as a teacher, the need to keep track of and collate evidence of our ability as teachers to teach becomes more and more important. The Practising Teacher Criteria requires teacher to collect evidence and artefacts and keep track of these to show how we meet each of the 12 criteria.

    Over the last few years I have developed a couple of models with which to do this.
    One involves using Google Sites and Google Drive, which I prefer.

    The other involves Microsoft OneNote.

    If you already use OneNote, you may wish to keep your evidence and artefacts of your teaching to the 12 criteria in a Notebook within OneNote.

    PTC Template

    Thinking ahead, before I built my own notebook, I made a skeleton outline to save as a template.

    In the template, I have made 12 folders, each representing one of the criteria. I have also included an “Administration” folder for bits and bobs associated with the PTC, but not necessarily part of it. Each of the 12 folders have a “Welcome page” that outlines the criteria.

    Once created, you can go ahead and add pages, documents, items into each folder to build your collection of evidence for your PTC. It’s all fairly straight forward.

    Privacy & Security

    One common and important question about these methods is the privacy of students that are being used as examples of evidence etc.
    Both Google Sites and Google Drive have a full range of permissions, from full editing to view only, to completely private (Only Me) modes.
    Microsoft OneNote package operates more like a Word doc, where only those with access to the file will be able to see it. Naturally, you can share this over OneDrive, or by email, but ultimately, the privacy is in your control with who can view the files.

    Download

    So, as I am doing with a lot of my teaching things at the moment, I am making this template freely available for you to use for your own use. It is protected under creative commons, meaning you can’t go on to sell copies of this, but you can feel free to edit it, modify it for your own use, develop it further, and use it.

    [su_button url=”http://res.cloudinary.com/alingham/raw/upload/v1462773574/PTC-TEMPLATE.onepkg” target=”blank” style=”flat” background=”#39aa29″ center=”yes” icon=”icon: cloud-download”]Download .onepkg (30.9 KB)[/su_button]

  • Microsoft OneNote – Teacher Planning – Part II

    Part 2 – How do I set OneNote up as my Planning Folder

    As mentioned in Part I of Microsoft OneNote – Teacher Planning, every teacher, every school, plans differently. The method that follows is just one way in which teachers could use Microsoft OneNote to plan. It is not necessarily my prefered method, but is one that I can see working well with how OneNote operates, and therefore is a good example of how OneNote can be used to enhance and organise teacher planning and paperwork.

    Below, I will outline how I have set up Microsoft OneNote as a planning folder for unit plans, lesson plans, and subject based information.

    Step 1: Create Notebook

    Folder structure for Planning Notebook

    However you like to, create a Notebook. Clicking on the existing Notebook reveals a drop down list in the Mac version, with a grey plus (“+”) button in the top. This will allow you to open or create a Notebook. I called mine “2016 Planning”.

    Step 2: Create Plan and subject folders

    Along the top I clicked the tab with the “+” sign to create a new tab and labeled each one accordingly. I had a generic “Plans” folder, along with a folder for Mathematics, Literacy, and Inquiry; which make up the three blocks in my day. I added P.E. and Health as there are additional plans that do not fit under inquiry that I will be using. In turn, there may also be additional plans in the other curriculum areas, such as The Arts, which don’t fit under any of the Inquiry units. I changed the colour of each to match the colours I associate each with thanks to previous curriculum documents. These also match the colours that I used in Google Sheets last year.

    Step 3: Plans folder

    In the plans folder I created a series of pages on the right hand side. These are as follows:

    • Page Structure for Planning FolderYearly Overview
    • Term 1 (menu holder)
      • Long Term Plan
      • Weekly Overview
        • Week 1

    *Note: The menu holder is a blank page that reads Term 1. This is merely to organise the sub pages into Terms, so within this folder, there will be Terms 1 through 4, and under each, a Long Term Plan, Weekly Overview, and the Weekly Plans. Two of these are school requirements that may or may not be necessary in your school. You’ll also see that Week 1 is a sub-page of “Weekly Overview”, though Weekly Overview is not a menu holder, in that a generic plan outline is included in this plan, with the sub pages sitting under it.

    Step 4: Including existing plans or planning templates

    There’s little point in throwing out the baby with the bathwater here.

    Instead of creating plans and units within Microsoft OneNote, you can insert or “attach” existing documents; much like you would be able to insert plans, notes, or newspaper cuttings into a clearfile folder.

    Importing local files into Microsoft OneNote

    For the long term plan, rather than attempt to create the complex table in OneNote, (especially seeing as I’ve developed this plan to automatically shade in particular subjects if they are not being covered) I have merely “attached” or inserted the excel spreadsheet into the OneNote page called “Long Term Plan”.

    Another option, and great feature, is Inserting a PDF printout. OneNote will go and open the selected file, print out a PDF copy of it as it is, and then insert that PDF as a page in your folder for display. A very useful feature that I am sure I will make the most of throughout the year.

    Step 5: Creating Unit Templates

    Initially, I thought about doing the same for Unit Plans, but quickly realised this would become tiresome as the year goes on. Essentially I would not be using OneNote at all, merely gathering files, which I may as well use Google Drive for.

    So to use OneNote a little more, I decided to copy the Unit template from Google Docs and paste it into OneNote.

    Seamless; aside from the superfluous Drawings/Shapes I had added as additional flare for the unit plans. These were quickly inserted by using screenshots and entering them into OneNote separately. I was amazed at how accurately it copied the table from Google Docs and added it into OneNote without any formatting issues.

    I then used Onetastic to create a number of custom headings and font formats, and went through and edited the template using these. This is not a necessary part of the process, but one I like to do as a designer.

    Creating Page templates is very easy in the Windows version of OneNote. I have yet to find if the OS-X version has this capability. Visit here to find out about creating page templates. Essentially, I created a blank Unit Template with the relevant headings and sample content. Saving these as templates then allows me to open them up as pages for following terms, and following years.

    Step 5: Weekly Plans

    Early in my teaching career I separated all my plans out, so I had a weekly overview, a mathematics weekly plan, a reading weekly plan, a writing plan, as well as an afternoon plan. I know many teachers who plan like this, and it hasn’t been difficult to go back to this after collating all those plans into one Google Sheet last year (Read here).

    Week 1 plan - Literacy

    By creating a folder for each subject, I have somewhat forced myself to return to this system. In each subject folder, I have created a “Term 1” menu holder, much like the page structure in Step 3. This is a blank page. I then made two sub-pages; “Unit Plan” where I inserted the Unit Template from Step 5, and a “Week 1” plan, which is displayed above.

    This is essentially a table copied from my Google Sheet from last year to show what happens in Literacy each day of the week, according to the Weekly Overview in the “Plans” folder (See Step 3).

    Step 6: Linking to OneNote Pages

    As I explored more and more of Microsoft OneNote, I needed to make sure I made use of its many facets. One of those is linking to the different pages from within OneNote, so that when I have my planning folder open, I can quickly click once on a particular part of the weekly plan and jump straight to the related week plan for that subject.

    Weekly Plan - Links to other PagesThe screenshot above is the “Week 1” page within the “Plans” folder (See Step 3). As you can see, I have made five “Week 1” links under Whole Class Maths for the week.

    These link to the Week 1 plan in the Mathematics Folder. This allows me to view the week overview, and directly click once on “Week 1” to automatically go to the Week 1 plan for Mathematics, rather than having to click on the Mathematics folder, and then find the corresponding week.

    Next week, in the Plans folder > Week 2 page, I will change these links to point to Mathematics folder > Week 2 page.

    In Conclusion

    And that’s about as far as I’ve got. I’m sure that there is much more to learn about Microsoft OneNote that I will no doubt come across throughout the course of the year.

    I am also very aware that there may be other ways of using OneNote for planning, and in teaching. If you do, please share these with us in the comments below. I would be more than interested in seeing how others use it and see whether such methods I could incorporate into my own planning.


  • Google Drive vs. OneDrive

    Sorry. Did I say versus?

    I meant AND.

    About four years ago, our school made a shift to using Gmail as our email client. We’ve never looked back.

    This year, we began delving into Google Drive, and Google Docs as a staff. We moved our Documents from My Documents to our Google Drive without so much of a hitch. We developed an Integrated Unit Plan to use in Google Docs that we could share and collaborate with our colleagues.

    But three terms on, and the full extent of Google Apps has yet to be fully embraced.

    Why?

    Quite simply, it comes down to one thing.

    Familiarity.

    Change is hard. Change is often unwelcome. And unless that change demonstrates it is a better option to the point where you can’t do without it, reverting back to your old ways is almost inevitable.

    Unfortunately, Google Docs, Google Sheets, Google Slides can all be done without by teachers. All because of one thing.

    Microsoft Office

    Ever since its release, teachers (and other professionals) have begun using Microsoft Office for everything. I know myself, that I very rarely turn to any other solution when needing to use a word processor, layout, A4 print, or anything else.

    Now don’t get me wrong; I have made every effort to convert myself into a Google App user. I’ve used it in almost ever faucet of my teaching computer use, including analysis of data, collection of data, unit planning, weekly planning, student collaboration, and more.

    Obviously my use of Microsoft Office continued, with report templates, data sheets, and pre-existing templates being used by the school still in Word or Excel. Other teachers avoided Google Docs because of its limitations, because it looks and feels different to Word, and because they prefer to use what they know, rather than spend a lot of time converting over to Google Docs. And I can’t blame them at all either. It requires a lot of time tweaking, adjusting, moving, changing, to completely adopt Google Apps and have a perfectly working Google Doc rather than an existing Word version. (And yes, I’m well aware you can open a Word document in Google Docs, but it doesn’t always get it right, and it always tries to save it as a Google Doc afterwards.

    The Switchback

    There is a new player on the court.

    It’s name?

    OneNote.

    It’s being heralded as a game changer and I can instantly see why.

    Yes, I’ve used Evernote. Then it became too mainstream and clunky with its high-brow graphics. It began doing too much, like food reviews and becoming social.

    Google’s version, Google Keep, is little more than a gimmick, imitating post-it notes. Don’t get me wrong; teacher’s do love a good stack of post-it notes. But guaranteed, when the rubber hits the road, and a teacher has to run out of the class in a fire; are they going to save the stack of post-it notes, or grab their planning folder and diary?

    Microsoft OneNote has that potential to become the central hub of everything a teacher does. Much like a ringbinder, I can see it becoming a filing cabinet, a student profile book, a manila folder, and a clearfile all in one.

    And one thing that makes OneNote a game changer is it’s ability to sync on mobile devices and share with colleagues. However, to do this, it needs OneDrive activated. Obviously Google and Microsoft are at war, and Microsoft won’t allow OneNote to sync using Google Drive instead of OneDrive.

    Two Peas in a Pod


    So suddenly we find ourselves wanting to get OneDrive set up. Both OneDrive and Google Apps are essentially ‘free’ for Education. So we have access to both.

    Initially, it would be fine just to use OneDrive as a means to an end, if only just to run OneNote it would be worth it.

    However, my thinking is, why not use all of Office 365, Microsoft’s answer to Google Apps. If teachers are sticking to using Word because of familiarity, why not
    just extend this to Office 365 and get all the benefits of Google Docs, but in a familiar setting. Perfect.

    Except we have Google Drive all set up. We have Google Doc templates. I’ve spent all year changing myself over to Google. And what’s more, our school has just invested in providing Chromebooks for use by our senior students, which all run off Google Apps.

    So teachers will still need Google Drive, and Google Apps.

    Or vs. And

    In most battles, it’s always an “or” that is used. Holden OR Ford. Marmite OR Vegemite. Rugby OR League. iPhone OR Samsung. Facebook OR Twitter. Microsoft OR Apple OR Google.

    However, in this case, because Google have nothing that even compares to OneNote, or the familiarity of Microsoft Office with Office365. But in the same sense, we definitely need to keep Google Drive and Google Apps. There is no way we should throw the baby out with the bathwater.

    So, at our school, we will be adopting an AND mindset.

    We will be using Google Apps and Microsoft Office 365. We will make use of Google Drive, and OneDrive. We will collaborate and share with students in Google Docs, and will organise ourselves through OneNote.

    Essentially, we will find ways that we can have the best of both worlds.