
Yesterday I posted about Realtimeboard, an online whiteboard I have begun using in my class to collate and collect the work that we work on together.
Today I plan to take you through the steps for getting started, making your first board and general use of the app. I’m sure that I won’t be able to cover everything that the app can do, but hope to give you enough of a start so that you can realise for yourself the power of this software and how you might start using it in your classroom.
Step 1. Getting Started
I am going to assume that you’ve managed to get yourself signed up, and hopefully have managed to get approved for an educator account. If not, I highly suggest that you do. Go to realtimeboard.com/education/ and fill in the form. They actually get back to you a lot sooner than they suggest.
Once you have signed in, you’ll be greeted by your dashboard. You may get a “What’s New” as is customary these days with these kinds of apps.
 The dashboard is relatively straight forward. You have your created boards at the top, and some demo boards below.
Clicking on the Google inspired blue “plus” circle will create your first board.
Realtimeboard has done well to make this app resemble any of the native Google Apps, by including “Shared with me” and “Last Opened” menu filters on the left hand side.
At the top right, there are account links and settings options.
Click the plus to create a new board.
Step 2. The Workspace
Navigating
The Realtimeboard workspace is essentially an infinite ‘canvas’ or board stretching out beyond the edges of the screen. There are a few, quick tips you’ll need to know for getting around.
- Using the mouse roller button, or doing two finger scroll on most trackpads these days will zoom in and out from your canvas. It zooms towards or away from the position of the mouse cursor on the screen.
- Clicking on the canvas and dragging allows you to move around the canvas at the current zoom rate.
- Clicking on an object selects that object and allows you to perform different operations with them.
- Double clicking will centre and zoom (in or out) to fit the selected object to the whole viewport.
- Arrow keys also allow you to move around the canvas
- Esc key exits from the current operation. If you are typing text, it will go back and show the selection of the text box. Pushing Esc again will deselect the textbox. Obviously, if you’ve only selected a shape, pushing Esc once will deselect it.
Zooming in and out allows you to get right into the little details, as well as zoom out to see an overview of your board. Using these together, especially with frames mode creates great transition animations as the viewing screen zooms in and out to fit the screen.
Top Left
 The top left, as with many Google Apps that Realtimeboard has mimicked, includes the Title & Document Name and a Home button to return you to the Dashboard.
In addition, Realtimeboard offers an “Export” button, which allows users to save the board off in a range of different formats. This is incredibly useful for a number of reasons and uses, such as including the board in a different document, keeping an archived version of the board, or merely just backing up. It also allows you to save it straight to your Google Drive; if you have linked your account.
 Tools
Tools
Realtimeboard includes all the tools you would expect to find in such an app. Each tool even has a shortcut key which is incredibly helpful for quickly changing tool. I’ve included these in square brackets.
 |
The pointer tool has two options. One is the standard Select tool [V], and the other is the hand, or Pan [H], which allows users to drag the viewport around the canvas. The select tool defaults to the hand tool when clicking on the canvas background instead of an object on the board. |
 |
The Text tool [T] brings up a standard text cursor that users can use to create text boxes on the whiteboard using click and drag |
 |
Hello Sticky Notes [N]! This is possibly one of the cooler tools that can be used to show key bits of information, or student’s ideas and suggestions. You can post one at a time, square or landscape, or create multiple notes at once. Great for writing down different student views from around the class! |
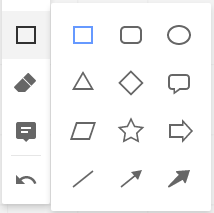 |
 It wouldn’t be a whiteboard without the Shape [S] tool. Gone are the days of teachers having to practise drawing perfect circles on their blackboard. Now, just select the shape and then click and drag it to the desired size on your canvas. It wouldn’t be a whiteboard without the Shape [S] tool. Gone are the days of teachers having to practise drawing perfect circles on their blackboard. Now, just select the shape and then click and drag it to the desired size on your canvas.
You can also add text to shapes! |
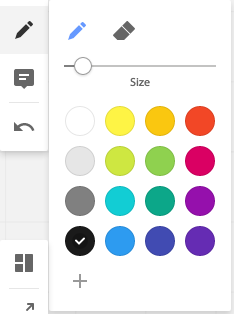 |
The Pen [P] and Eraser [E] tools are great additions for the whiteboard. You can quickly select the desired size and then free hand draw or write onto the canvas with a selection of colours. While these are initially limited, you can also add your own custom colours from the spectrum.
The eraser tool works really well, but only for lines drawn with the pen. It does not erase shapes for example.
|
 |
Comments [C] are integrated into Realtimeboard much like they are in Google Apps. You can even mention other collaborators directly. Like in Google Docs where you can assign comments to words or lines or sections, you can place comments on any part of the canvas. |
 |
Undo [Ctrl+Z or Cmd+Z] is the most used tool, and it’s no surprise that the folk at Realtimeboard have built this into their app, along with the common shortcut people will be used to. |
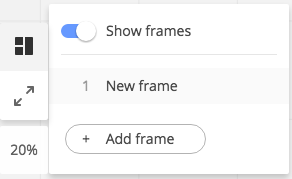 |
Lower down the tool menu, Frames [F] (which I am quite impressed with as mentioned on my overview). This tool allows you to create “pages” or “views” within the whiteboard. You can then navigate between them using the arrow keys (only when in Frames). When using this tool, you can select the size and drag it to incorporate whatever you like to appear in the ‘view’. |
 |
Fullscreen does just that. No bells. No whistles. But quite useful none the less, especially when displaying this on an actual whiteboard. |
 |
The last tool is the Minimap [Z], or zoom tool. This essentially allows you to return to the default zoom or size of the document, as well as showing a mini-map of your board (remembering that it could be gigantic on an infinite whiteboard!). |
Inserting Media
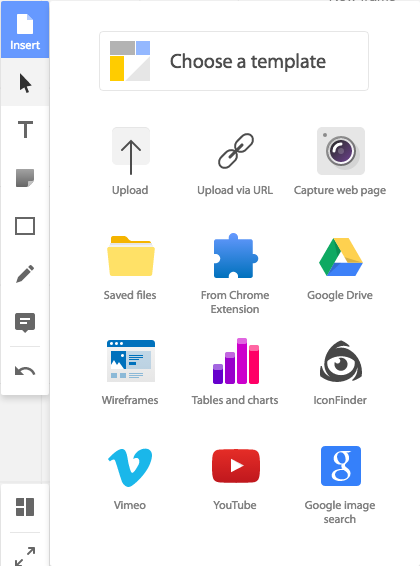 The other tool is at the top of the whole list. It allows you to do a range of different things:
- Choose a template from a range of different layouts and examples of what Realtimeboard can be used for.
- Uploading images, files from your local computer.
- Uploading images etc from a URL.
- Screenshot of a webpage.
- Recently uploaded files that you’ve already uploaded.
- Files from the Realtimeboard Chrome Browser Extension.
- Files from your Google Drive (if you have connected your account in settings).
- Wireframes are great! They are a quick-select library of templates or layouts which are quick and easy to add into your board. See below for the examples.
- Tables and Charts to give a quick visual of data or statistics is built into this app nicely.
- IconFinder allows you to add a selection of icons to make your board more visually rich.
- Vimeo allows you to select video from Vimeo.com.
- Adding videos from YouTube.
- Add images from Google Image Search.
Top Right
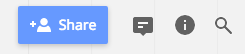 Once again, Realtimeboard have been smart in keeping the same kind of features they offer in the same location as Google Apps. In the top right, includes a Share button to add ‘viewers’ or ‘editors’ and ‘collaborators’. You can invite people using their email addresses, and you can set the level of privacy, from ‘Can View’, to ‘Can Comment’, and ‘Can Edit’. You can also get a ‘Public’ link that allows you to easily share it out to everyone.
Next to the share button are the ‘Comments’ that have been made, all available in one place.
The Information button gives you quick links to feature pages of Realtimeboard. These are not related to the document.
The Search button does just that; searches your board for a given word or phrase.
Other Features
The only other feature is key to real-time collaboration with others, and that is the Chat Feature in the bottom right corner. Video Chat requires a premium account, but screensharing appears to be available – although I have yet to try this. I can imagine this might be quite useful for view only collaborators.
The other great feature of Realtimeboard is that it automatically saves, just like Google Apps.
3. Creating Content
Adding Text
 One of the most common tasks you’ll want to do is adding text.
- Select the Text tool [T]
- Click on the board where you want the text to start.
- Start typing…
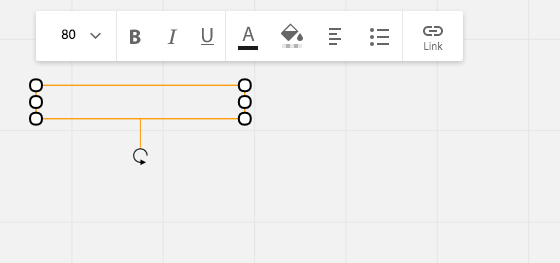
As with most text tools, there are a number of formatting tools for use. From left to right;
- You can choose the font size
- Set the text as Bold, Italic, or Underlined, or a combination of all three.
- Change the font colour, or the Fill colour. The fill colour sets the background of the text box to the colour you select.
- Set the alignment of the text within the box, from left, centre, or right.
- Create a bulleted list.
- Create a link.
Modifying Objects
With all the objects placed on the board, the orange outline shows the object that is selected. This goes away when another object is selected, or you click off that object (or press Esc).
The white circles around the outside of the selection allow you to change the dimensions of the box by clicking and dragging them in the appropriate direction. The corner circles allow for diagonal adjustments, and with text boxes, or if you hold down shift as you drag, these will keep the proportions as you adjust them. The circles in the middle of each outline allows for adjustment in either the horizontal or vertical direction only.
The arrow on the end of a looped three-quarter circle allows you to rotate the object through 360 degrees.
If you right click on an object, there is a drop down menu that will appear with a range of options. These are different depending on the type of object. Most of them however include the following tools:
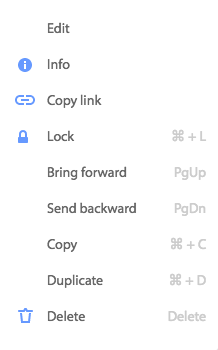
Right click menu on any object |
 Right click menu on any image Right click menu on any image |
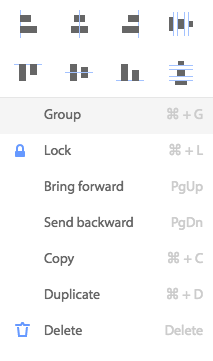
Right click menu when multiple objects are selected (using Shift) |
Holding down Shift as you click on different objects allows you to select multiple objects at once. Right clicking on these selected object then allows you to group and/or align objects together, as well as other functions.
The key menu items I use from these are definitely the ‘Bring forward’ function, or the ‘Send backward’, which allows me to put things behind or in front of other things, particularly important when adding shapes and text to work in with each other.
Examples
I’m sure you’ll get the hang of it. Below I’ve just put up some examples of the content our class is currently experiencing through the Keeping Ourselves Safe programme run by the New Zealand Police. I spent a bit of time after our last session going through and adding a bit of flare to the content, more to show what is possible. I’ve included a few notes about how each was created.
Example 1

- Square shape, dragged to rectangle, filled with black.
- Text, text colour changed to white.
- Text, header box given a ‘pink’ fill, text colour to white.
- Same pink colour for down arrow (Shape).
Example 2

- Square shape made into rectangle, thick border, purple/blue (custom colour)
- 4x text boxes for each numbered point. Bold first line. Examples unbolded.
- Text header, given same fill colour as border of square. White text colour changed.
- Post-it Note added to right hand space. Font changed on note to ‘handwritten’.
Example 3

- Star Shape, Yellow Fill.
- Star shape (small), orange fill, duplicated 4x.
- 4x text box next to each small star.
- STAR heading. Rotated 90 degrees. Bold text.
- S.T.A.R, bold first letter. Bring to front over top of Star shape.
Each of these examples look like a Powerpoint slide, but these are just the tip of the iceberg of how you can create content, and then add to it to make it visually impactual for your class. Adding in frames allows you to present it like a slideshow, or simply use the Pan tool [H] to move around the content. Each of these three examples exist on the one Realtimeboard, and are visually linked by arrows that viewers can follow the lesson progression as we worked through it.
Right. That should be enough to get your feet wet. I’m sure that you’ll get the hang of it in no time, and begin creating a variety of creative and amazing content that will engage and inspire your students.

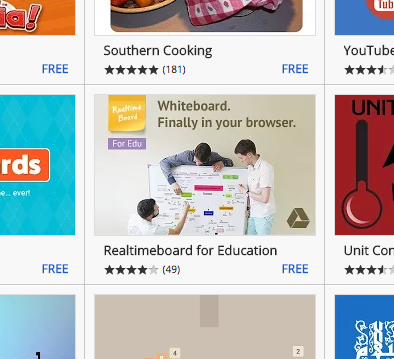 Web App on Chrome