Tag: Google

  • Lockdown Learning: Set up your Teacher Browser for Lockdown

    Lockdown Learning: Set up your Teacher Browser for Lockdown

    I use Chrome browser exclusively these days. There are a number of reasons why, but I won’t go into those here. The reality is, you can PROBABLY do this in any browser, but you’ll have to search through the settings on how to do it in them.

    Basically, what I found is that as a teacher teaching remotely I had a whole heap of tabs that I routinely used to set up the day. Google Classroom Stream, Google Classroom Classwork, Google Docs for the Overview of the Day, YouTube studio for uploading the videos I recorded, and more.

    Rather than spending five minutes opening those each day, I figured, while I’m on lockdown, I may as well have them routinely open all the time whenever I open my browser. That way, I can maximise my sleep ins and be ready to go with the pages I needed!

    Here’s how to do it!

    Firstly, open up every page you want open that you regularly use for the lockdown. You can even have multiple tabs of the same site if that site has different pages in it. For instance, I like to have the Stream for Google Classroom open, as well as, the Classwork page open so that I know what I named each of the Material for each day. I can have these both open in different tabs. Once you’ve opened each page in a new tab put them in order that works for you. I usually have the most used on the left through to less important on the right.

    Make sure that the tabs you have open are the default pages. For instance, if you want your Inbox to be open, have it open on the standard Inbox page, not a specific email, otherwise it will open that email each and every time. This is, of course, unless you want that specific email to be opened each time!

    Open up settings by clicking on the three dots in the top right corner of Chrome and selecting “Settings”. Alternatively type “chrome://settings/” into a new browser tab.

    This will open up the settings page.

    At the bottom of that basic page, you will find the following screen

    Once you find this, don’t worry about adding new pages to the list. Just click on “Use current pages”. This will load in each of the tabs that you have open at the time, that you started at the start of this tutorial.

    And you’re done.

    At the end of this lockdown and we’re back in class teaching the kids, you can go back to your home page settings.

    Enjoy. And stay safe.

  • Lockdown Learning: Teaching Small Groups or Whole Class via Google Meet

    Lockdown Learning: Teaching Small Groups or Whole Class via Google Meet

    Today as I headed out on my weekly Wednesday run, I was reflecting on the first day of Term Two, which we had to teach remotely from home.

    Largely, it was me sitting on the laptop answering questions like “What do we do now?” and “I’ve finished it!” and “I’m stuck”. that students messaged in. After that, it was checking to see that my scheduled activities were sent out correctly and checking to see who had commented on it (and what they had commented).

    And that’s the point. I felt like I was just handing out activities, and watching the kids do them from afar.

    It wasn’t exactly “teaching”.

    Sure, I’d put out a welcome video, a video of me doing a mini reading strategy (of which was quite good because unlike in class, there wasn’t any calling out or interruptions!), and the like… but it wasn’t interacting or connecting with my students.

    So as I was thinking about how I could do it, I suddenly realised what I’d come across during a Board Meeting last week.

    Google Meeting “Present” Mode

    In Google Meet (which has been turned on for all educators during the lockdown), you can set up a video conference for anyone with the link. It only works really in Google Chrome. This sets up a multiscreen layout of everyone’s webcam as we’ve become accustomed to seeing in the likes of Zoom etc.

    However, Google Meet also has a Presenter Mode. This allows for someone to present to the others what is on their screen.
    For instance,  I could have open a document, or even Microsoft Whiteboard or an online version such as Miro, or even Microsoft OneNote. As you present your screen, you don’t have to worry about the camera side of things, as your camera is replaced by a live feed of your screen. However, your microphone will still work, allowing you to explain things that are happening on your screen.

    In this way, you could show students a document, or if you have a touchscreen (or are particularly dexterous with your trackpad) draw and write just like you would on a whiteboard or modelling book. I currently have both an iPad Pro with Apple Pencil and Microsoft Surface Pro with Apple Pen that both work well for this purpose.

    This saves you wrangling your camera around to try and focus on a piece of paper and work out how to position yourself so your hand doesn’t get in the way.

    Here’s how you do it.

    Set Up a Google Meet

    Head to meet.google.com and click on the “Join or start a meeting” button. Follow the steps through. It’s pretty straight forward.

    Meeting Created

    Google will go through and check your microphone and camera is working. If it’s your first time, you’ll have to click on “Allow” to let the browser use your microphone and camera. Click on “Join now”.

    Get the Link

    Once you join the meeting, this window will give you the joining info to invite others. Click on “Copy joining info” and post it on your Google Classroom, Seesaw, or whatever platform you’re using to reach your class.

    This will then allow your students to join your “Meeting” lesson.

    Up and Running

    Once you’re up and running, checked that everyone is joined and connected and you’ve introduced the lesson, you will need to click on “Present now” to switch to showing your screen. It might be a good idea to mute student’s until you’re ready to answer questions. This prevents them from “calling out”!

    Then click on either “A window” if you’re using Whiteboard or OneNote or some application to write in, or sometime’s its easier just to click on “Your entire screen”.

    Share your Screen

    Click on the application you want to screen. This image isn’t a great example of it, as I only have one application open. But maybe I have another tab in Chrome Browser that I want to show the students.

    Click on “Share” which will show up blue once you click on the application you want to share.

    This will then replace your “camera” with a video feed of your screen. Students can see your cursor and your screen. Don’t worry about looking down the camera though, because they can’t see you. However, you can still talk to them about what you’re doing on the screen, and thus, teach a lesson just as you would on a whiteboard, or in a modelling book – just with less calling out due to the muted microphones and less eye contact due to the turned off camera!

    Taking it Further

    Obviously if you have a touchscreen device with a stylus, this becomes even more powerful as you can write down what you’re teaching, or showing, or modelling for the students. You can then un-mute students for a question time, just as you might in a small group. Answer them as you like while still modelling on the screen. Once you’ve covered all that, you can come out of Presenter mode and return to your standard Google Meeting and close out the lesson.

    Disclaimer

    Please note: Other software might also have presenter mode and so the same can be achieved using that. I can only talk from my experience. I am not being paid to represent Google products!

    Secondly and most importantly, I did not write this to set any expectations on teachers during this incredibly trying, unknown, and stressful time. I do not share this to overwhelm teachers who feel like this is what everyone should be doing, or that they’re inferior if you don’t do this. Please do not feel that way. There are no judgements here.
    Quite simply, the reason I decided to write this was not to show off, or set a standard for which everyone must strive for, but as a solution to a problem I was having as a teacher in not being able to teach the students in my class. I was looking for ways where I can teach new concepts, or be informative for students, rather than just pushing activities at them, and this came to me as a viable option. That is all. I’d like to assume that there are other teachers out there who reflected on their day and were having the same concern about this issue. Hopefully this might solve that problem for you.

    I hope that you are able to take from this idea what you need and can apply it in a way that works for you. Try it yourself on two different devices. Set one device up as a “student” joining your “teacher” device if you need. See how it works. Get familiar with it and that will give you enough confidence to take it and run with it.

    Enjoy. And stay safe.

  • Using Google Classroom

    In 2014 Google released it’s LMS to the world. Aptly called “Google Classroom”, it was little more than a Google Plus type newsfeed for classes. Teachers could sign up student accounts, and set assignments and post announcements.

    Read more: About Google Classroom

    Since it’s release, it continues to be developed. There are now polls, feedback, assignment documents. It even integrates with Google Calendar to keep students on top of the upcoming and due assignments that teachers set.

    Obviously, the target audience for Classroom is for use in High Schools. However, I have also used it rather successfully in upper primary school as well.

    Using Google Classroom in the Classroom

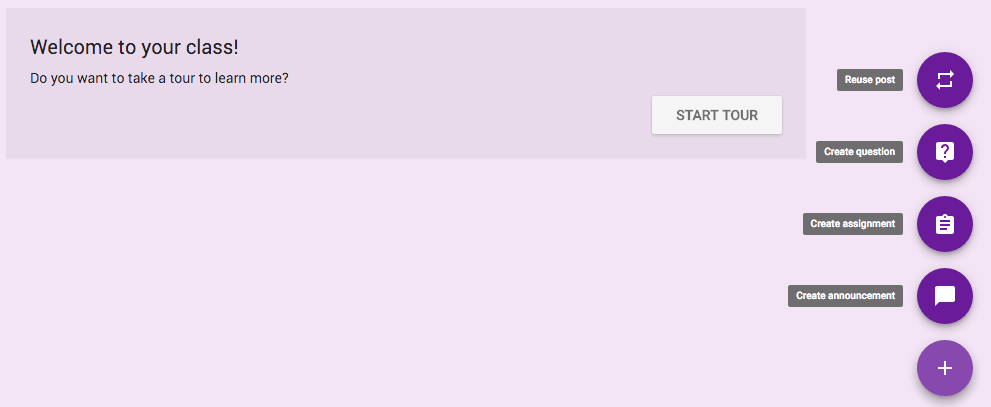
    First, go to http://classroom.google.com. It will then ask you to either sign in using your Google Account (Education), or if you’re already signed in, then you can Create or Join a class. You’ll want to Create one. Click on the plus, and click on Create.

    Of course, you can create as many classes as you need. One for each year level, subject or whatever. As a primary school teacher, I create one class for each year I teach.

    The great thing is, Google Classroom integrates straight with Google Drive, and creates a “class folder” for students work, posts, documents and everything else.

    For my class, each student has a school Google Account. I then put up the unique class code on the whiteboard and ask each student next time they log onto the Chromebooks to join the class.

    Once this is done, it is relatively simple to add assignments, projects, and ideas to the ‘news feed’ for the Classroom.
    For instance, if there is a particular video that I want the students to watch for a lesson, I can create a new post, and share the link. Students will then look at the Google Classroom and see the video link, and in time, watch it. Much like a newsfeed, they can comment and share their thoughts (though mostly comments turn to “wassup au” and the like) as they find themselves in a new social environment and explore communicating with each other in different ways!

    Once you have setup your class, it’s easy to manage assignments. Let’s say an afternoon’s work requires students to research and answer a few questions; you could set up a Google Document that has the questions on it. Each student gets a copy of this, and fills it in as they work through the afternoon, and at the end, they click on “Turn in”. This submits the work to the teacher, who can then provide feedback as necessary. The great thing about it is that it keeps students motivated; much more than just printing off a worksheet of questions and getting them to hand it in on your desk at the end of the day!

    There are a number of settings which are pretty straight forward which will help you set up your Google Classroom to your own preference. Things like whether students can comment or post, who can see what, and the look and feel of the site.

    There’s a heap more going on, and more is being developed each day, but as I always try and encourage – get in there and play around yourself. You learn more by doing anyway!

    Related Links

  • Open Source for Education

    I’ve been a long time advocate for open source software. It’s not just that it is freely available, but that it can be added to, modified, improved, or further developed and passed on for others that makes it appealing. In a sense, it is like education and knowledge; we pass it on to others, adding to it, developing it, and using it for our own uses, however and whenever we need to. In New Zealand, public education is free (though there is obviously a cost for this), and so following an open-source model for school technology is actually not too far removed from a possibility.


    Cost

    One factor that often holds schools back is the cost of technology. Usually this is related to devices and hardware, networks and infrastructure. Adding software to this cost is often unavoidable, but one way that schools can avoid paying more is by committing to using only open source software.

    Availability

    Much of today’s software is license based, and while there are various schemes to make things more affordable for schools and education institutes, paying for multiple licenses for different workstations and devices quickly adds up. Open-source software on the other hand is readily available, and is free to distribute throughout the school devices without the need for licenses or subscriptions.


    GNU.org even goes so far as to suggest that schools and education institutes have the moral obligation to exclusively use Open Source software. “The deepest reason for using free software in schools is for moral education. We expect schools to teach students basic facts and useful skills, but that is only part of their job. The most fundamental task of schools is to teach good citizenship, including the habit of helping others. In the area of computing, this means teaching people to share software. Schools, starting from nursery school, should tell their students, “If you bring software to school, you must share it with the other students. You must show the source code to the class, in case someone wants to learn. Therefore bringing nonfree software to class is not permitted, unless it is for reverse-engineering work.”

    You can read the entire article here: Why Schools Should Exclusively Use Free Software.


    Software

    There are a variety of lists out there of open source software suitable for teaching and learning. I’m not going to go into detail on all of them, but instead, begin to list some that you’re probably already using without knowing or realising it.

    Google Apps for Education

    Many of you will already be using Google Apps for Education. GMail, Google Docs, Google Drive, and Google Classroom are all becoming more and more popular and widespread throughout schools. Google have made this suite free for schools to use, with bumped up space and data for education purposes. Originally, all of these have been developed as open source software. The Google Apps API is still publically available for developers to utilise and build third-party apps on. Add to this the myriad of Apps available for free in the Google Webstore which can be added to user accounts for them to use online with Chromebooks or any Internet browser alike.

    WordPress

    WordPress is becoming more and more widespread as the CMS of choice for websites. Many schools use WordPress as the basis for their website, and with WordPress.com offering free accounts, classes and students are even developing their own blogs and sites as well. WordPress is, of course, open source, and is developed regularly, and added to through the use of plugins and other tools.

    Mozilla Firefox

    Shipped with all TELA laptops these days is the little browser known as Firefox. It’s a lightweight version of Mozilla browser, which is open-source, but Firefox seems to have taken off a lot more than its predecessor.

    Google Chrome Browser

    Much like Google Apps for Education, Chrome is Google as well as open source, and is fast becoming the most preferred browser for users around the world.

    Moodle

    Moodle is the industry standard in LMS (Learning Management System) for schools. It is proudly open-source, and provides users with all the flexibility that comes with that.

    VLC Media Player

    VLC is a well renowned media player, and is open source. The main reason I use VLC over anything else is because it’s just about guaranteed to be able to play every different kind of format there is. Videos with different codecs, DVD’s, audio; you name it, and VLC will play it. There’s nothing worse than opening up a video in front of the class and then it not work because a codec won’t load or the file won’t play. VLC seems to get around that.

    GIMP

    With it’s ridiculous prices, even the Education suite of Photoshop is out of reach for most schools. GIMP is THE open source version of Photoshop, and it does most, if not all, the major functions that you’ll need for editing images and photos in the classroom.

    There are numerous others out there. Wikipedia has an extensive list that you might want to check out. For now though, thats all from me!

    Related Links

  • Getting started with Genius Hour

    So this week I was intrigued by the concept of “Genius Hour” or “Passion Projects”. It just so happened that there seems to be a spare hour on Friday where students have finished their handwriting and spelling, and have got some “finishing off time”. Being that we get most things finished each week, this usually means a class full of students with nothing by mischief to get up to.

    Background

    The origins of “Genius Hour” actually links to a Google policy introduced by it’s owners, where employees were encouraged to use one day a week to pursue personal projects. It actually brought about the birth of GMail, which effectively launched Google’s Apps that we are now familiar with. It has since been abandoned by Google, but the ethos behind the policy has enlightened educators as they look for ways to extend their students into finding passions, and developing valuable skills, and motivating them through their interests.

    In simple terms, the idea effectively promotes students to be engaged, inspired, and unleashed.


    Getting Started

    I set about finding out all about Genius Hour and how other teachers have introduced it. I looked for worksheets and Powerpoint presentations, videos, and rubrics. My class is a Year 5/6 class, but obviously this can be made easier, or harder, depending on the level of your students, as it is about them and what they are interested in, and are able to complete.

    Essentially from this I came up with how I wanted to structure the project for the class.

    1. Firstly, I got them to watch Kid President and accept the challenge and become engaged. I also gave them a brief outline of what they would get up to.
    2. The next morning I set them up to brainstorm different things they were passionate about. I gave them a list of different projects that other classes had done. The students all went and brainstormed a range of different ideas that they were passionate about.
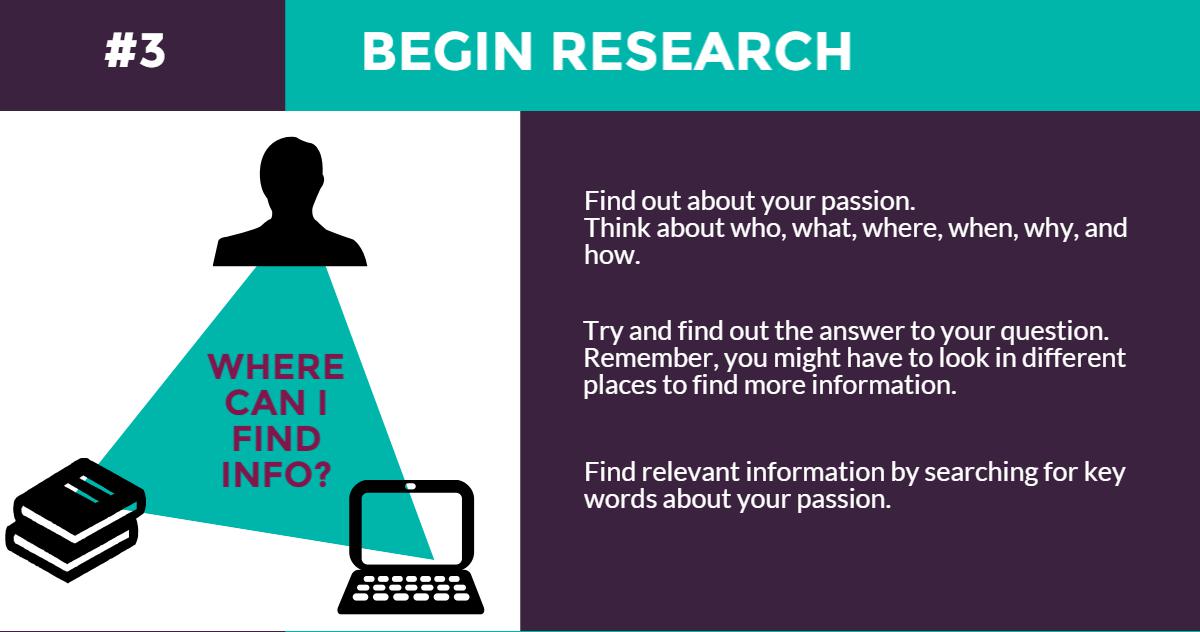
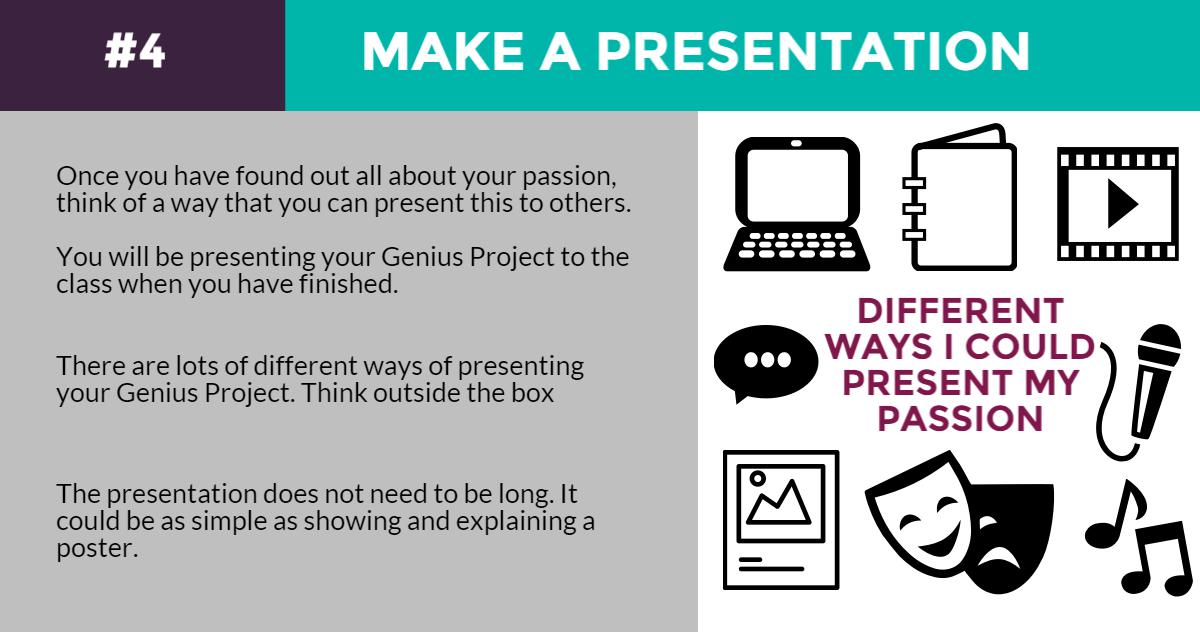
    3. I created a presentation / infographic that illustrate the guidelines I was expecting for each Genius Hour project. This is loosely based on a myriad of different flow charts I had seen from my research.
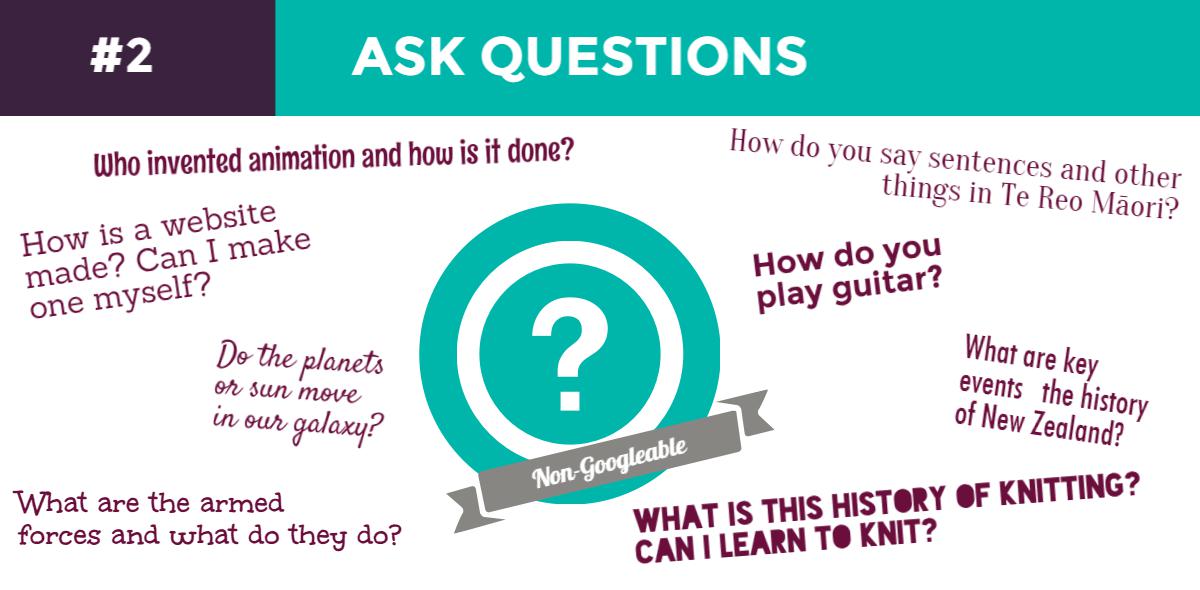
    4. The next step was to get students thinking about the questions that would guide their project, and some of the surrounding information. There is a very simple and straightforward project page available here. This, of course, can be adapted for your own needs.
    5. Check off each of these sheets to ensure that the students know what they are doing, and let them at it. 
    6. Set time: 60 minutes / 1 hour. Let Genius Hour begin!

    I will let you know how we get on soon!


    Related Links & Resources

    Pinterest Search

    Creative Classroom Tools

  • Google Drive vs. OneDrive

    Sorry. Did I say versus?

    I meant AND.

    About four years ago, our school made a shift to using Gmail as our email client. We’ve never looked back.

    This year, we began delving into Google Drive, and Google Docs as a staff. We moved our Documents from My Documents to our Google Drive without so much of a hitch. We developed an Integrated Unit Plan to use in Google Docs that we could share and collaborate with our colleagues.

    But three terms on, and the full extent of Google Apps has yet to be fully embraced.

    Why?

    Quite simply, it comes down to one thing.

    Familiarity.

    Change is hard. Change is often unwelcome. And unless that change demonstrates it is a better option to the point where you can’t do without it, reverting back to your old ways is almost inevitable.

    Unfortunately, Google Docs, Google Sheets, Google Slides can all be done without by teachers. All because of one thing.

    Microsoft Office

    Ever since its release, teachers (and other professionals) have begun using Microsoft Office for everything. I know myself, that I very rarely turn to any other solution when needing to use a word processor, layout, A4 print, or anything else.

    Now don’t get me wrong; I have made every effort to convert myself into a Google App user. I’ve used it in almost ever faucet of my teaching computer use, including analysis of data, collection of data, unit planning, weekly planning, student collaboration, and more.

    Obviously my use of Microsoft Office continued, with report templates, data sheets, and pre-existing templates being used by the school still in Word or Excel. Other teachers avoided Google Docs because of its limitations, because it looks and feels different to Word, and because they prefer to use what they know, rather than spend a lot of time converting over to Google Docs. And I can’t blame them at all either. It requires a lot of time tweaking, adjusting, moving, changing, to completely adopt Google Apps and have a perfectly working Google Doc rather than an existing Word version. (And yes, I’m well aware you can open a Word document in Google Docs, but it doesn’t always get it right, and it always tries to save it as a Google Doc afterwards.

    The Switchback

    There is a new player on the court.

    It’s name?

    OneNote.

    It’s being heralded as a game changer and I can instantly see why.

    Yes, I’ve used Evernote. Then it became too mainstream and clunky with its high-brow graphics. It began doing too much, like food reviews and becoming social.

    Google’s version, Google Keep, is little more than a gimmick, imitating post-it notes. Don’t get me wrong; teacher’s do love a good stack of post-it notes. But guaranteed, when the rubber hits the road, and a teacher has to run out of the class in a fire; are they going to save the stack of post-it notes, or grab their planning folder and diary?

    Microsoft OneNote has that potential to become the central hub of everything a teacher does. Much like a ringbinder, I can see it becoming a filing cabinet, a student profile book, a manila folder, and a clearfile all in one.

    And one thing that makes OneNote a game changer is it’s ability to sync on mobile devices and share with colleagues. However, to do this, it needs OneDrive activated. Obviously Google and Microsoft are at war, and Microsoft won’t allow OneNote to sync using Google Drive instead of OneDrive.

    Two Peas in a Pod
     

    So suddenly we find ourselves wanting to get OneDrive set up. Both OneDrive and Google Apps are essentially ‘free’ for Education. So we have access to both.

    Initially, it would be fine just to use OneDrive as a means to an end, if only just to run OneNote it would be worth it.

    However, my thinking is, why not use all of Office 365, Microsoft’s answer to Google Apps. If teachers are sticking to using Word because of familiarity, why not
    just extend this to Office 365 and get all the benefits of Google Docs, but in a familiar setting. Perfect.

    Except we have Google Drive all set up. We have Google Doc templates. I’ve spent all year changing myself over to Google. And what’s more, our school has just invested in providing Chromebooks for use by our senior students, which all run off Google Apps.

    So teachers will still need Google Drive, and Google Apps.

    Or vs. And

    In most battles, it’s always an “or” that is used. Holden OR Ford. Marmite OR Vegemite. Rugby OR League. iPhone OR Samsung. Facebook OR Twitter. Microsoft OR Apple OR Google.

    However, in this case, because Google have nothing that even compares to OneNote, or the familiarity of Microsoft Office with Office365. But in the same sense, we definitely need to keep Google Drive and Google Apps. There is no way we should throw the baby out with the bathwater.

    So, at our school, we will be adopting an AND mindset.

    We will be using Google Apps and Microsoft Office 365. We will make use of Google Drive, and OneDrive. We will collaborate and share with students in Google Docs, and will organise ourselves through OneNote.

    Essentially, we will find ways that we can have the best of both worlds.

  • Saving Recent Downloads to Google Drive

    So you’ve gotten used to saving attachments from your G-Mail straight to your Google Drive. It’s pretty handy isn’t it!?

    But what about when you download that PDF resource? You can’t just select your Drive and it goes straight there (unless you have Google Drive for your PC).

    Not to worry. There is a very easy way to do this seamlessly using Google Chrome.

    Step 1

    First you will have to open up your drive in another tab. http://drive.google.com

    Step 2

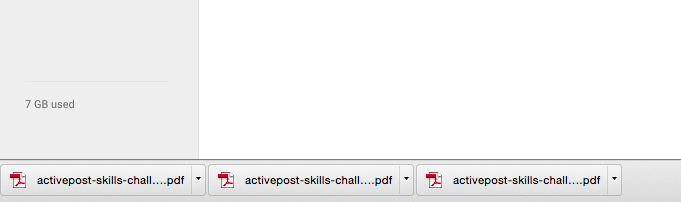
    Your downloaded files have finished (hopefully) and are now displayed down the bottom of your browser.

    All you have to do, is drag the file from the bottom of the browser into your drive window. They will then begin uploading straight away.

    Step 3

    And you’re done! You will see the little Uploads black box in the bottom right corner and be able to watch your files be uploaded into your drive.

    Screen Shot 2015-02-06 at 6.08.15 pm

    No more looking through your Downloads folder or trying to find where you downloaded them to before uploading them manually to your Google Drive. You can do it all from inside your browser window!


    I suspect that this trick will work in other browsers that list downloaded files, but have not tested it. Let me know if you’ve tried it and it works in Firefox or IE10!

  • Using Google Drive instead of My Documents

    Sometimes old habits die hard. Sometimes default settings also can be a bit of a pain. Sometimes you can set up all the synchronisation you want, but files will still get lost somewhere in the blue void.

    That’s my experience with Windows in schools. Microsoft does a very good job for the most part, but it has always been a bit of a sticking point when a teacher arrives at work on Monday and suddenly their work from the weekend goes missing. Or they’ve logged in on another computer and suddenly don’t have all the files they thought they did.

    Firstly, before we even look into using Google Drive, I want to say one thing. Back up your files.

    Then back them up again. Put them on a USB or portable storage. Take them home. Back them up again. Just in case.

    I make a habit of doing it every year at the end of the year. Some would even suggest doing it more regularly. Every term, or every month. However, now that I’m using Google Drive to store my files, I’m finding that the need to back up is much, much less than if I were purely relying on Windows and My Documents synchronisation.

    Google Drive

    Okay. So what is this amazing thing called Google Drive?

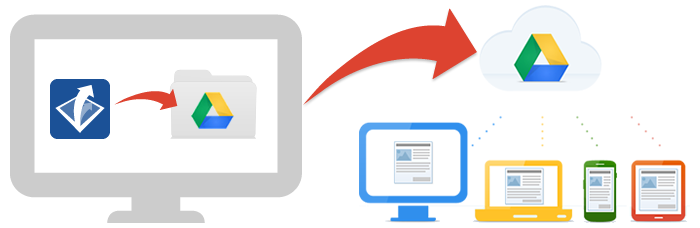
    Basically it is a server of all your files on the interweb. In a cloud some people say. It’s a USB stick, except instead of plugging it in, you simply log in online. This image below gives you an idea of how it works.

    All your files, uploaded to Drive, available on all your devices. Essentially we are setting up one big backup each time we make or create or edit or move any document in ‘My Documents’. And what’s more, space has just become unlimited with Google Apps for Education (#GAFE)

    Find out more about using Google Drive here: www.google.co.nz/drive

    From here you can click on  and create a new Google Doc, Google Sheet, Google Slide, or Create Folders to store your documents in, just as you would in My Documents.
    The Incoming tab will display all your shared files, along with any files that have been shared with you.

    The Recent tab displays the most recent files you have created or opened and worked on.

    In the Starred tab, you can see any files that you have starred (just like emails that you ‘star’ in Gmail)

    Bin is where all your deleted files are kept just in case.

    Searching and Finding

    Remember; Google is a search engine first and foremost. This means they can apply the same search functions to your documents as they can to the entire world wide web.

    At the top of the Drive home page (drive.google.com), or the Docs home page (docs.google.com), is a search box. This can search through any document you have opened or put into your drive.

    Do not forget you can use the Incoming and Recent tabs to help with finding documents.

    Integrating Google Drive with Windows

    There is a great program for Google Drive which creates a folder on your computer for your Google Drive documents. This then syncs up with your Google Drive on the internet.

    ANY file can be put onto Google Drive. It’s not just limited to Google Docs. This includes old planning files, PDF’s, images and photos of your class, worksheets, and other resources.

    1. Go to http://www.google.co.nz/drive/download/ and click on Download → Mac and PC.
    2. Once it’s downloaded open it and install with the preset default options.
    3. It will require you to sign in at some point.
    4. You will now see a Google Drive option in your “Favourites” bar when you go to Windows Explorer (Windows+E).
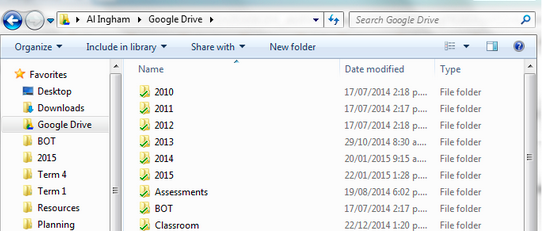
      Here you can see I have copied all my teaching files over from My Documents to Google Drive.
      When I save a file, instead of saving it in My Documents, I save it to the Google Drive folder.
    5. In Libraries (down bottom left of the picture above), click on Documents


    6. You will see a bar at the top of the window. Click on Includes: 2 locations
      (Note: Mine says 3, yours may have a different number)
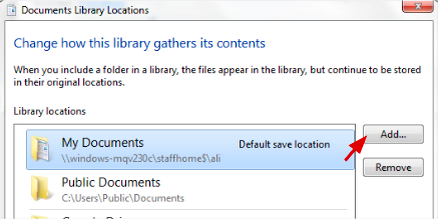
    7. On the right of the pop up box, click on Add.
    8. Find your Google Drive folder (should still be on the right in your favourites) and click on Include folder.
    9. You should now have your Google Drive folder showing up as a location.
    10. Right click on Google Drive and select “Set as default save location
      I then right click on it and select “Move Up” until it is at the top. This means when you click on “Documents”, your Google Drive location will show up at the top.
    11. Click on OK. And now you are all set up and ready to go!

    Tips and Tricks

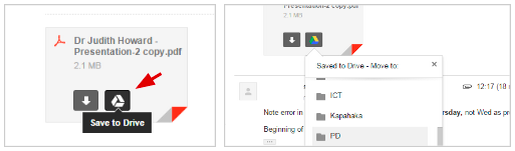
    1. You can save attachments straight from emails to your drive. Just click on the Drive icon that shows over the attachment in Gmail. Then you can choose which folder to put it in afterwards, and open it in your Google Drive.
    2. Use the little arrow at the end of the Google Search bar to filter your search results before you search. Maybe you can’t remember the title of the document, but you can remember that it was shared by a particular person or was a PDF. You can select these first. This arrow also works in Docs, Gmail, and all the other Google Apps.
  • Creating Unit Templates in Google Docs


    One of the big shifts forward in our school this year has been the introduction of Google Docs, Google Drive, and collaborating. This also coincides with a drive and a passion to integrate our unit plans and follow the “Less is More” policy (especially in regards to paper usage!). With a Term 4 being a huge success, we are stepping out into 2015 with our best foot forward.

    Part of my role as the “IT Guru” (Computer Wiz, TechGeek, whatever-you-want-to-call-me) is to make sure that

    1. The introduction of new technology happens seamlessly. This means having things up and running in the background before unleashing it to the general populous.
    2. That teachers are introduced to the new technology in a friendly and non-threatening way so as to learn, engage, and use it effectively to enhance their practise.

    Before running my tutorial on using Google Docs and Google Drive, I had to make sure things were set up and ready to be used in the easiest way possible. Ease of use for the end user is high on my list for anything I’ve ever done in regards to IT and teachers. If it is made easy for them, then they’re more likely to want to use it.

    One of the keys to this, was first making a template for the collaborative and integrated unit plan. This would enable other teachers to make a unit plan using a default (and schoolwide) template.

    1. Create a document in Google Docs by clicking on the blue plus (+) sign.
    2. Rename your new file by clicking on the title. Call it “Unit Plan Template” or something similar.
    3. Make your template for the minimal outline of the template. Add in the text, colours, stylings to build up the template with the default text and features. These should be things that are common across ALL unit plans; not just yours. For instance: instead of having “Term 1, 2015”, have “Term X, 20XX” so that others that use the template won’t forget to change the date.
    4. The next part is a little confusing. I suspect possibly because either Google has moved away from using templates, or they’re re-developing how it is to be integrated. Anyhow, this is how you make your template available to others in your organisation.
      You will need to go to “File > New > From template…“. This should load up the template gallery in a new tab.
    5. On the far right you will see the text “Submit a template“.
    6. This will bring up a standard form for you to submit your own.
    7. Click on “Choose from your Google Docs” and find your document “Unit Plan Template”. You can search for it in the search box at the top, or scroll through your recent documents.
    8. You can choose whether to enter a description. This could be quite useful if you’re planning on making a lot of different templates.
    9. You can decide on your own category. I put mine under “Planners”.
    10. The rest I left as is, but obviously you can set a second category if it applies, and change the language should you need to.
    11. Click on “Submit template“.
    12. It may take a while to appear in your list, as it has to be checked that it will work. I’ve never had any issues with this process. Usually within 5 minutes it will be made available to use.
    13. It should appear under your organisations tab for templates. It will also be available under “My Templates“.
    14. It will appear in this place for all the teachers in your organisation, and so they will be able to follow the process of clicking “File > New> From template…” and then clicking on the “Use this template” button.
    15. Once I’ve done that, you’ll see that the document is still in your Google Docs and Google Drive. I like to create a folder called “Templates” in Google Drive and drag the file into it. That way it doesn’t get in the way and is nice and organised. It also means all my templates will be in one spot on my Google Drive. The other benefit of having the file still, is that when you edit the template file “Unit Plan Template“, the change will automatically update for the Template Gallery. Useful!
    16. And you’re done!