Category: Archived

All the old posts from years gone by.

  • Lockdown Learning: Benefits to Teaching Remotely

    Lockdown Learning: Benefits to Teaching Remotely

    Over the course of this time of remote learning, where students are at home, teachers are at home and we’re delivering some form of curriculum to them via a range of methods, usually online, there are a great deal of struggles that make this form of teaching undesirable. There is of course a reason why we continue to deliver widespread education in these places called schools.
    Of course, it’s not for everyone, and homeschoolers across the country are all laughing at us right now!

    But I have to admit, there are SOME benefits to teaching from home – not that I’d ever want to see this style become the new norm!

    1. Not having to announce to the class that you’re going to the office (when you really need a bathroom break).
    2. Snacking.
    3. Muttering under your breath without the fear of students hearing your frustrations.
    4. A wider spread appreciation from parents who now understand the immense task you have dealing with not only their child’s learning, but 29 others as well!
    5. Voice strain nearly non-existent.
    6. Not spending money on things for my class that I really don’t need!
    7. Not having to wait for the microwave.
    8. Not having to think what the weather will be like so you can dress appropriately.
    9. Not having to dress appropriately.
    10. Having bacon and eggs in your dressing gown during a fitness lesson.
    11. Being able to eat a lolly without being snapped by your class. I used to always sneak one back to class when they were on the table in the staff room and then try eat it without the kids noticing!
    12. Having the choice of drinking anything other than water at ‘school’ if I want.
    13. Starting AND finishing a hot coffee.
    14. Being able to check your phone whenever you like.
    15. No lunchtime duty or road patrol in the rain.
    16. Lunchtime doesn’t get filled up with meetings or medical emergencies.
    17. Sleeping in until 8:55 before you start school!
    18. Not having “Classroom” smells.
    19. Not spending all afternoon sorting out a fight that happened at lunchtime.
    20. Not having to constantly remind student’s of their excessive noise levels while working.

    Comment with your own below!

  • Lockdown Learning: Set up your Teacher Browser for Lockdown

    Lockdown Learning: Set up your Teacher Browser for Lockdown

    I use Chrome browser exclusively these days. There are a number of reasons why, but I won’t go into those here. The reality is, you can PROBABLY do this in any browser, but you’ll have to search through the settings on how to do it in them.

    Basically, what I found is that as a teacher teaching remotely I had a whole heap of tabs that I routinely used to set up the day. Google Classroom Stream, Google Classroom Classwork, Google Docs for the Overview of the Day, YouTube studio for uploading the videos I recorded, and more.

    Rather than spending five minutes opening those each day, I figured, while I’m on lockdown, I may as well have them routinely open all the time whenever I open my browser. That way, I can maximise my sleep ins and be ready to go with the pages I needed!

    Here’s how to do it!

    Firstly, open up every page you want open that you regularly use for the lockdown. You can even have multiple tabs of the same site if that site has different pages in it. For instance, I like to have the Stream for Google Classroom open, as well as, the Classwork page open so that I know what I named each of the Material for each day. I can have these both open in different tabs. Once you’ve opened each page in a new tab put them in order that works for you. I usually have the most used on the left through to less important on the right.

    Make sure that the tabs you have open are the default pages. For instance, if you want your Inbox to be open, have it open on the standard Inbox page, not a specific email, otherwise it will open that email each and every time. This is, of course, unless you want that specific email to be opened each time!

    Open up settings by clicking on the three dots in the top right corner of Chrome and selecting “Settings”. Alternatively type “chrome://settings/” into a new browser tab.

    This will open up the settings page.

    At the bottom of that basic page, you will find the following screen

    Once you find this, don’t worry about adding new pages to the list. Just click on “Use current pages”. This will load in each of the tabs that you have open at the time, that you started at the start of this tutorial.

    And you’re done.

    At the end of this lockdown and we’re back in class teaching the kids, you can go back to your home page settings.

    Enjoy. And stay safe.

  • Lockdown Learning: Teaching Small Groups or Whole Class via Google Meet

    Lockdown Learning: Teaching Small Groups or Whole Class via Google Meet

    Today as I headed out on my weekly Wednesday run, I was reflecting on the first day of Term Two, which we had to teach remotely from home.

    Largely, it was me sitting on the laptop answering questions like “What do we do now?” and “I’ve finished it!” and “I’m stuck”. that students messaged in. After that, it was checking to see that my scheduled activities were sent out correctly and checking to see who had commented on it (and what they had commented).

    And that’s the point. I felt like I was just handing out activities, and watching the kids do them from afar.

    It wasn’t exactly “teaching”.

    Sure, I’d put out a welcome video, a video of me doing a mini reading strategy (of which was quite good because unlike in class, there wasn’t any calling out or interruptions!), and the like… but it wasn’t interacting or connecting with my students.

    So as I was thinking about how I could do it, I suddenly realised what I’d come across during a Board Meeting last week.

    Google Meeting “Present” Mode

    In Google Meet (which has been turned on for all educators during the lockdown), you can set up a video conference for anyone with the link. It only works really in Google Chrome. This sets up a multiscreen layout of everyone’s webcam as we’ve become accustomed to seeing in the likes of Zoom etc.

    However, Google Meet also has a Presenter Mode. This allows for someone to present to the others what is on their screen.
    For instance,  I could have open a document, or even Microsoft Whiteboard or an online version such as Miro, or even Microsoft OneNote. As you present your screen, you don’t have to worry about the camera side of things, as your camera is replaced by a live feed of your screen. However, your microphone will still work, allowing you to explain things that are happening on your screen.

    In this way, you could show students a document, or if you have a touchscreen (or are particularly dexterous with your trackpad) draw and write just like you would on a whiteboard or modelling book. I currently have both an iPad Pro with Apple Pencil and Microsoft Surface Pro with Apple Pen that both work well for this purpose.

    This saves you wrangling your camera around to try and focus on a piece of paper and work out how to position yourself so your hand doesn’t get in the way.

    Here’s how you do it.

    Set Up a Google Meet

    Head to meet.google.com and click on the “Join or start a meeting” button. Follow the steps through. It’s pretty straight forward.

    Meeting Created

    Google will go through and check your microphone and camera is working. If it’s your first time, you’ll have to click on “Allow” to let the browser use your microphone and camera. Click on “Join now”.

    Get the Link

    Once you join the meeting, this window will give you the joining info to invite others. Click on “Copy joining info” and post it on your Google Classroom, Seesaw, or whatever platform you’re using to reach your class.

    This will then allow your students to join your “Meeting” lesson.

    Up and Running

    Once you’re up and running, checked that everyone is joined and connected and you’ve introduced the lesson, you will need to click on “Present now” to switch to showing your screen. It might be a good idea to mute student’s until you’re ready to answer questions. This prevents them from “calling out”!

    Then click on either “A window” if you’re using Whiteboard or OneNote or some application to write in, or sometime’s its easier just to click on “Your entire screen”.

    Share your Screen

    Click on the application you want to screen. This image isn’t a great example of it, as I only have one application open. But maybe I have another tab in Chrome Browser that I want to show the students.

    Click on “Share” which will show up blue once you click on the application you want to share.

    This will then replace your “camera” with a video feed of your screen. Students can see your cursor and your screen. Don’t worry about looking down the camera though, because they can’t see you. However, you can still talk to them about what you’re doing on the screen, and thus, teach a lesson just as you would on a whiteboard, or in a modelling book – just with less calling out due to the muted microphones and less eye contact due to the turned off camera!

    Taking it Further

    Obviously if you have a touchscreen device with a stylus, this becomes even more powerful as you can write down what you’re teaching, or showing, or modelling for the students. You can then un-mute students for a question time, just as you might in a small group. Answer them as you like while still modelling on the screen. Once you’ve covered all that, you can come out of Presenter mode and return to your standard Google Meeting and close out the lesson.

    Disclaimer

    Please note: Other software might also have presenter mode and so the same can be achieved using that. I can only talk from my experience. I am not being paid to represent Google products!

    Secondly and most importantly, I did not write this to set any expectations on teachers during this incredibly trying, unknown, and stressful time. I do not share this to overwhelm teachers who feel like this is what everyone should be doing, or that they’re inferior if you don’t do this. Please do not feel that way. There are no judgements here.
    Quite simply, the reason I decided to write this was not to show off, or set a standard for which everyone must strive for, but as a solution to a problem I was having as a teacher in not being able to teach the students in my class. I was looking for ways where I can teach new concepts, or be informative for students, rather than just pushing activities at them, and this came to me as a viable option. That is all. I’d like to assume that there are other teachers out there who reflected on their day and were having the same concern about this issue. Hopefully this might solve that problem for you.

    I hope that you are able to take from this idea what you need and can apply it in a way that works for you. Try it yourself on two different devices. Set one device up as a “student” joining your “teacher” device if you need. See how it works. Get familiar with it and that will give you enough confidence to take it and run with it.

    Enjoy. And stay safe.

  • Lockdown Learning – List of Resources

    Last week I posted that I would make a list of resources, apps, software, and programs that would assist you in providing remote learning.

    I regret mentioning it. Because I have decided that this is counter-productive for two reasons.

    Firstly, others have already started doing the same thing. Most notably, the Ministry of Education.

    Secondly, due to reflecting on this over the last week or so, I’ve determined that actually, the saturation of these apps and free trials of products is overwhelming and unproductive for many teachers, and actually, Teachers will be better to stick with what we know. It will not only help us to keep our remote learning plans programme manageable (and therefore sustainable) for us, but also will be familiar and accessible to our students who are learning from home and don’t really need to be learning how to use software at the same time. If we know they can already use it because we used it when we were at school together, then we’re more confident that they’ll be able to complete the tasks we’re asking of them.

    So, in short, this is us saying we’re not going to be adding a list of notable software, products that have been made free, or recommended apps for different tasks.

    Use what you’re familiar with. Use what you know works for you and what works for your students.

    If you’d like a list of software, apps, and ideas that can be used to assist you in delivering your remote learning plans, please visit these two sites:

    Learning from Home – learningfromhome.govt.nz

    Teach from Home – teachfromhome.google

  • Lockdown Learning – How much is too much?

    It seems that not a day goes by without some company out there offering free access to their product until July. Don’t get me wrong, I know that for the most part they’re doing this in all good faith.

    But the reality is, the market is getting saturated at the moment as teachers, parents, and children all prepare for this thing called remote learning.

    No doubt, many of these tools, programmes, and software will all help provide learning opportunities for your students while they’re stuck at home.

    But maybe we need to just take a step back and think about this for a bit.

    Step back

    The world faces a pandemic, of the likes none of us have seen before. The Spanish plague at the end of WWI is listed as the last time this happened. Everyone is affected by it, and everyone reacts in different ways. For most, being cooped up inside is stressful enough in itself, let alone the threat of a virus. Students and children are no different. And yet, for some reason, we’re expecting that while they’re at home, they focus on furthering their education?

    At this stage, we are on lockdown for four weeks. Many of us know this will be a minimum, with many of us thinking it will likely be 6 weeks, if not more. Yet we are putting pressure on teachers to get their whole class online, prepare a programme, and develop competence in a range of different software, apps, or systems, many of which we’ve never used before. All this compounds the stress teachers are feeling at the moment to do the “right thing”.

    Then you have the education elite, specialists, and experts, who are all asking the big questions like whether your plans for online learning and remote tasks in the digital realm align with the latest pedagogy and add any educational benefits to our learners. Suddenly, I’m not so certain of myself, my abilities as a teacher in these times, despite the fact I’m one of the more technologically inept teachers out there. The reality remains though, that these are very big questions for what will hopefully be a very short amount of time. If (God forbid) this lockdown heads into several months, then we can begin to contemplate those questions further.

    Routine

    I know that for many people, routine is important. It’s why much of my class programme follows a regular schedule when we’re at school. And during this time where there is so much uncertainty, providing my students with that same routine becomes even more important.

    So where does this leave me?

    How Much is Too Much

    Well. I return to the question at the top. How much is too much?
    Let’s face it; students are not in our care for the six hours we usually have. It is unreasonable to expect that we get six hours of “work” out of them. Therefore, we shouldn’t be providing six hours of work. Less is more.

    We don’t need to go out and use every and any software and system out there. Keep it simple. Less is more. In the four days I had with my class between the closure of schools on Tuesday 24 March through to Friday 27 March where “School Holidays” were brought forward to, I managed to continue with a basic programme with my class, of which 10 students regularly participated in. During that time I made the learning work using five main apps. Five. That’s it. Less is more.

    1. Google Classroom: Everything went through this. I scheduled material to be released at different times of the day so that students didn’t rush ahead and get everything done in an hour and then be mucking around for the rest of the day.
    2. Google Docs: Students are already used to how this work. I turned chat back on for everyone, and this allowed us to collaborate on a topic brainstorm that we continued from the Monday. Add to this, I put our a daily advanced organiser or “Day Overview” for the students which had the times and activities they had to do that day. This also helped me to schedule things on Google Classroom at the right times.
    3. Youtube: I pre-recorded a series of videos, from reading chapters of our class story to mini-lessons around Reading strategies. I did not dabble in any live streaming, and didn’t really see the need to.
    4. GoNoodle: These are a bunch of videos that I’d already been using in class for various uses. In this remote learning phase, I used GoNoodle for fitness activities, and for mindfulness sessions.
    5. Google Meet: This is a video conferencing software which Google has made available to all educators during this time. This is really the only one I hadn’t used before, but works quite well, along the same lines as Zoom which has become popular lately. We used this once on Friday to touch base with each other. We are also having a Board meeting with it this week!

    That’s it. That’s all I used, and all I felt I needed to use. Three of these apps, the students had already had experience with. Google Classroom was relatively easy to pick up, as was Google Meet.

    New Apps, New Opportunities

    But could signing up for all these flash apps and programmes make it better? Video conferencing, collaborative whiteboards and presentation productions all sound brilliant. They could add another level of connection with our students that we’ve yet to experience, and maybe they will make this whole teaching from home thing a lot easier for teachers. They might enrich the learning, and make better use of the wide world of technology that we currently have at our disposal. What if they have the answer to our problems we’re running into with delivering remote learning? What if they revolutionise how we teach? What if there’s something they do that we hadn’t considered before. We don’t know what we don’t know.

    Or maybe they will just complicate something which at its very essence, needs to be as straightforward as possible. For two reasons. One: because it needs to be realistic and manageable for teachers in order for it to be sustainable if this lockdown lasts longer than 4 weeks. And two: because it needs to remain accessible for students who may not have much experience using these new apps, and may not have much ICT support at home if things go wrong. As it was, the hardest things my students struggled with were those apps that we hadn’t used in class much – Google Classroom, and Google Meet.

    Final Thoughts

    So if you’re at home, getting bombarded with emails of various systems who are now offering their latest product at free costs for the next two months, or you see posts from educational experts imploring you to consider the learning benefits and pedagogy behind your learning. You don’t actually need all the bells and whistles just because they’ve been made free to use. Remember: Be brave. Do less. It’s a mantra I use when teaching in my actual classroom, and I stick by it when thinking about this remote learning. Make it sustainable for you – this means set up a system that you’re comfortable with and works for you (not you working for it!). Make it accessible for your students – this means using apps and software that students can not only access, but are familiar with so that there is less stress around getting it working or not knowing what to do. Stick with what you know. Stick with what your students know.

    Less is more.

    Stay safe.

  • COVID-19 Lockdown

    Hi all,

    As I’m sure you can appreciate, I’ve been flat out busy focusing on my class and getting remote learning up and running. I’ve been trialing different things and trying to set up a system for learning that works for the students, and works for me as their teacher.

    Because of this, I’ve been somewhat negligent of updating and posting to Unleash Education. I apologise.

    Over the next few weeks I am planning on collating a wide range of resources that might help teachers with remote learning while the country is in lock down.

    Do remember, that we all have different skill levels, especially when it comes to technology and ICT. The expectation is for teachers to do all that is practicable to continue teaching remotely. For some, that might be engaging with all the bells and whistles, video conferencing with students, recording online lessons and opening interactive whiteboards and creating presentations. For others, practicable might just be sending out a weekly plan of some activities students could do at home this week.

    The important thing to remember is to look after yourself.

    Don’t fret if you’re not up with the play and doing all these awesome things technology allows us to do in this day and age. Do what works for you, personally. Don’t compare yourself to others or put yourself down because you feel like you’re doing less than what your colleagues are doing. And if you’re feeling like you’re doing too much and possibly creating unreasonable expectations of yourself, then feel free to scale it back. The chances are if you’re feeling overwhelmed by doing everything, then your students will be feeling the pressure to do everything too, which might be overwhelming for them in this uncertain time.

    So, over the next two weeks during the ‘school holidays’, take some time out for yourself. Get yourself into a routine at home. Figure out how this lock down works for you and your family. Focus on getting that right. Then towards the end of these holidays, just before Easter, begin to work out what remote learning is going to look like for you and your class. Check back here at Unleash Education for ideas or resources. Check out a few of the other key sites about online learning, especially those put out by the Ministry of Education here in New Zealand, such as Learning from Home.

    Stay safe. Stay home. And look after yourself.

  • Remote Learning – What I’m doing as a Teacher

    So the time has come where COVID-19 has forced us into the inevidable lockdown, and everyone is now required to work from home. As a teacher, the expectation is that we continue to provide an education for students, largely with online based materials for those who have access from home.

    I may be exceeding expectations here, but none of us have done this before, and I’m going to do what I can do to be the best teacher for my students, especially now in such an uncertain time.

    Advance Organiser

    Tomorrow morning my advance organiser will be sent out via Google Classroom to my students. This is just a Google Doc with an outline for the day, similar to what I run through with them at the start of a ‘normal’ school day.

    The outline for the day will keep much of the same routine that they would have at school. Many of the activities we do in class they can do at home. This will hopefully provide some kind of normality to the uncertainty that is happening right now.

    I’ve set a lot of these documents up as templates, so that I can copy and paste them each day, with minor adjustments. This makes it easier for myself as the teacher to replicate each day and not get bogged down by continually having to create things. I can just copy and paste over what is relevant each day.

    Bookmark Bar

    To those ends, I’ve temporarily created a folder in my Bookmarks Bar to keep every online service and teacher dashboard, document template and Google Classroom resource that I’ll be using in one place.

    Google Classroom

    Today I spent the morning getting the students to sign up to Google Classroom. Usually this is something I’d already done by now, but for some reason this task had gotten lost in the beginnings of the year activities.

    However, for tomorrow I have added in scheduled posts to be released at the relevant points in the day. This keeps kids from rushing ahead into the tasks, and spreads the work out throughout the day. This will also help keep the routine. All I had to do to create the scheduled posts is work through the Advance Organiser document I’d created for the day and posted an Assignment or Material with documents or links and scheduled them for specific times.

    In Conclusion

    At the end of the day – this might be over the top… but I’ve made it to be as sustainable for myself most of all, so that I can maintain this throughout the foreseeable future. I’m not sure how many (if any) of my students will log in and join in with the programme. But even if just one student logs in and wants to follow the learning activities at home, then as far as I’m concerned, it’s worth it.

    Stay safe out there everyone.

  • Teaching Portfolios: How to set up a OneNote portfolio

    I’ve been using OneNote to build my teacher portfolio for a while now.

    Back in 2016 I wrote a quick how-to about building your teacher portfolio in OneNote. Back then, of course, there were 12 criteria, and so the template is no longer valid.

    However, since that time, I’ve also been adjusting the way in which I use OneNote to collect evidence and artefacts for the portfolio and how they’re organised. This means two things:

    1. Its okay to change as you go

    Don’t feel like you have to keep your portfolio in the same mode for all three years of your registration. If something isn’t working, don’t feel like you have to stick with it just because that’s how you decided to do it before you had even started.

    2. It’s flexible

    OneNote is completely flexible to keep up with however you want to organise it. If you want to have the years along the top sections, go for it. If you’d rather have each of the six standards along the top, you can do that too. However it works for your brain, OneNote is flexible enough to cope with it.

    Getting Set Up
    1. Install Microsoft OneNote

    Firstly, you will want to install Microsoft OneNote. Most Windows computers already come with it. However, there are TWO versions of OneNote. There’s the App Store version (which is an all-operating-system app for iOS, Android, and Windows Store), and there is the BETTER version that comes with Microsoft Office – OneNote 2016.

    You will want to get the OneNote 2016 version and ensure you pin the icon on your taskbar so you don’t open the other version.

    The main reason for this is the ability to install macros, and there is a LOT more control over things like tags, both of which you’ll want to utilise to make your portfolio.

    2. Get an Account.

    This isn’t a necessity to be able to use OneNote. However there are benefits to having an account, such as sharing, and accessing your portfolio on different devices. Luckily, Microsoft products are free for schools to use. Talk to your network administrator to get Office365 accounts set up for you and your staff.

    3. Create a New Notebook

    You’ll need to make a new notebook. I would call this something such as “Portfolio 2020-2022” or whichever year range you intend (I just use my registration years).

    The reason for this is that as you add evidence into your portfolio, the filesize of your notebook will get bigger and bigger, and cause things to take longer to load the more you have in it. By setting it to just three years, it keeps everything nicely in one place for one round of registrations. You can then save it off and begin a new one when your new registration begins!

    I’m not going to go into details on how to create a new notebook. You can find multiple tutorials for this online.


    OneNote Tutorial

    4. Set Up Sections

    The first decision you will want to make is whether you’re going to go with a date-based portfolio or standards-based portfolio. You can read more about that here.

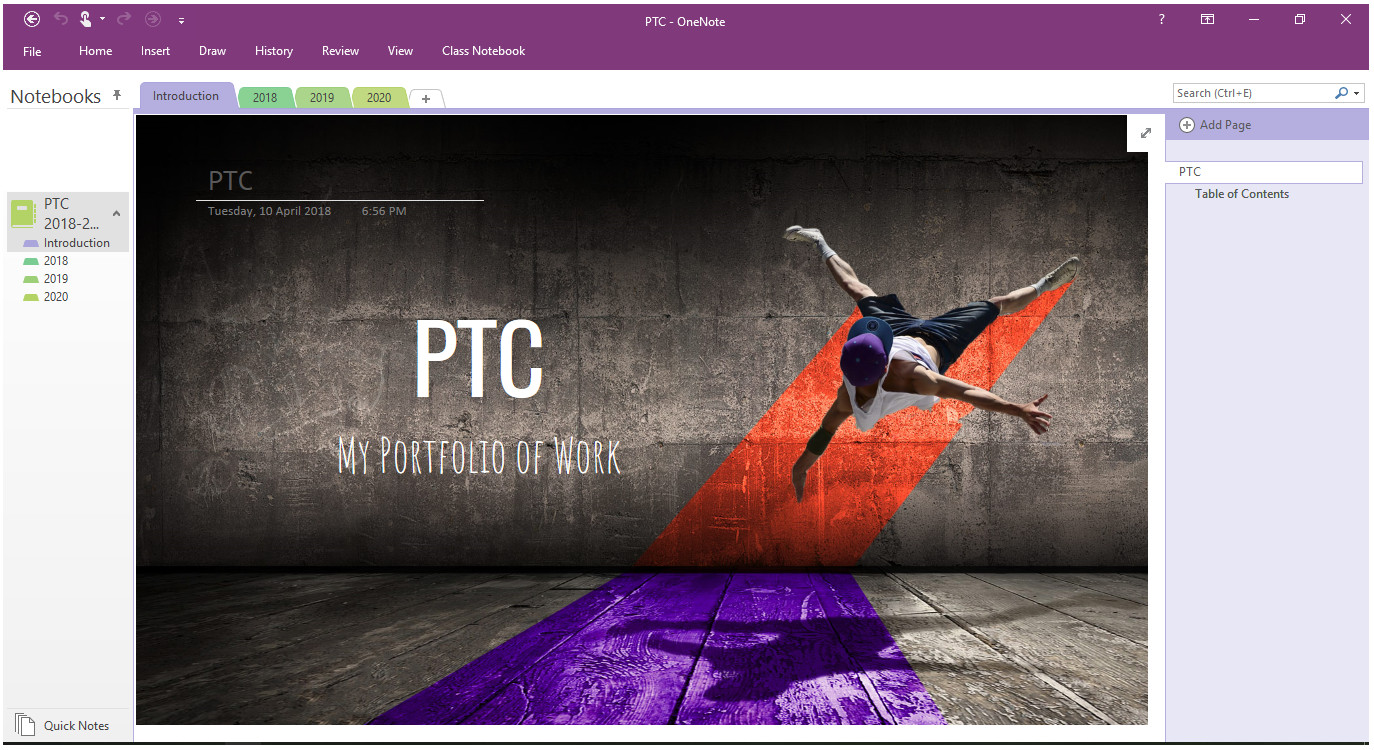
    Along the top of OneNote 2016, you will see your ‘Sections’. Here you can see I’ve gone with a date-based section portfolio, but you could just as easily go with standards, or even types of evidence. Dates is just the one that made best sense to me, and it allowed me to try different things each year of the registration period without having to stick to one method of collecting evidence.
    Adding a new section is as simple as clicking on the white ‘+’ tab. You can add as many sections as you like, as well as, have groups of sections. So – for instance – you could have a section group for each year, and within each of those groups, have each of the six standards as sections as well. This essentially creates two layers of sections at the top. Like I said, OneNote is pretty flexible for however you want to structure your portfolio.

    5. Create Page Headings

    On the right hand side of OneNote are your pages (although you can completely customise this so that it is on the left).

    You can make up to three layers deep of pages by indenting them under parent pages.

    Here you can see I have an “Admin” parent page which holds my index, summaries, job descriptions, release records and anything else pertaining to my registration for the year.

    Then I’ve made an “Evidence” parent page which I dump all my pieces of evidence in it. I’ve gone through and put it roughly in chronological order, but this hasn’t always been the case. You could put it in subject order, or leave it in complete chaos. Once again – however your brain works!

    Below that is a quick screenshot of another way of setting out the parent pages. You can see that these are expandable with the drop down arrows. You can have anything as parent pages – you could even set up each of the six standards as parent pages that you then put evidence within.


    6. Create Custom Tags

    OneNote comes with it’s own set of pre-made tags (and many of these are useful to keep). It also allows you to add in your own tags, and this is where comes the power of OneNote.

    Remember: this is in Microsoft OneNote 2016 – not the App version.

    1. Under the ‘Home’ tab at the top, go to the tags part and open the drop down list of tags.
    2. At the bottom of this is a “Customize Tags…” button. In there, you can create six new tags, one for each of the six standards. You can select an icon for them – I’ve just used the six coloured squares.
    3. You can then order them and see them within your list of tags. You could even move them to the top so you have the shortcuts for them (I’ve got other tags that I use for teaching in those slots…)
    7. Macro It Up!

    This step is a bit extra for those who like to have a list of their evidence somewhere.

    In Microsoft OneNote 2016, there is a ‘Macros’ part under the ‘Home’ tab. You can download a range of different macros which are like plugins for OneNote that carry out different tasks systematically. The one that allows you to create an index page like the one above is called ‘Tag Summary with Page Names‘.

    Once you’ve installed it you can create a new page and then run it.

    It will ask you for the ‘Scope‘. Select from Current Section, or Current Section Group, Current Notebook, or All Notebooks. I usually just select the ‘Current Section‘ option.

    Under ‘Filter‘ make sure you select ‘All‘. The unchecked only and checked only are for the ‘To-Do’ tag which can be marked as checked or unchecked. Our tags are just tags.

    Click ‘Ok‘ and it will go through and create a list of the pages that include the different tags.

    It could take a while depending on how many pages are in the Current Section. It’ll go along and show you the progress and page it is up to, and eventually be all finished and show you a page like the one above.

    Now, bear in mind, you selected ‘All’ for the tags it would look for, and so it will also list the other tags as well. You can go through these and delete the list of pages under these tags, leaving you with just the six standards and the pages that include that tag on them somewhere

    Other Macros

    Another good macro to get is a TOC (Table of Contents) called TOC in Current Section and TOC in Current Notebook. Both of these will build a linked list of pages within your section or notebook and display it on its own page. It’s not dynamic, so it won’t update as you add pages, but is good to have at the end of the year for example.

    Some Examples

    And that’s it. Add your evidence as a page in the section, organise it and add it in a parent page, and you’re away laughing!

    Below are some examples of evidence I have added into my OneNote portfolio.

    A great thing about OneNote is it is quick and easy to add evidence. Just create a new page in the right section, move it under a parent page if you need to, and then start typing. The date of creation is added at the top (I believe you can edit this if you’re adding evidence in retrospectively) and then you can add in an explanation or annotation of the evidence. It is easy to add screenshots or images, photos, or other media. If you have an iPad you can even write and draw in the page with Apple Pencil or a stylus.

    In this example, you can see at the top of the page I’ve added in the tags for the standards I believe that the piece of evidence links to. This is the strength of using tags, is that you create the evidence ONCE, and attribute the tags to that one evidence. There’s no copying it to different sections and organising it everywhere making multiple copies or anything. Just add the tags at the top. You can see the star one, which is my icon for PB4L stuff, which this also pertains to.

    In Conclusion

    I hope that is enough to get you started in using OneNote to house your teaching portfolio. It is the best system I’ve found for keeping your portfolio, and I’ve tried most of them. In my opinion it is the best for because of the following:

    • Adding evidence is easy, with the ability to copy and paste images and text into it. It also saves automatically.
    • It fits with my other OneNote notebooks that I keep for my other teaching work, allowing me to quickly copy work I’ve already done over into my portfolio as well.
    • Tags. Need I say more?
    • Flexible organising to suit my needs. Whichever way I need to structure my portfolio, it has a way of making it work with different layers of sections, section groups, pages, parent pages, and more.
    • Being able to draw, take notes, and annotate evidence with my iPad and Apple Pencil in OneNote has been awesome. These are at an additional cost, but add to the whole experience, and part of the reason why I use OneNote for all the other areas of teaching as well.
  • Teaching Portfolios: How to set up a Blog based portfolio

    A blog based template is a good way of going about keeping a record of your portfolio. Many people are used to the system of blogging, and the key part of anything is it’s flexibility.

    Essentially, each piece of evidence is a new post. In that post you can include file links, images, and annotations or descriptions. Built in to every blog system is the use of categories and tags, which can be used to track the six teaching standards, subject of the evidence, type of evidence (image, photo, resource, video, etc…) and more. These can then all be used to create archive pages or collections to showcase in your portfolio.

    The big benefit to creating your portfolio online is its accessibility from anywhere, allowing you to add evidence no matter where you are. In addition to this, being able to easily share your portfolio with your principal in order to get your registration signed off is also a convenience. Another benefit is the ability to add comment, annotation, and descriptions or reflections to each piece of evidence and have it attached with the evidence permanently in one place.

    There are a couple of downsides to using a blog system. The first is a matter of privacy. The thing that makes it a great system, accessibility, is also it’s downfall. Unless you go through your evidence and black out names or blur faces in photos, and moderate any comments you make in annotations, all of these things will go up online for everyone to see. Of course, there are ways of making this work, such as making your portfolio private and password protected. You will have to provide your principal with an account to view it however if you wish to share it with them.
    Secondly, it requires extra work on your part. Each piece of evidence needs to be added as a new blog post, files and photos uploaded, and comments or descriptions added. This is slightly more cumbersome than just dropping files into a folder, or even adding it as a new page in OneNote – especially if you keep getting signed out!

    Pros
    • Accessible online from anywhere
    • Easy to share with others
    • Explanations, Descriptions and Reflections all easy to add to a piece of evidence and posted together.
    Cons
    • Privacy issues by being online
    • Additional work required to add pieces of evidence

    Creating a Teaching Portfolio in a blog

    Getting started is actually a lot easier than you’d first imagine. The hardest part is choosing a blogging system. There are several that I would recommend.

    In the end, choose one that works for you. If it’s too hard for you to use and get used to, then you’re not going to maintain your portfolio very well. The other factor to take into account is the privacy capabilities of the system – does it have private mode? Can you make posts password protected?

    I’m not going to go into details of how to use each of these systems. Most of them have a simple tag and category based system, especially the first two. Instead, I’ll go through the basic setup of what you need to build the structure of your portfolio.

    I’ve actually made an entire website for this purpose. You can visit it below:


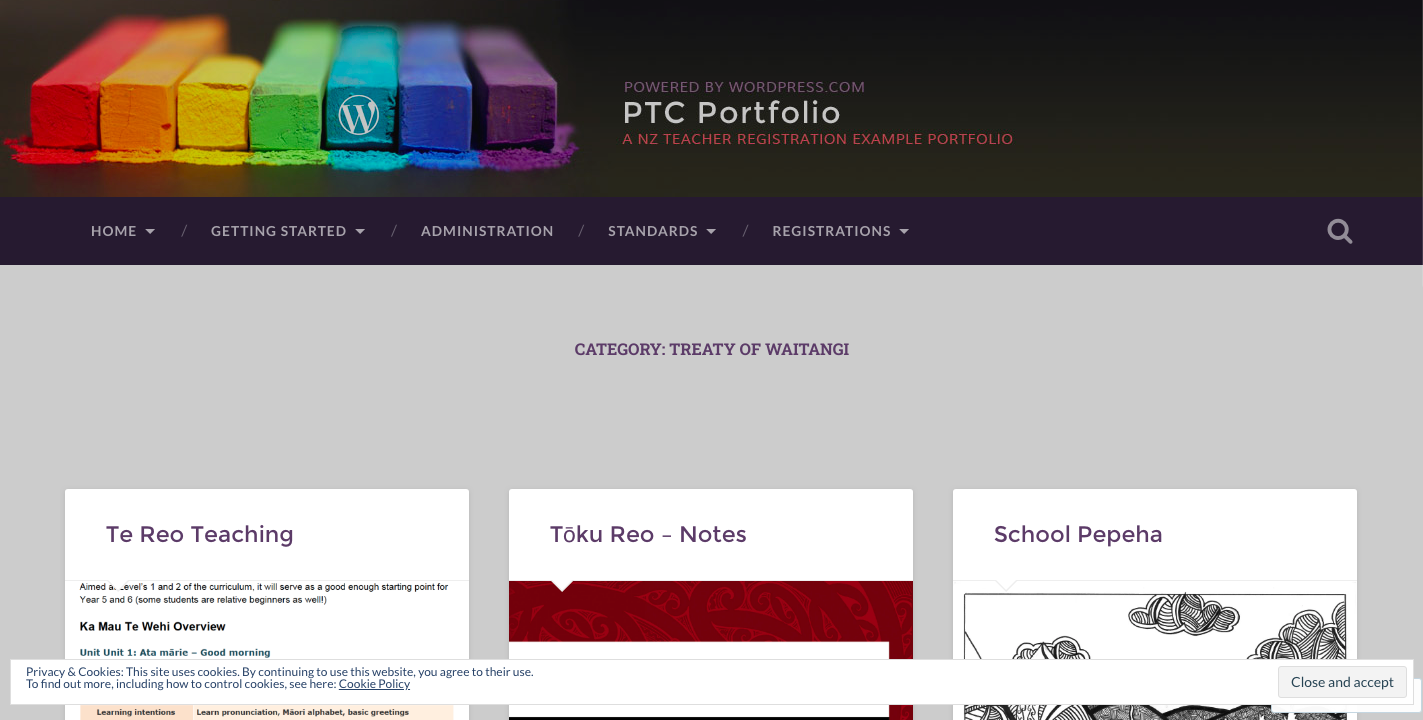
    Wordpress.com PTC Portfolio

    Please go through and have a look at this site. It takes you through the whole set up with you, and addresses each of the issues outlined above.

    Examples

    Here are some examples of some blog based portfolios I’ve come across or made myself.

    PTC Portfolio Template

    Not only is the WordPress tutorial I built above a walkthrough, but also serves as an example of what your portfolio could look like. I’ve also put in some example evidence. Go ahead and have a look through it.


    PTC Portfolio

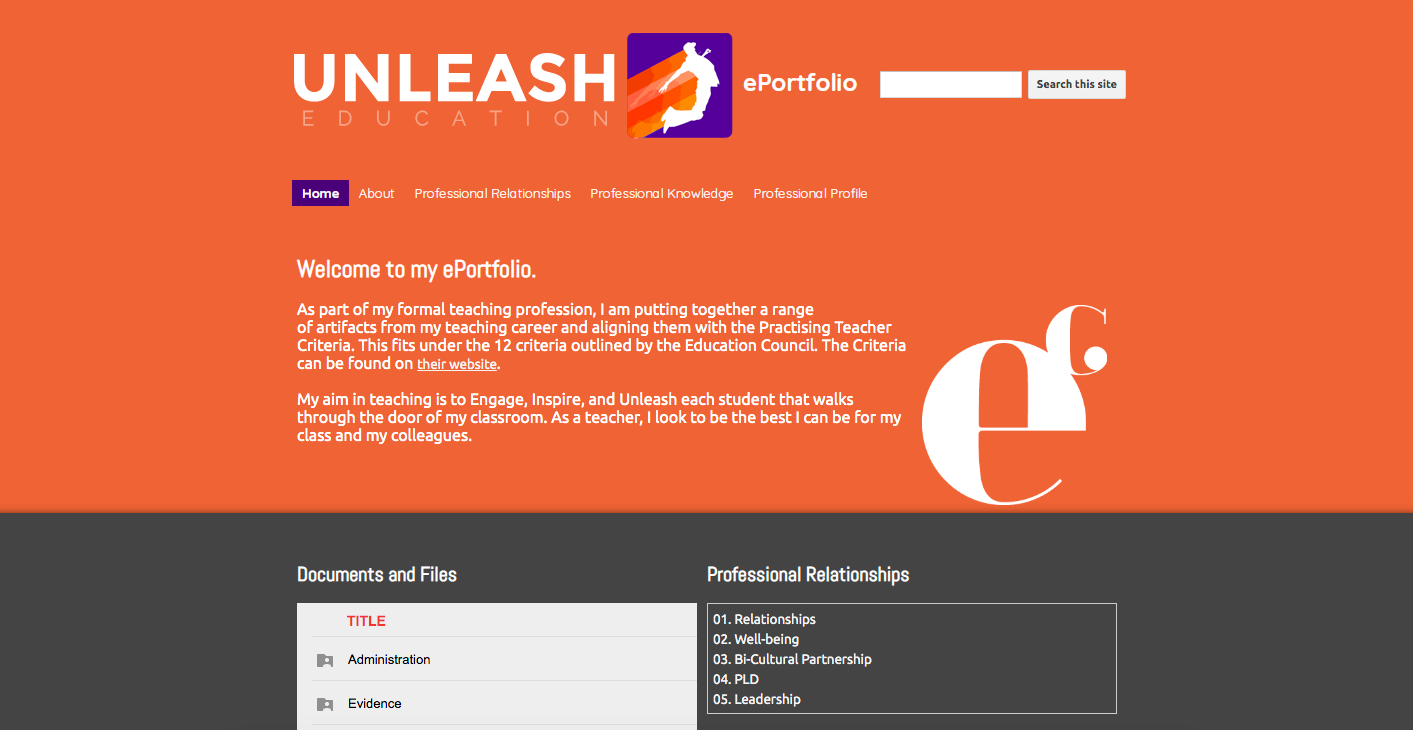
    ePortfolio – Google Site


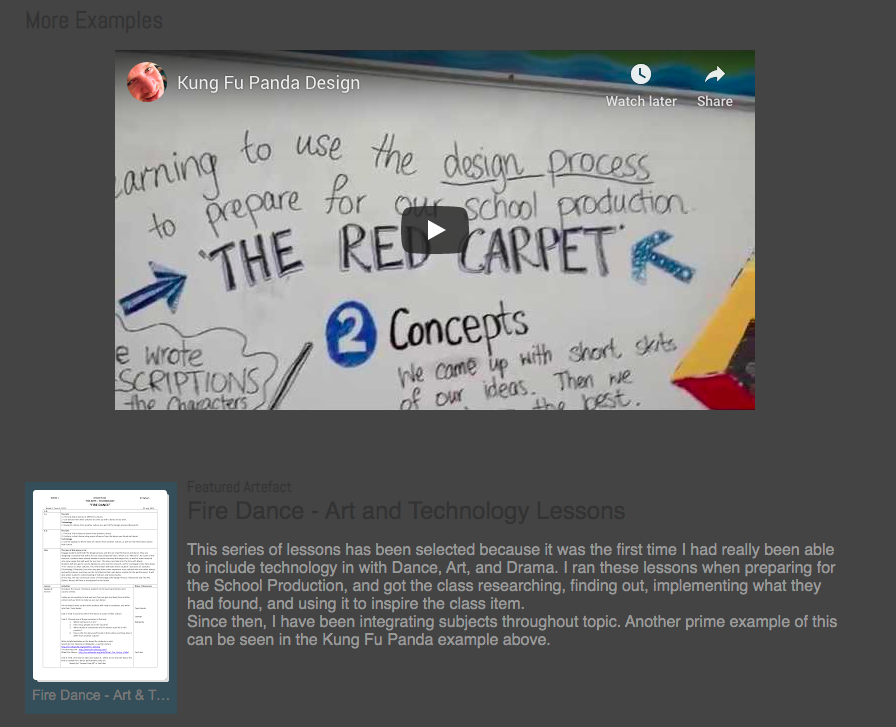
    Here I used a combination of Google Drive and Google Sites. Essentially I would just add evidence into relevant folders in Google Drive and the Site would link to those folders. I could then create some featured posts to showcase some of the better pieces of evidence.

  • Teaching Portfolios: Example of My Portfolio

    Sometimes the best way to work out what you need in a portfolio is just to see what someone else has done.

    So I’ve taken a series of whole screen screenshots to show off what I’ve done. It’s not necessarily the best portfolio in the world, or at all what you do. But, it is what I have done, and have been adjusting and trying different things with time.

    Introduction
    Title Page

    I’m not sure why, but I made a title page for my portfolio. It just seemed like something that I could do to include some of my graphics design skills.

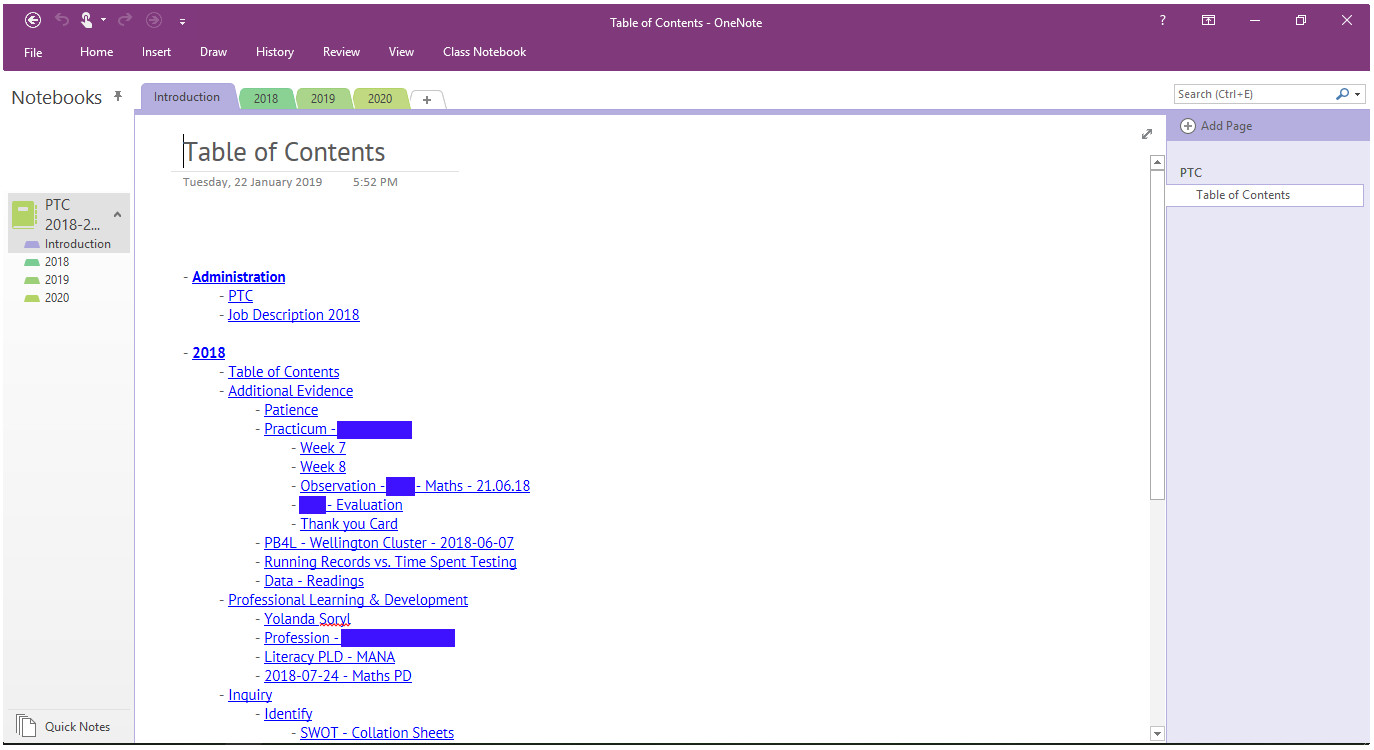
    Table of Contents
    A Table of Contents with all the pages for my portoflio listed

    I used a downloaded macro that creates a list of the pages in an indented list.

    In 2018 I focused my registration efforts into Inquiry, and through that Inquiry made links to the standards / criteria. I then collected additional evidence that I wanted to keep a record of.

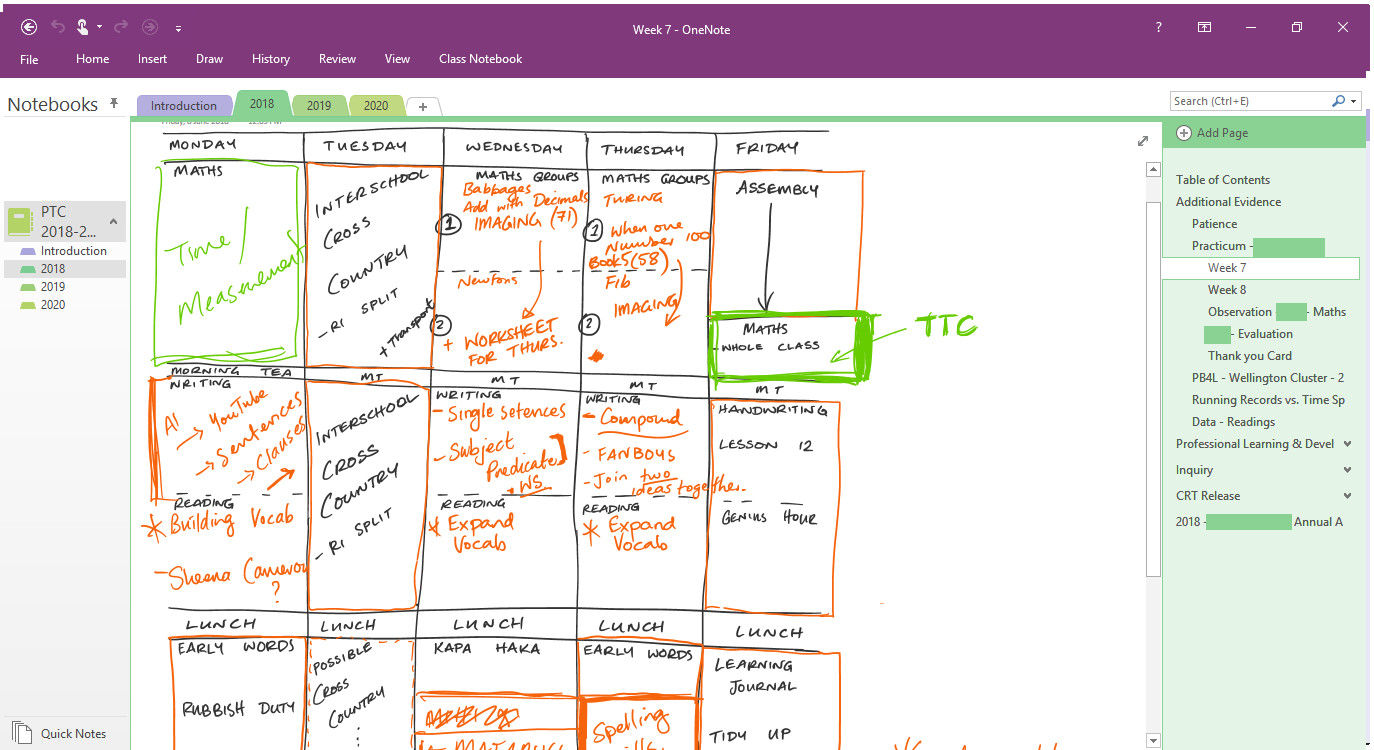
    Evidence example 1

    This is an outline of the week plan for the student teacher in my class.

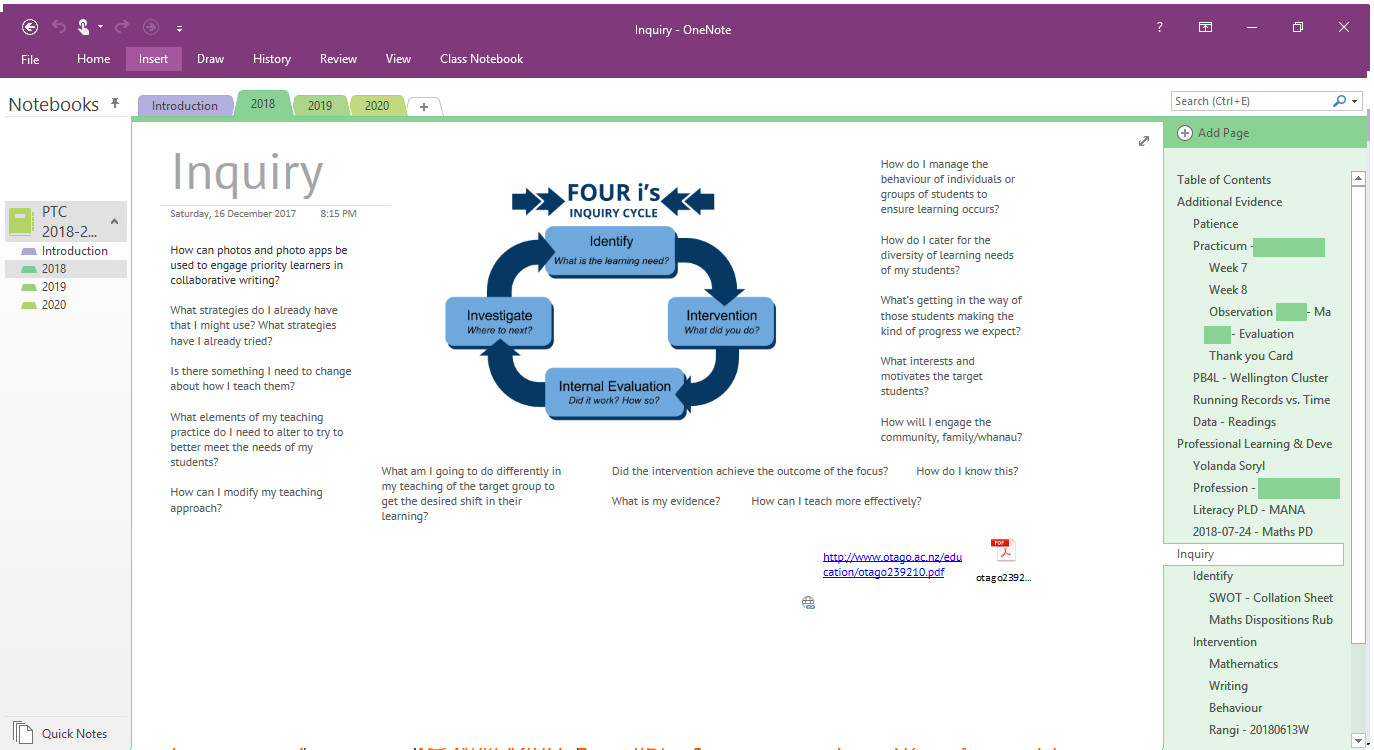
    Evidence example 2

    The Inquiry cycle we used as a school staff complete with some of the questions we would be asking ourselves.

    Evidence example 3

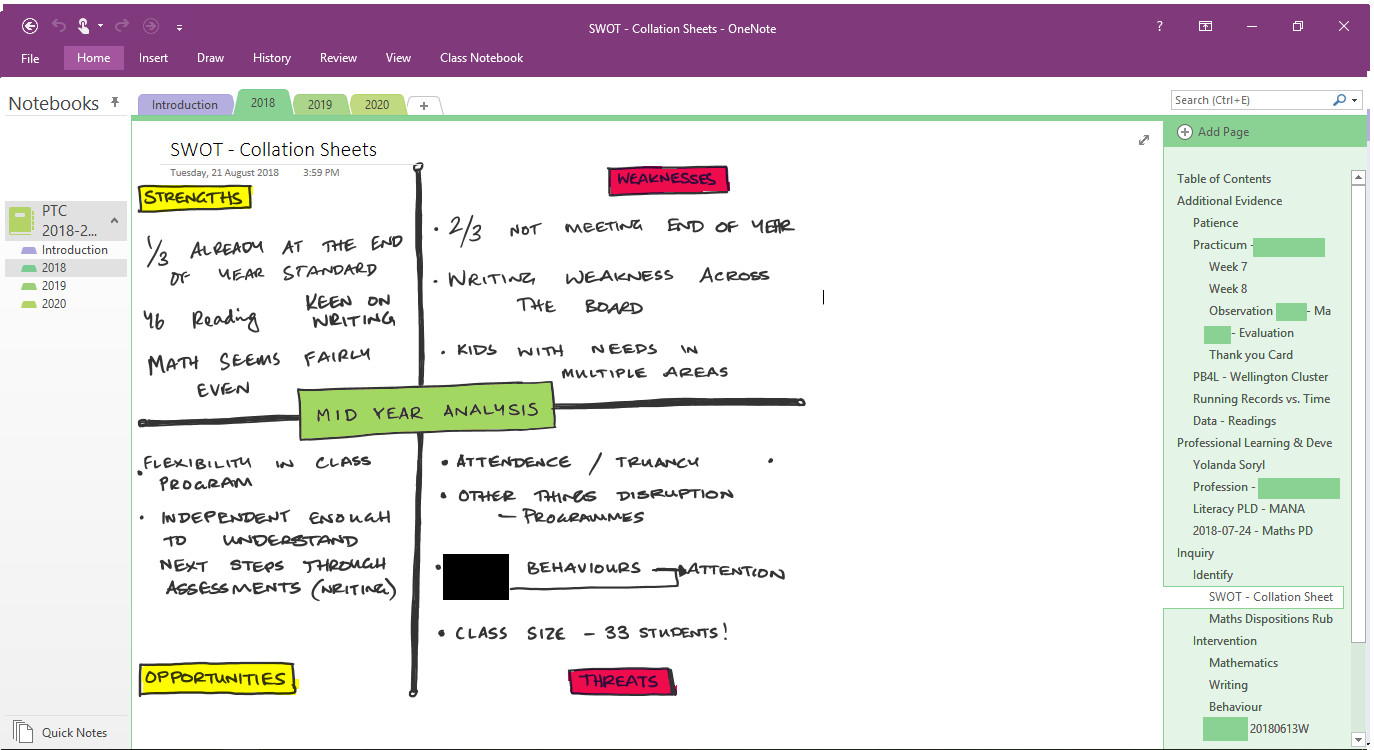
    A mid year review using ‘SWOT’ as a focus. I won’t go into details with these as they are merely serving as examples of the kind of evidence I collected for my Inquiry and portfolio. The key here is doing ONE thing but getting two uses out of it – as well as not doubling up on any work!

    Evidence example 4

    The record keeping of the interventions I carried out for one of my priority learners in my Inquiry.

    2019 contents page

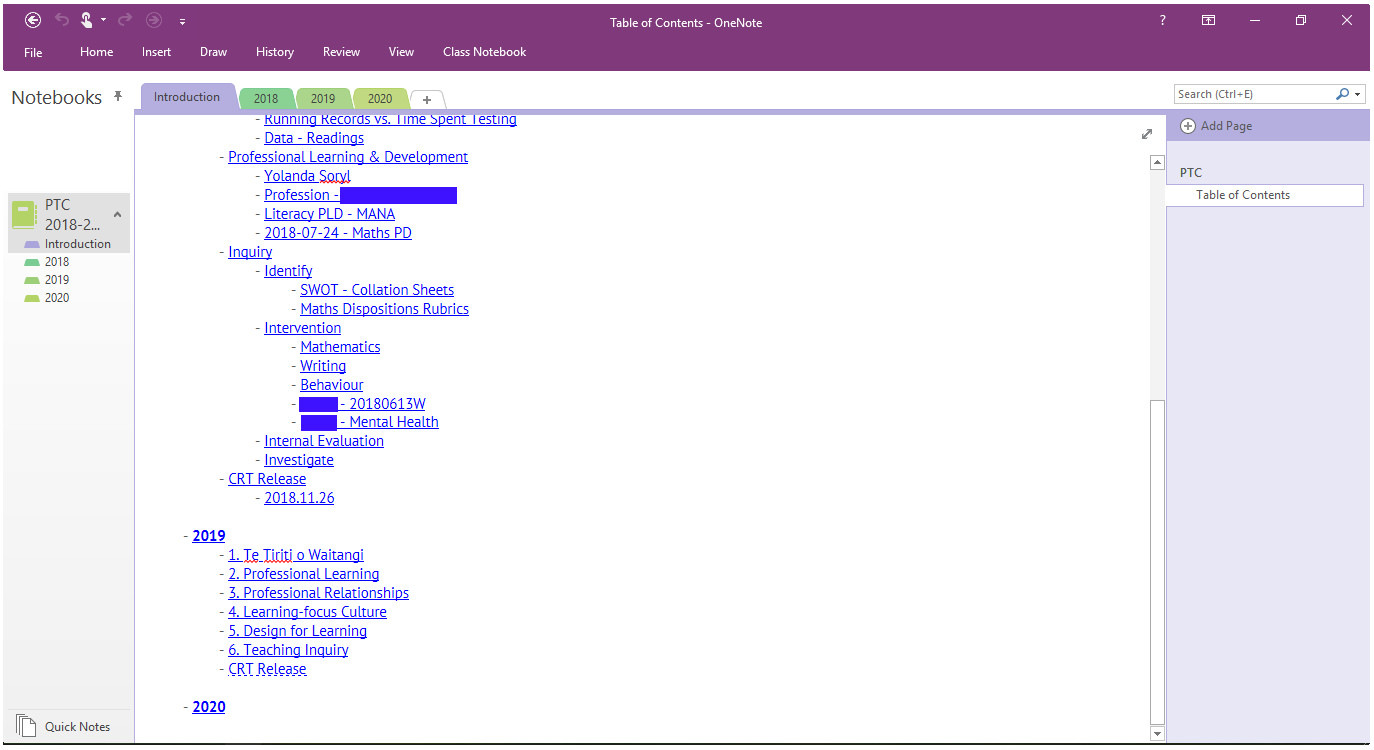
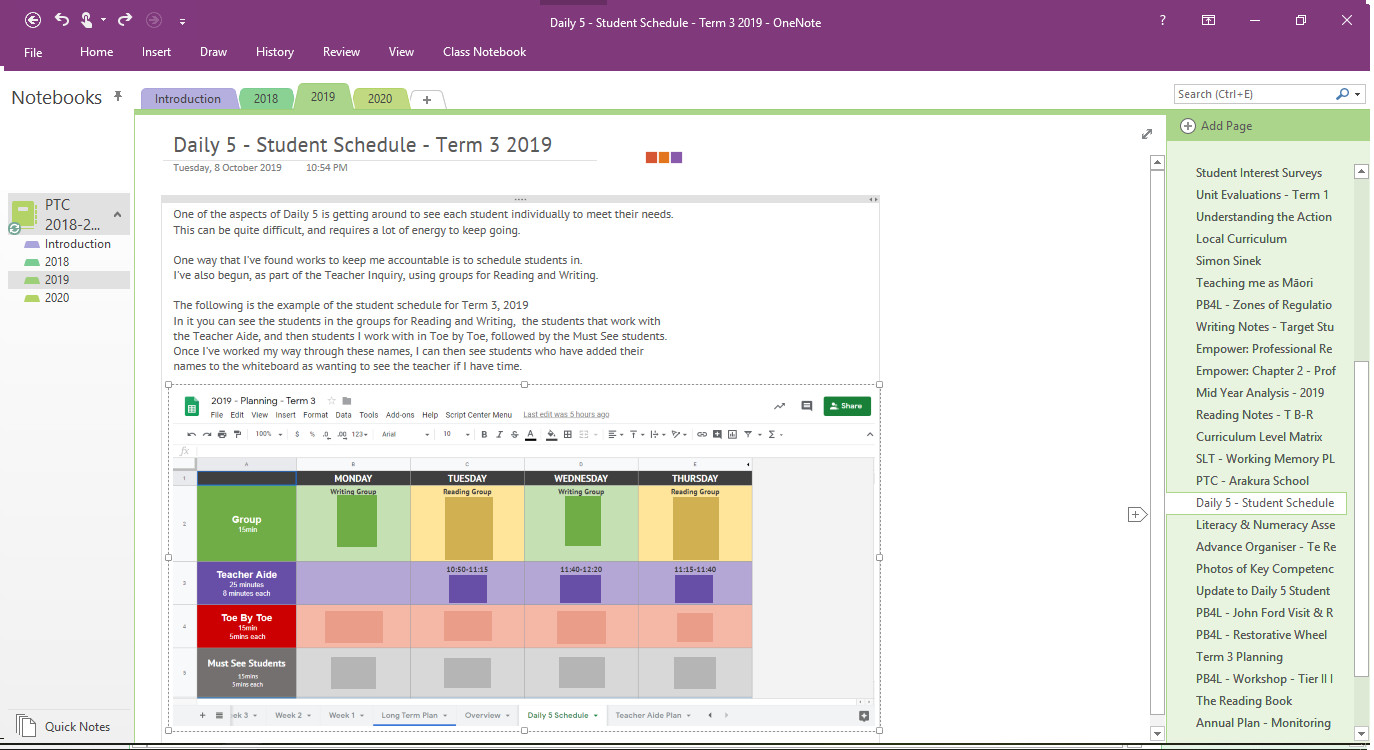
    In 2019, I began keeping my portfolio in a slightly different method, with more focus on evidence than on Inquiry. Essentially, the Inquiry became just another piece of evidence, rather than using the Inquiry to show the standards being met.

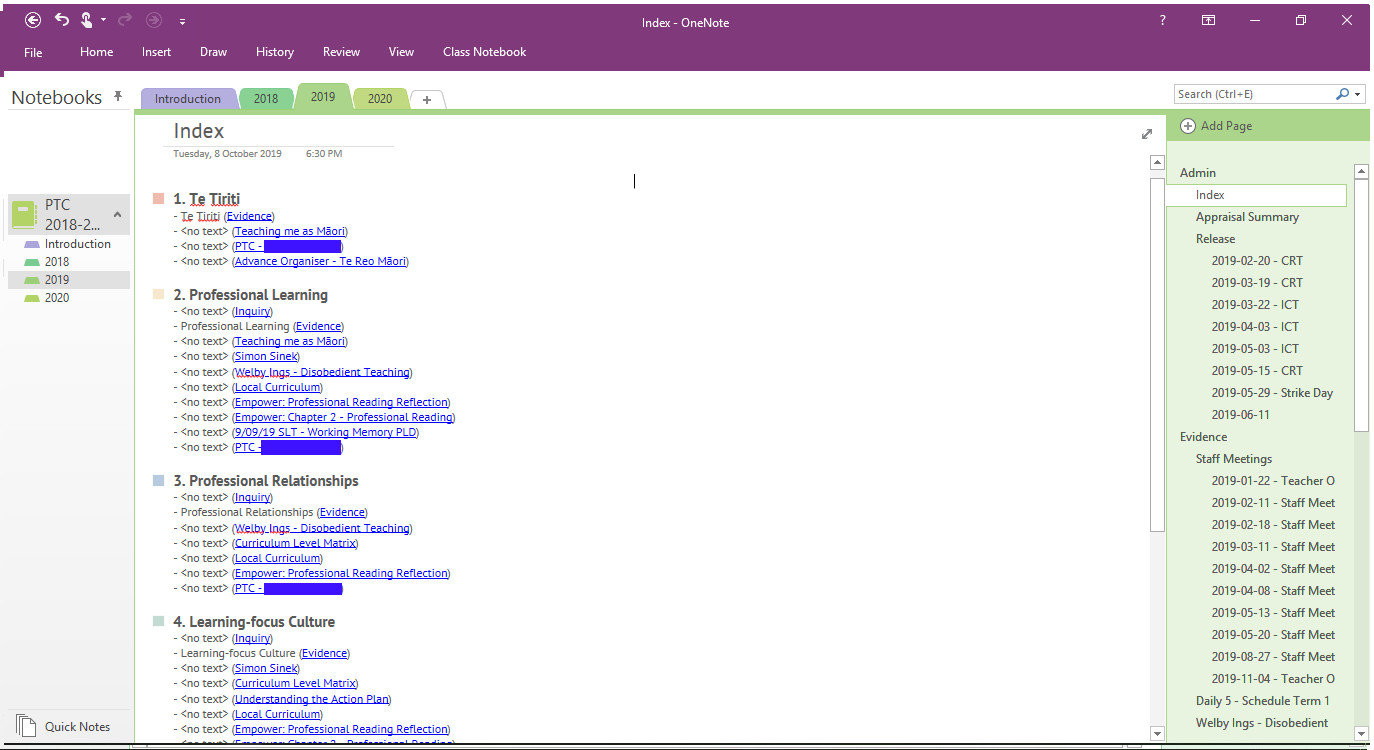
    You can see on the right hand side that all the evidence has just been added into one big folder, and then in the Contents page it has a list of the tags being used using the standards as each tag.

    Evidence Example 5

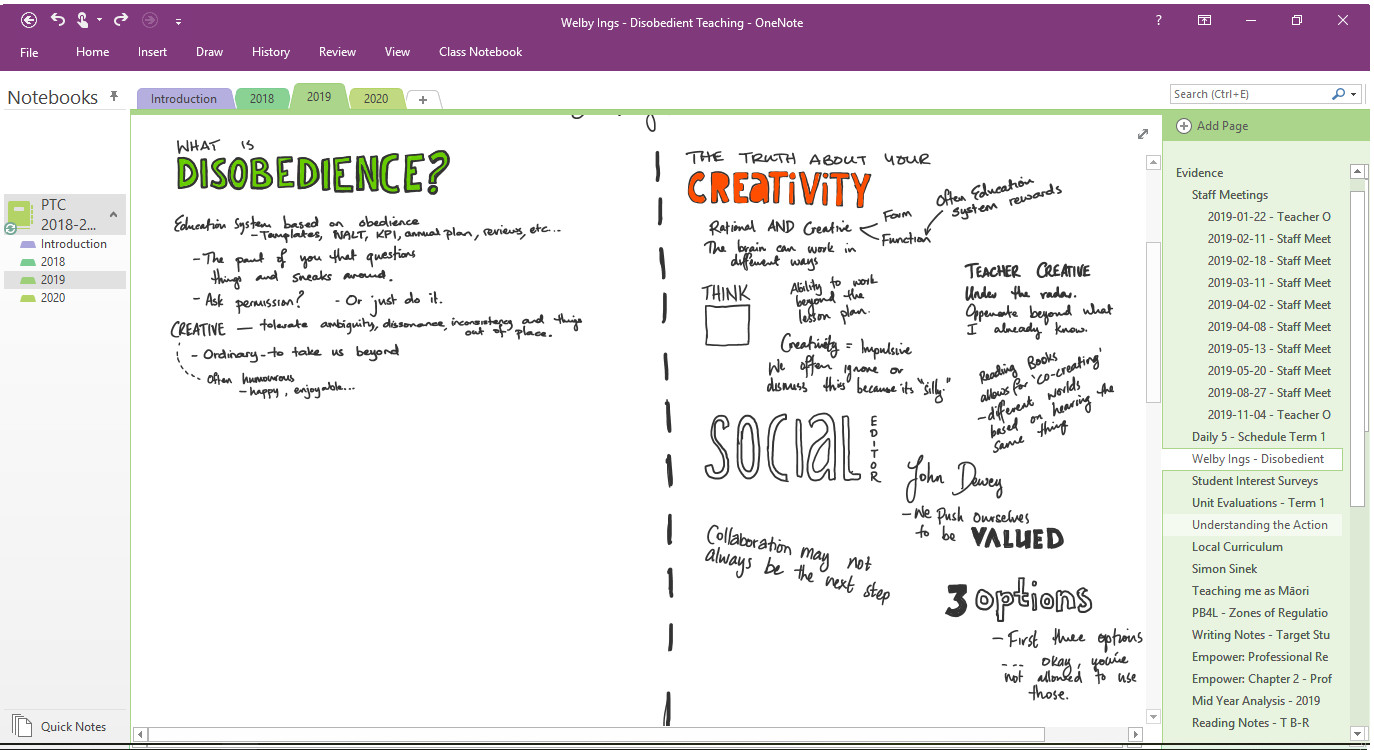
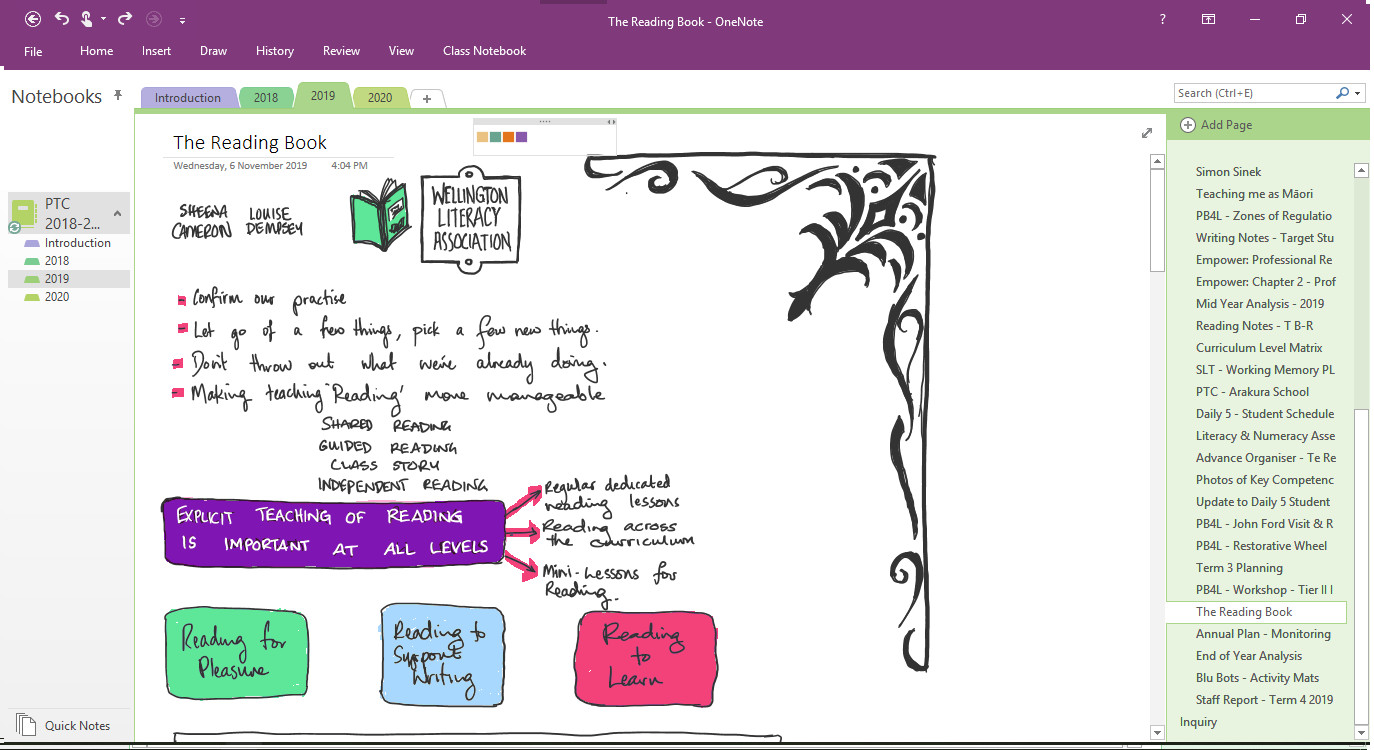
    Another piece of evidence from a PLD session. Check the list on the right side; everything is in one big folder. I’ve attempted to keep it in chronological order.

    Evidence Example 6

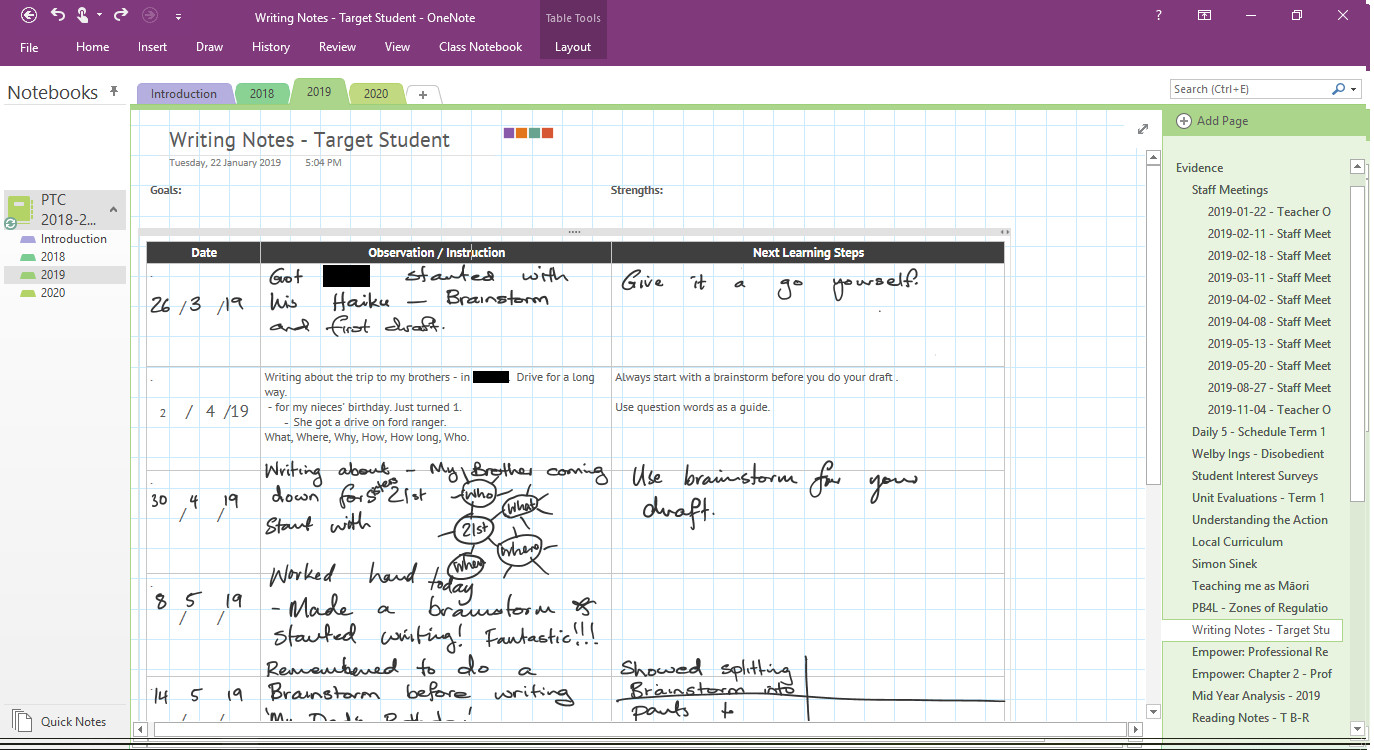
    An example of anecdotal notes taken on one of my priority learners.

    Evidence Example 7

    In this piece of evidence, you can see three benefits of using OneNote for collecting evidence. Firstly, the ability to add in screenshots easily means that you can use other documents and then import them straight in. Secondly, I am able to add my own explanation and description of the evidence in the text above. Thirdly, you can see the three coloured box icons at the top of the page – these are the tags of the standards that this piece of evidence meets – meaning that one piece of evidence can fit into multiple standard categories without having to copy and paste or duplicate evidence.

    Evidence Example 8

    More evidence I’d taken from notes at a PLD workshop. Note the tags used at the top of this evidence.

    Evidence Example 9

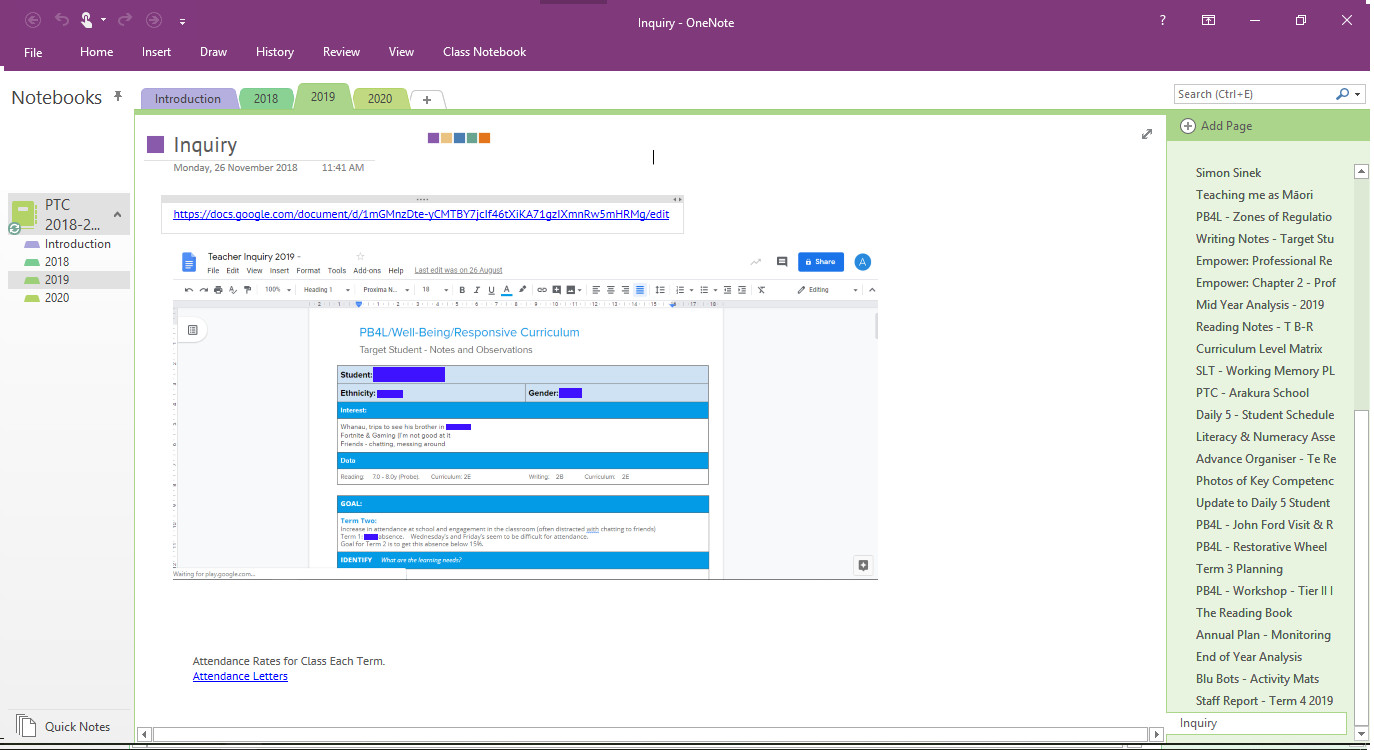
    Finally, as mentioned, I had kept my Inquiry as a separate piece of evidence from my portfolio. Here I’ve made a link to the document (so that I could access it from OneNote and my portfolio) and included a quick screenshot as well as other notes and links that are relevant to the inquiry as the year went on.

    So hopefully that has been a help to those out there that are looking for ideas, or just want to see what others are doing with their portfolios. Remember to check out my other posts about teacher portfolios and ways that you can maintain and keep a portfolio of this kind.