Category: Archived

All the old posts from years gone by.

  • Teaching Portfolios: Standards Based Portfolio

    One way in which you can build your teaching portfolio is to use each of the six standards as a different ‘category’ for which to organise your evidence into. This can be done easily in both hard copy portfolios as well as online or computer based portfolios.

    Whichever way you decide to go in setting up your portfolio, you should consider each of the steps in this guide.

    Hard Copy Portfolio

    For hard copy portfolios, use a set of file dividers to break your folder into sections.

    You could also use an expanding folder and set aside six pockets to put the evidence into.
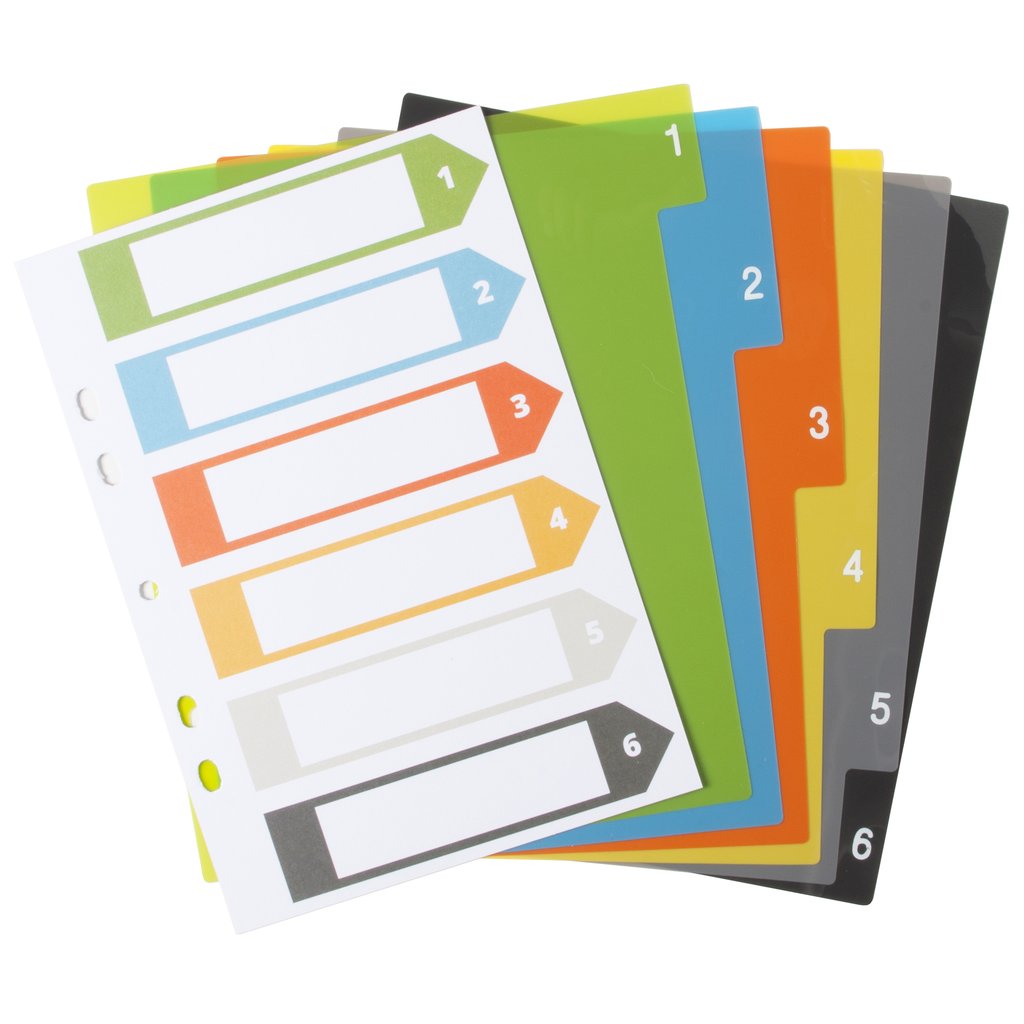
    Keep the front divider page and use this as either a title for each section, or as a contents / index page for what you put into each section.

    Computer Portfolio

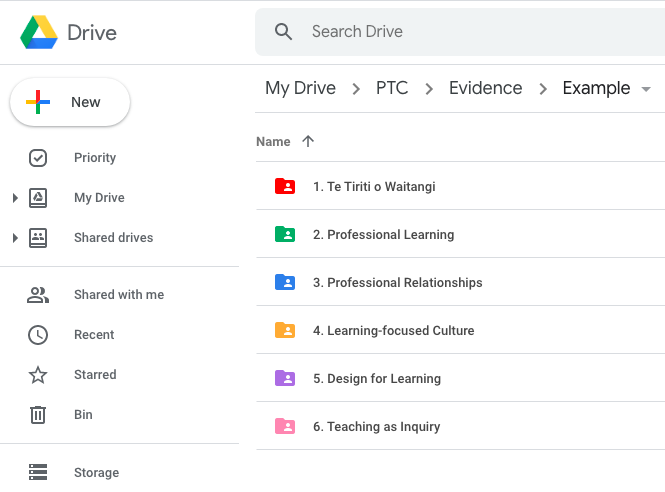
    If you plan on using Google Drive / OneDrive / Dropbox or even just Windows Explorer / My Documents, simply create a folder for your portfolio, then inside it, create six folders – one for each of the six standards.
    You could also use OneNote and create six sections along the top for each of the standards. Then each new piece of evidence just becomes a page within that section.

    See our article on OneNote portfolios for more info.

    Evidence

    As you collect evidence of your teaching practise, simply take a copy (photocopy or Ctrl+C) and put it into the relevant section. If it fits under more than one of the standards, then put additional copies into those sections. In Computer based portfolios this is very easy, as you just continue to paste each file into each relevant folder as many times as you like. For hard copy portfolios you’ll need to make additional photocopies.

    Don’t forget to date each piece of evidence as it comes in. Computer based portfolios will do this automatically for when the file was created.

    Keep Track

    It is a good idea to keep a contents page of what has been placed in your portfolio. There are several ways you could do this, but the simplest way would be to draw up six columns and each time a piece of evidence is added into the section, you add it to the column / columns that pertain to each standard. You could also use the index card of the dividers set that you purchased for your folder and add each piece of evidence as you go.

    It is also interesting to keep track of how many pieces of evidence you have in each of the standards. A simple file count in each folder will tell you in a computer based portfolio. A tracking sheet could be used for both systems as well so you can see what areas you might want to work on or focus on for the next term or two.
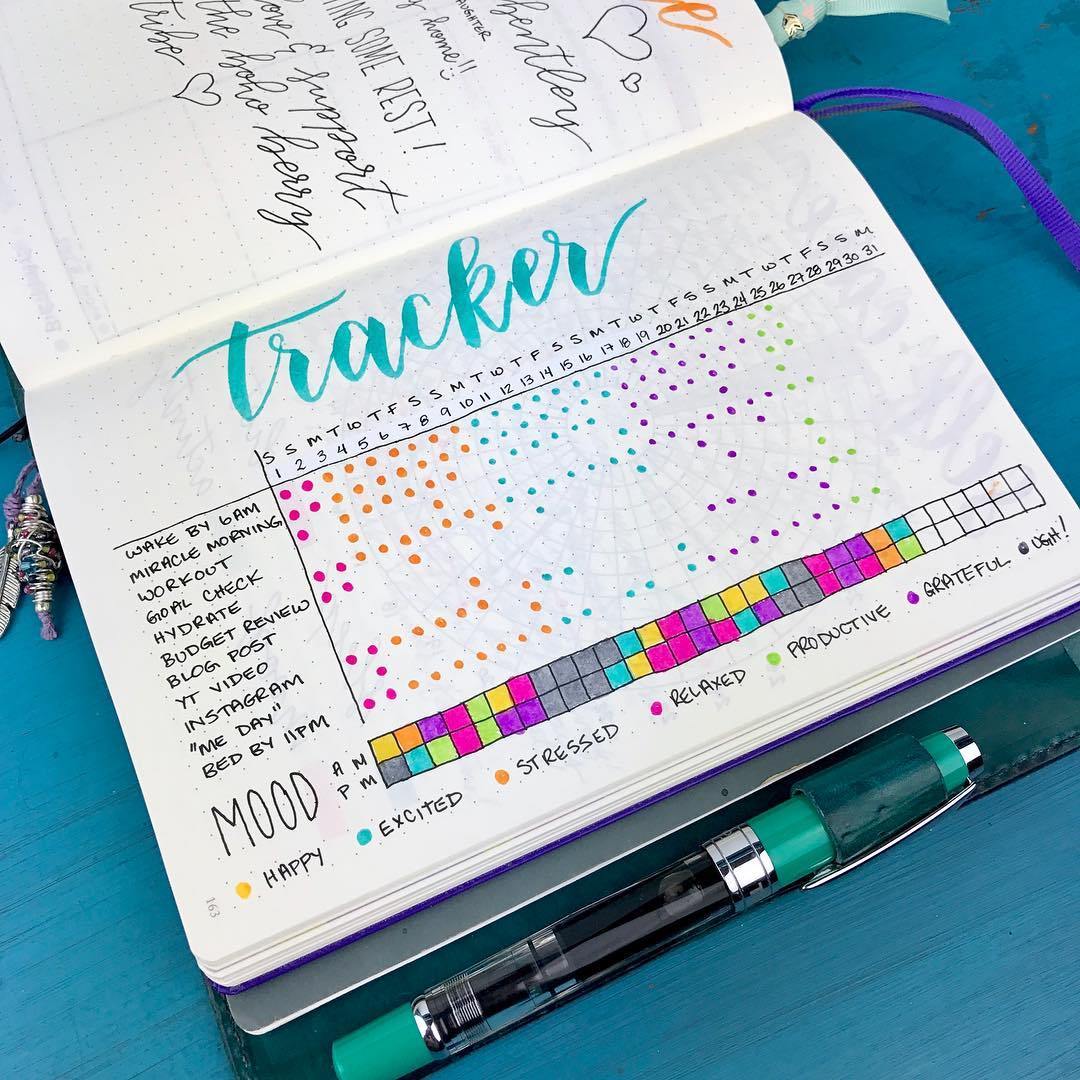
    This is a tracker from a bullet-journal, but one could easily adapt something like this for keeping track of the number of artefacts you have in each of the six teaching standards.

    This is just the beginning steps of setting up your Standards based Portfolio.

    Another way would be to set up your portfolio using dates as your organiser. You can see how this is done in the next article.

  • Teaching Porfolios: Date Based Portfolio

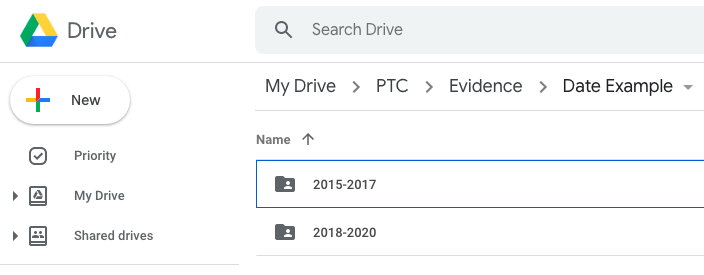
    One way in which you can build your teaching portfolio is to use each of the years for your registration as a structure for folders and dividers for your portfolio. This can be done easily in both hard copy portfolios as well as online or computer based portfolios.

    Whichever way you decide to go in setting up your portfolio, you should consider each of the steps in this guide.

    Hard Copy Portfolio

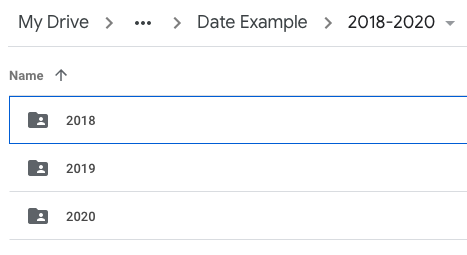
    Essentially you just need a divider, or section, or entire folder for each year. You could choose to group your years together for the three years of your registration, though this is not necessary.

    Then its just a matter of putting each piece of evidence into the relevant year as you teach. I would keep each one dated and keep them in the order they happened in. Then at the end of the year, close it off, and open up the next section ready for the new year.

    Computer Portfolio

    In Google Drive / Drop Box / Windows Explorer / Finder create three folders inside your portfolio. Label these as the years of your registration. Obviously, you could just continue, or keep your registrations together in a folder themselves.


    One big melting pot

    Obviously if you just add each piece of evidence into a folder for each year it will begin to resemble a dumping ground of teaching stuff or one big melting pot of evidence rather than a well organised portfolio.

    One could merge the standards based approach outlined here into each of the year folders in order to add another layer of structure to your portfolio in an effort to keep it more organised. But this would require six folders, all named the same, created three times for each of the years. It would work, but it wouldn’t be very elegant. But, if this is how your brain works, then its a viable option. However, a better way would be by using tags.

    Tags for each teaching standard

    You can create a set of six tags, each one relating to a standard.

    Tags can be used throughout most file systems, but in particular if you use OneNote I would highly recommend this. If you set up a blog for your portfolio, categories or tags can be used for this purpose. I believe both Windows and MacOS have the ability to tag files. I’m not sure this is possible in Google Drive or Drop Box, but I could be wrong.

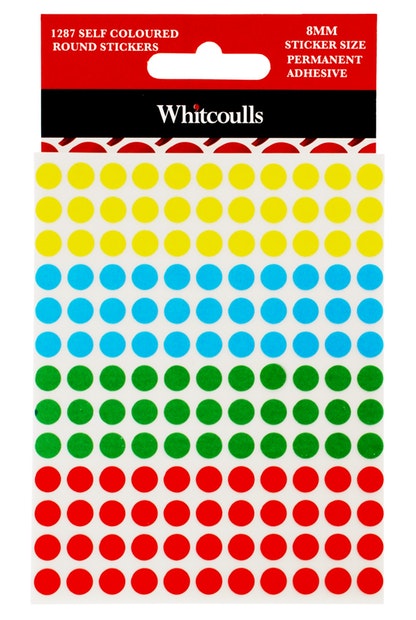
    If you’re building a hard copy portfolio, then stickers are your friends! Choose six coloured stickers to use, make a key of which standard each colour relates to, and then in the corner of the piece of evidence, place a sticker for the standard or standards that it relates to.

    Multiple Standards

    The biggest benefit to using tags is that it becomes very easy to attribute multiple standards to one piece of evidence. This is something that happens more often than not. Using tags saves on the doubling up of evidence as you copy a piece into multiple standards folders of other systems. Instead, you merely add as many tags as is suitable for the evidence, and it is “added” to those standards straight away.

    OneNote is free to use. Whilst the online and app version is very good, I find the OneNote 2016 software to be the best.

    For syncing, you will need an Office365 account, which costs. However, it is free for all schools thanks to the Government schools agreement with Microsoft.

    The Best Method

    The best software I’ve found for building a portfolio is Microsoft OneNote. In particular is the ability to use tags. These can then be searched for, and using different macros it can also build a contents / index page for each of these tags.

    I used to use a blog type approach, with each post being a different piece of evidence, but with some privacy issues being that it was online, as well as the fact I was having to create posts as a piece of evidence, rather than just using the file, it became cumbersome and extra work with the doubling up. I did however appreciate the use of tags and categories to be able to organise the evidence while still maintaining a date based approach.

    I will write an in-depth article about setting up your teacher portfolio in OneNote soon.

  • Teaching Portfolios: Making them Work

    Even though they are not required by the Teaching Council, many schools use Teaching portfolios to show evidence that a teacher is meeting the criteria and standards for registration, and therefore can be signed off when their registration comes up for renewal.

    The format of appraisal and the keeping of portfolios has been a bug-bear of teachers for a while now, with the increase of workload in collecting evidence and putting it in a portfolio for something that is not actually required.

    However, I argue that portfolios are a good way of keeping records of your teaching career and can help make you a more reflective teacher in the process. I think that they would be worth maintaining even if they are not required.  While I acknowledge there is a bit of work required to keep it, there are several ways in which you can streamline the process so that keeping a portfolio is no longer a burden or a time-sapping exercise.

    The following are several keys to success that I’ve found along the way so that keeping and maintaining your teacher portfolio.

    Rule 1: Make it work for you; instead of you working for it…

    The number one thing you need to do when making your portfolio is to make it work for you.

    What does this mean?

    Put simply, choose a system, a method of keeping evidence, resources, materials, artefacts that is natural to you. If you’re a hands on person who prefers hard copies of things, then use a clearfile or lever-arch folder, or even a cascading folder.
    If you keep a lot of your teaching work in Google Docs, or use Google Drive a lot, then create a folder for evidence and put all the files in there.
    If you put a lot of your teaching work online, then you could set up a blog or website.

    Choose a system that works for you

    • Clearfile
    • Lever-arch File
    • Cascading Folder
    • Cardboard Box
    • Google Drive Folder
    • One Note Notebook
    • Google Site
    • Website
    • Blog

    You can find out more about each of the main ways to organise your portfolio at the following articles:

    Date Based Portfolio

    Standard Based Portfolio

    Organise it how your brain works

    Following on from the previous point on making it work for you: Setting up your portfolio in the way that your brain operates means that organising and maintaining your portfolio will be second nature to you rather than battling with yourself internally each time you come to update it.

    There are two main ways in which you can organise your teaching standards portfolio:

    • Date Based
      This consists of folders or sections labeled by date (ie. 2018, 2019, 2020). In each folder you put evidence of your teaching practise as it happens.
    • By Standard
      This consists of creating a set of six folders or sections, one for each of the six teaching standards. As you create each piece of evidence, simply put it in the folder that it best suits.

    Obviously there are other ways as well. I’ve found the best to be a combination of these two ways. It doesn’t matter really how you choose to organise it, as long as whichever way you choose is how your brain best processes a portfolio of this kind.

    Robust yet Flexible

    It wouldn’t be a blog about teaching without a bit of an oxymoron in it. When you set up your portfolio, make sure whatever system you choose to organise it in is robust. Stick to it, and keep it consistent. At the same time however, be flexible enough to adapt it to fit your needs as you go. Don’t be afraid to try new things, reorganise it or adjust it as you need to. Remember, the first rule is key: this HAS to work for you. As soon as it doesn’t, you’re working for it and it become cumbersome.

    Tags Are Your Friend

    One thing I have found the more and more portfolios I have made over my years as a teacher is that you need a way to tag or categorise each piece of evidence. Regardless of whether you go with a date based or standards based approach, having a system of tags will save you a lot of time. Using tags avoids the problem mentioned next.

    Avoid doubling up

    There is nothing more demoralising to a teacher (or anyone for that fact) than having to do something twice.

    Therefore, ensure that you only have to enter evidence into your portfolio once. The use of computer based portfolios certainly helps with this, especially with evidence that fits under multiple standards.

    Avoid doubling up

    There is nothing more demoralising to a teacher (or anyone for that fact) than having to do something twice.

    A very good portfolio will find a way in which you can keep your work organised when you create it AND enter it into your portfolio at the same time. This is somewhat of a pipedream, though definitely possible. Essentially this is where flexibility of your system is key, as this wouldn’t be possible for every piece of evidence, but definitely a possibility for some.

    Keep an eye out for more…

    We will be adding more Teacher Portfolio ideas, tips, tricks, and how-to guides in the near future. Check back here for more!

  • Teaching Portfolios: Do we need them?

    Ever since I became a teacher in 2009 I’ve been keeping everything I’ve done. For the first two years as a PRT (Provisionally Registered Teacher) it was pretty much part of the process of what was expected to keep track of my progress, my teaching, and my career. After that, it had become somewhat second nature and with the appraisal process becoming much less trustworthy with the introduction of the Education Council (renamed Teacher’s Council), schools and principals were encouraged to tighten their systems of appraisal and were expected to have their staff collect evidence that they were meeting each of the 12 criteria at the time.

    On top of this, teachers were also encouraged to carry out what has become known as “Teacher Inquiry” where teachers inquired into their own practise and how they might be better teachers for their classes and students.

    Although I’d known no different and all of this was second nature and just part of the job, it is a lot of work on top of what we have to do day in and day out – the core business of teaching. It quickly became one of the number one pieces of paperwork and time consumers for teachers.

    Along came Labour, winning the 2017 election and swiftly removing the ‘Education Council’ and returning it to the teachers. With the pay negotiations came the agreement to address the workload. And with that the appraisal process, of which teacher inquiry and portfolios had become synonymous with.

    In September 2019, the following paragraph was released from the Teaching Council website in regards to it’s requirements around portfolios and inquiry.


    The Teaching Council would like to clarify what it expects for the issue or renewal of a practising certificate.
    The issue or renewal of a practising certificate will be based on an endorsement made by the professional leader, based on the teacher’s participation in a system that includes:

    • an annual summary report that states whether or not the appraisee meets the Standards or Ngā Paerewa
      • the annual summary report is the only teacher documentation that is required for the purposes of the audit ERO undertakes on behalf of the Teaching Council
    • that appraisees have been observed once annually and involved in two conversations ideally with an appraiser who is familiar with the day to day work of the teacher
      • the Council has listened to the profession and accepts that one observation may suffice for fully certificated teachers.

    We do not ask (nor do we require) to see copies of the annual summary report, or any evidence. We rely on the professional judgement of the appraiser and the leader making the endorsement.

    While schools and centres are free to design their appraisal processes there is no requirement in law or by any agency that an appraisal system must include:

    1. an inquiry to be undertaken by teachers

    2. reports to be kept of all the professional development teachers do

    3. a portfolio of evidence compiled by teachers


    So essentially, it is not the Teacher’s Council that requires you to collect evidence, or complete an inquiry, but your school and/or principal. However, schools and principals feel that they have to get teachers to do these in order to have something to sign off on for the annual summary report. They don’t, but they might feel that they have to have some kind of evidence that teachers are meeting the criteria when signing off the annual summary report.

    Regardless, I return to my first question: Do we need them?

    The short answer is no. Not legally.

    But that doesn’t mean we shouldn’t have them or keep them, as professionals and learners. Portfolios are a good way of collating experiences, celebrating successes, recording failures, and building a collection of your career as a teacher. They provide you with opportunities to reflect, question, and develop your own skills as a learner, and when done well, can be incredibly insightful and important to the practise of teaching.

    The long answer is yes. Yes definitely.

    But… but…. but they make so much more work! Yes. You’re right. But there are two things I say to that.

    Firstly: There are no shortcuts to anywhere worth going.

    Secondly: Make the portfolio work for you, not you work for it.

    I have several ways of doing this which I plan on sharing over the course of the next few months. This is because I believe there are ways to make them easier to create and collect. I also believe they are worth maintaining even though they are not required legally. Otherwise I wouldn’t bother writing about this now when there is a chance that schools will start dropping the expectation that teachers maintain them. I believe that even if my school dropped them as a requirement, that I would still continue to collect and reflect on my teaching practise in the form of a portfolio.

  • Happy New Year: 2020 Vision

    At the end of last year (2019), the most searched term that lead to this website was ‘teaching portfolios” followed by “examples of teaching portfolios”. It prompted me to think about and reflect on how this website is being used, and the direction it could (or should) take.

    Don’t worry, it will continue to raise issues with current practise, policy, and politics, just as it did in the past, but I also want it to be a source of information, help, tips, tricks, and experience sharing with the people that use it – those being predominantly teachers.

    I have now been teaching for ten years, and I’m beginning to realise that not only do I have a lot of skills (especially in technology) that could be shared with other teachers to make their lives easier, but I also have a lot of experience that might also be useful for others to hear from.

    To that end, I want to begin providing not just my opinion on certain topics, but also some more “How-to” based articles along with tutorials and “Here’s what I do” posts.

    If there are any other topics you’d like to be covered more on this site, please leave a comment and I’ll consider it.

    Here’s hoping 2020 is a great year for you, whatever it might hold for you!

  • Teaching times Ten – Place Holders: Leaves and Rocks

    Teaching times Ten – Place Holders: Leaves and Rocks

    This morning I used the following mental picture to assist students in understanding what happens to numbers when they multiply it by ten. It also allowed for follow up for multiplying by 100.

    Example 1

    Here’s the set up.

    The fan is blowing hard, and pushes all the leaves against the far wall.

    The leaf can be moved closer to the fan by multiplying it by 10. Or; when you multiply it by ten, it moves across one column.

    Now, the fan is blowing pretty hard, and so that leaf is just going to get blown back against the wall. How can we stop it from being blown back?

    That’s right! Put a rock behind it. This rock happens to be of a similar shape to a zero. Coincidence!?

    Example 2

    Here’s another example with a two digit number. Children often get confused by 58 x 10 becoming 508, rather than 580.

    Follow the following images, as with above, to show how the leaves stick together. The five is being blown against the 8, and the 8 is against the wall.


    We multiply them by 10, and they both move across, sticking next to each other.


    That fan is pretty strong. It’ll blow those leaves right back against the wall if we don’t do something about it…


    That’s the trick! Add a rock and it keeps the leaves from blowing away!

    Extension:

    Make a link between multiplying by 10 having one rock, and there’s one zero in the number 10.

    What do you think will happen when we multiply by 100. How many squares can the leaves move? How many rocks do we need to fill the space? How many zeros in the number 100?


    Feel free to use this next time you’re teaching multiplying by ten!

    Enjoy!

  • Daily 5 – Reading or Writing Student Conference

    I have just made this resource to assist my Teacher Aide(s) in meeting with regular students during Daily 5. It outlines various questions and learning based conversations to have as to what the student has chosen to meet with them about (either Reading or Writing). This helps support the student to make choices, and depending on what stage they are up to with their writing or reading determines the kind of responses and coaching the teacher aide will provide.

    While this has been developed for a Teacher Aide to use, it can also be used by Teachers as well. It largely follows the same kind of conference I have with my students when I meet with them.

    The idea behind this would be to fold it in half and laminate it. Then it can sit in a folder in class, or be stuck to the wall somewhere and depending on what the student chooses, the resource can just be flipped to the relevent side. It can sit along side the Teacher or Teacher Aide as they conference with the student.

    Teacher Aide Daily 5.pdf (143 kb)


  • The Foundation: A Line in the Sand

    Draw a Line in the Sand

    It is incredibly important that when we talk about relationships, we talk about them in a purely professional sense. There have been far too many children who have suffered because their relationship with their teacher became more than professional. Keep yourself personally safe. To do this, you have to make some boundaries for yourself, and stick with them.

    1. Children are your students, not your friends.
      You need to build a relationship with them, that doesn’t mean you have to be their friend. You can be likeable, you can be funny. You can be there for them when they need you to be, but there’s no need to accept an invite to their birthday party or play on the swings with them after school.
      Draw that line in the sand.
    2. Teachers are their teachers, not their friends.
      You are their teacher, not their friend. They might like you as a person, but your job is not to be liked – it is to teach. Don’t let the guise of “friendship” stop you from keeping them accountable or making the hard call to follow consequences or make them do the hard work.
      I often get students saying “Sup Mr…”. I tell them they can say “Sup” to their friends. Not to me. I’m not their friend. At this I usually get a stink face or a “Awww sad” in reply. I follow it with “I’m your teacher”.
      Draw that line in the sand.
    3. Personal Cellphone is your personal cellphone. 
      Don’t share your personal number or other details with students. Too many teachers I’ve seen got caught up with this. It’s just not worth it. This also applies to all other forms of communication, including social media, personal emails, etc…
      Draw that line in the sand.
    4. Your class is more than one student.
      Never get into a situation where you are solely focussed on one student. You have a responsibility to the others. This will hopefully stop you from having favourites. It will also stop you from getting into one on one situations which could lead to trouble. Always have more than one student in a room with you, or have open windows for all to see (for one on one testing for example). Simple.
      Draw that line in the sand.


  • The Foundation: Building Relationships

    Relationships. Such a loaded word. And so many get it wrong. They use the wrong cement, or the wrong dimensions, or don’t dig deep enough (or some dig too deep!). Getting it right is key to the success of the rest of the building.

    I call them an “in”. Getting an “in” with a student opens them up. Being able to get “in” can be your key to success in being able to reach a student; to be able to meet them where they are and teach them effectively.

    How to build relationships

    1. Use humour
      This is the number one tool that you can use to break down those barriers that people put up when first meeting each other. The kind of humour that works is making fun of situations, never of people themselves. Getting the students to laugh with you is key. The other factor is to be able to laugh at yourself, and getting them to laugh at themselves.
      A good joke once in a while is good fun. Puns also work a treat, and are especially good when half the class miss it, while the ones who pay attention and who understand get it. It becomes a little “in” for those students and you can build on it from there. Humour is highly effective, especially for those hard to reach kids that are too cool for school.
    2. Be Genuine
      They say that dogs can smell fear. Well… kids can smell fakery. Building relationships is one of those things where you can’t “fake it ’til you make it”. You have to be genuinely interested. You have to genuinely listen. You have to genuinely care about what the student is telling you, or what they’re interested in – even when you have a million other things to do. Failure to be genuine undoes any hard work you might have tried prior to it. It tells students you don’t care, that you have other things that are more important, and that you don’t value them.
    3. Get to Know them
      This kind of goes without saying, but it needs to be done. Get to know what your students do in their spare time. Get to know what they think about when they’re waiting for the bus. Get to know what your students get up to in the weekends. What do they do with themselves? Who are their friends? Who lives with them? Then begin making connections. If they play sports, let them know what sports you used to play when you were their age. If they are learning a musical instrument, share with them that your sister plays the same instrument. Don’t make it up. Be genuine. These “in’s” are key to making connections with people. It’s why Māori begin speech with their Mihi and explain about their whakapapa, their maunga, their iwi, their whanau; all so that those who they are addressing might be able to connect with the speaker over common ground.
    4. Be Unrelenting
      Never give up on building the relationships. Maybe one child had a bad day yesterday and you had to discipline them… don’t let that affect how you treat them today. Maybe one of your jokes didn’t hit the mark. Don’t stop trying another one to break the ice. Just because you’ve asked how they are today, don’t give up on asking how they really are.
    5. Be equal
      Okay. We all have favourites. But don’t let the students know that. And don’t let yourself know that. Tell yourself that you don’t have favourites. Don’t let that thought enter your head where you start to rank students in your mind from favourite to not so much. Not even on the last day of school and they’re all no longer your students.
      Let them know that you value each of them as individuals – not just with your words, but your actions as well. Sure; you will have more input into some students than others. Some students will crave more attention from you than others. Some will be better behaved, be more responsible, and do more awesome things than others. But each of them are still in your class.
    6. Actions or Words
      Actions speak louder than words and words can never hurt me. Both words and actions are important. Words can pick people up and put them down. But actions speak volumes when it comes to relationships. I can turn up to the after school touch rugby and cheer on my students from the sideline, not say anything to them about it before, after, or during and the mere fact I was there can mean the world to some kids. It shows you value them. It shows you care enough to come watch them.
    7. Be their Teacher, not their friend
      Teachers often get this wrong – especially beginning teachers. You are not there to be their friend. They have those already. You’re there to be their teacher. You’re there to instruct, ask questions, model, explain, and challenge. You’re there to push them towards greatness. You’re there to encourage them to be better.
      You’re also there to call them up when they step out of line. Stick to your expectations for them all. Students might not like you for an hour when you issue the consequence for their constant disruptions, but they will respect you forever for sticking to your guns and calling them on it.


    Next Part:

    The Foundation: A Line in the Sand

  • Valuing Teachers: Teacher Salaries Compared

    A pay deal offered to teachers would put some among the country’s top earners.

    Teachers are stuck in a stand-off with the Government over its latest pay offer.

    What’s been offered – and rejected – looks something like this.

    Primary teachers with a degree, or advanced diploma, would have their base salaries increase to a range of $52,429 to $82,992, from $47,980 to $71,891 currently. Primary teachers with teaching qualifications and a specialist subject degree would get a bit more — $54,186 to $85,481.

    A beginner secondary teacher’s base salary would increase from $51,200 to $55,948 if they were to start teaching in 2021.

    More than 10,000 primary teachers, or about a third, get more than the top of the base scale (currently $71,891) because they receive extra payments in recognition of management or leadership responsibilities.

    The latest rejected offer would put a primary teacher with one unit for extra responsibilities at $89,481 a year by 2021.

     Almost 60 per cent, or 12,000 secondary teachers, are paid above the top of their base scale.


    Full Article: https://www.stuff.co.nz/business/113366626/valuing-teachers-does-pay-deal-stack-up